Bulletin 4391-B400S
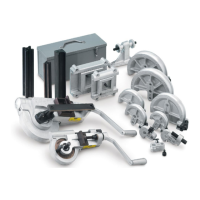
EXACTOL
®
400 Series Tube Benders
4
Parker Hannifin Corporation
Tube Fittings Division
Columbus, OH
www.parker.com/tfd
Medium to Heavy Wall Tube Bending
Step 1: Mounting Tube Bender
The tube bender should be mounted in a bench vise (or in an
adapter assembly fastened to a bench). Be sure the bender is
tightly clamped or securely bolted down.
Step 3: Mark Tube
The first bend is easy. Simply measure from the end of the tube
to the desired length of the centerline of the first bend. The tubing
should be positioned in the bender so that the end measured from
(or “measurement end”) is to the left as you face the bender.
Step 2: Select Radius Block
Select the proper radius block according to the chart on page 3.
Radius blocks, size 1/4" through 3/4" are made to drive with two
pins; radius blocks, 7/8" through 1-1/2", are made to drive with
three pins. After selecting the proper size radius block, remove or
add one drive pin in the drive plate to correspond with the radius
block.
Mount the selected radius block on the center post and drive post.
Position the radius block so the 0° mark is toward the vise face
and handle end of bender. Radius blocks are accurately milled and
bored to slip easily onto posts. Light lubrication of the posts will aid
assembly. When handling radius blocks, as well as the slide block,
care should be taken to avoid nicking the grooved surfaces.
Step 4: Clamp Tube
Position the tube in the “opened” tube clamping device of the radius
block so that the mark is tangent to the desired degree mark on the
radius block (see diagram).
On long lengths of tubing, support is recommended to prevent sag
and to help keep tubing aligned with the radius block centerline.
 Loading...