1716
ASSEMBLY
ASSEMBLY
7
8
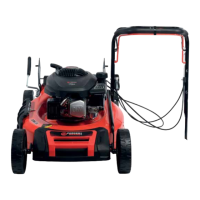
ASSEMBLE LOCKING KNOBALIGN TOP & BOTTOM HANDLES
Assemble the locking knob as shown above. Thread the
locking lever through both the upper and lower handle
and secure in place by tightening the locking knob. This
process will need to be repeated on both sides of the
handle.
Align the holes in the bottom of the upper handle with the
holes located at the top of the lower handle. This process
will need to be repeated on both sides of the handle.
9
10
LOCK LOCKING KNOBTIGHTEN LOCKING KNOB
Lock the the assembly in position by pulling the lever
into the downward position. This process will need to be
repeated on both sides of the handle.
Tighten the locking knob by turning it in a clockwise
direction. This process will need to be repeated on both
sides of the handle.
WARNING: Do Not operate the machine with a loose handle, ensure that the upper handle is fully secured in place before commencing use.

 Loading...