Parker Hannifin Corporation
Instrumentation Valve Division
Jacksonville, Alabama
MI-137
2
DISASSEMBLY
WARNING: MAKE CERTAIN THE SYSTEM IN WHICH THE VALVE IS INSTALLED IS DRAINED AND/OR EXHAUSTED
OF ALL PRESSURES BEFORE VALVE DISASSEMBLY OR REMOVAL OCCURS.
1. If the valve is locked into position, break apart the Locknut and Cap by turning the Locknut clockwise with a 7/8
inch wrench while holding the Cap with another 7/8 inch wrench.
2. If the valve is a manual version, loosen the Set Screw in the Handle by using a 5/64 hex Allen wrench and unthread
the Handle from the Manual Upper Stem by holding the stem and rotating the Handle counter-clockwise.
3. Unthread the Cap from the Bonnet by rotating the Cap counter-clockwise.
4. Remove the Spring and PTFE Washers and set them aside for reuse during reassembly. (It is possibly easier to
remove the lower PTFE washer after step 5.)
5. Remove the Bonnet from the Valve Body by turning counter-clockwise with a 7/8 inch wrench.
6. Using a pair of pliers, secure a grip onto the Upper Stem/Manual Upper Stem and pull the cartridge assembly from
the Valve Body.
7. Disengage the Upper Stem/Manual Upper Stem and the Lower Stem by holding the Lower Stem with a pair of
adjustable pliers (Do not clamp over the crimped o-ring if the stem is to be reused.) and unthreading the Upper
Stem/Manual Upper Stem with a 7/16 inch wrench.
8. Remove the Lower Stem from the Body Bonnet by grasping the end that includes the crimped seat and gently pull
it out.
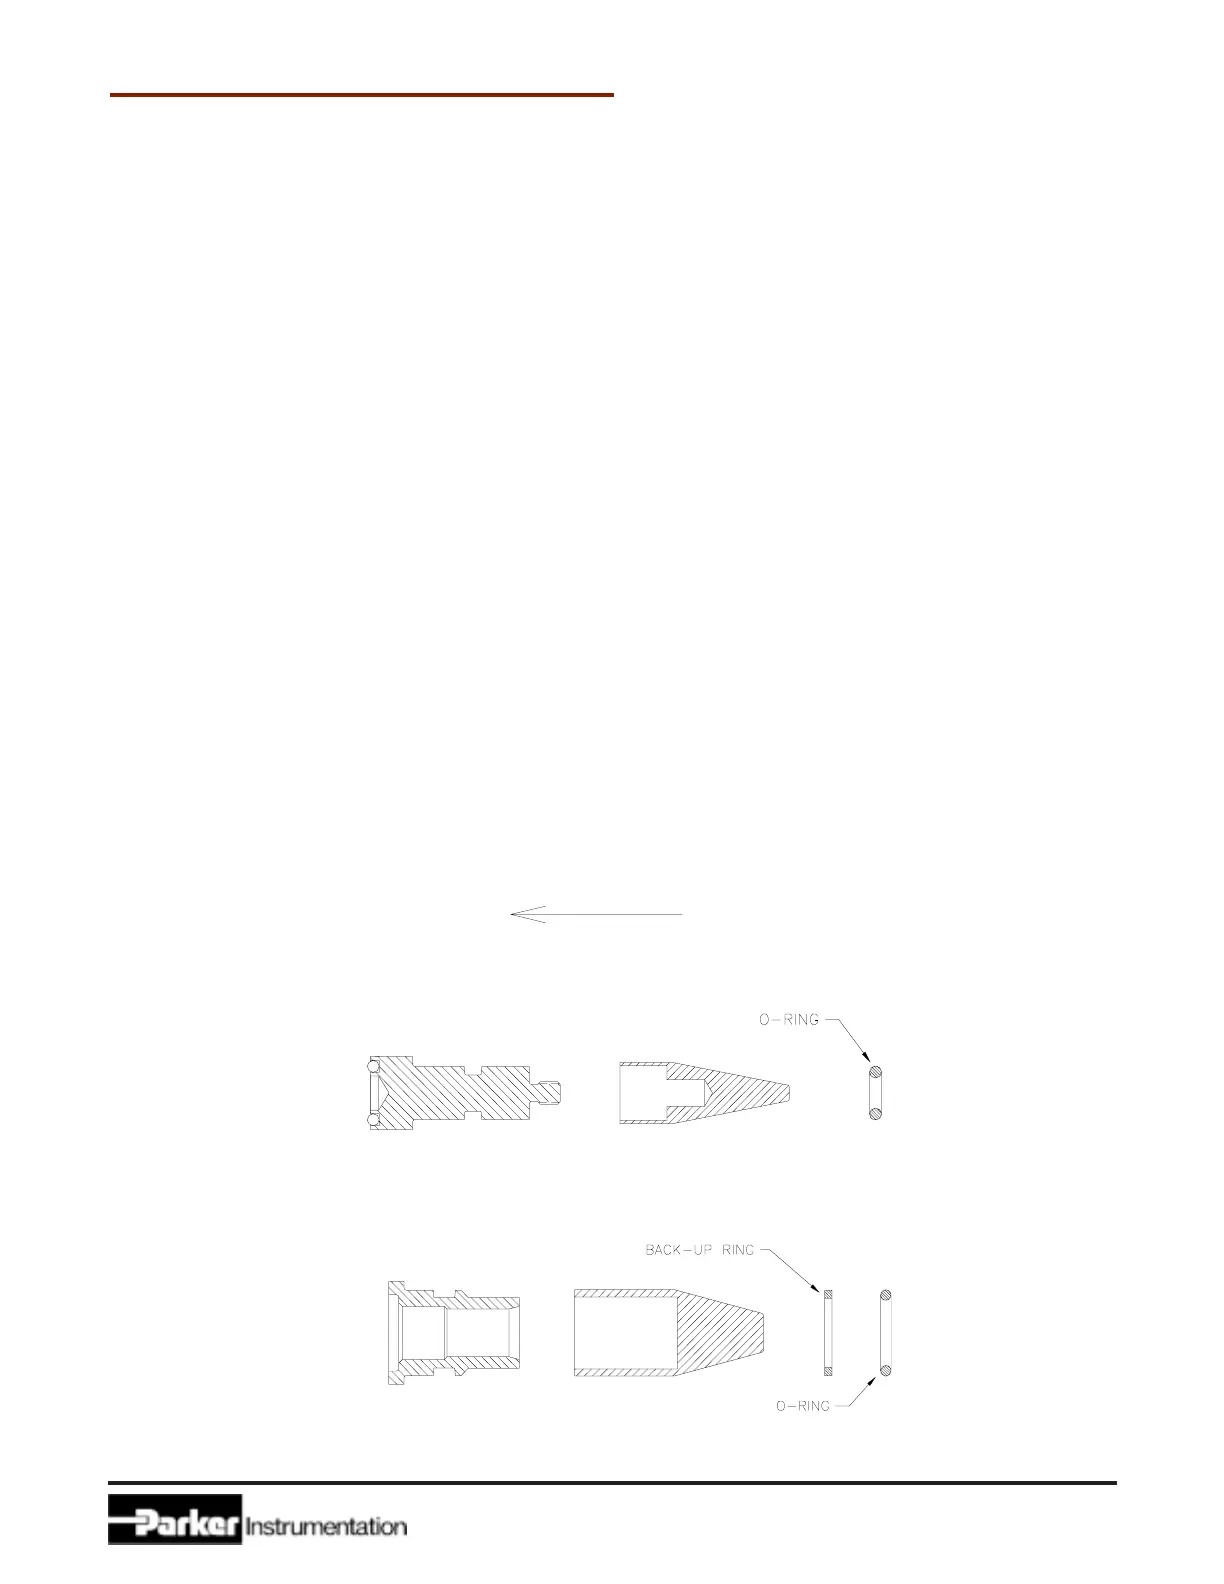
O-RING/BACK-UP RING INSERTION
1. Place the mandrel over the appropriate end of the components as seen in the drawing.
2. Slide the O-ring or O-ring/Back-up ring combination slowly and gently over the mandrel (Note the orientation of the
O-ring and back-up ring).
3. Place the O-ring or O-ring/Back-up ring into the groove provided for it.
Gently slide the o-ring over the mandrel in this direction
Lower Stem Assembly
Body Bonnet Assembly
 Loading...