Parker Hannifin Corporation
Instrumentation Valve Division
Jacksonville, Alabama
MI-137
3
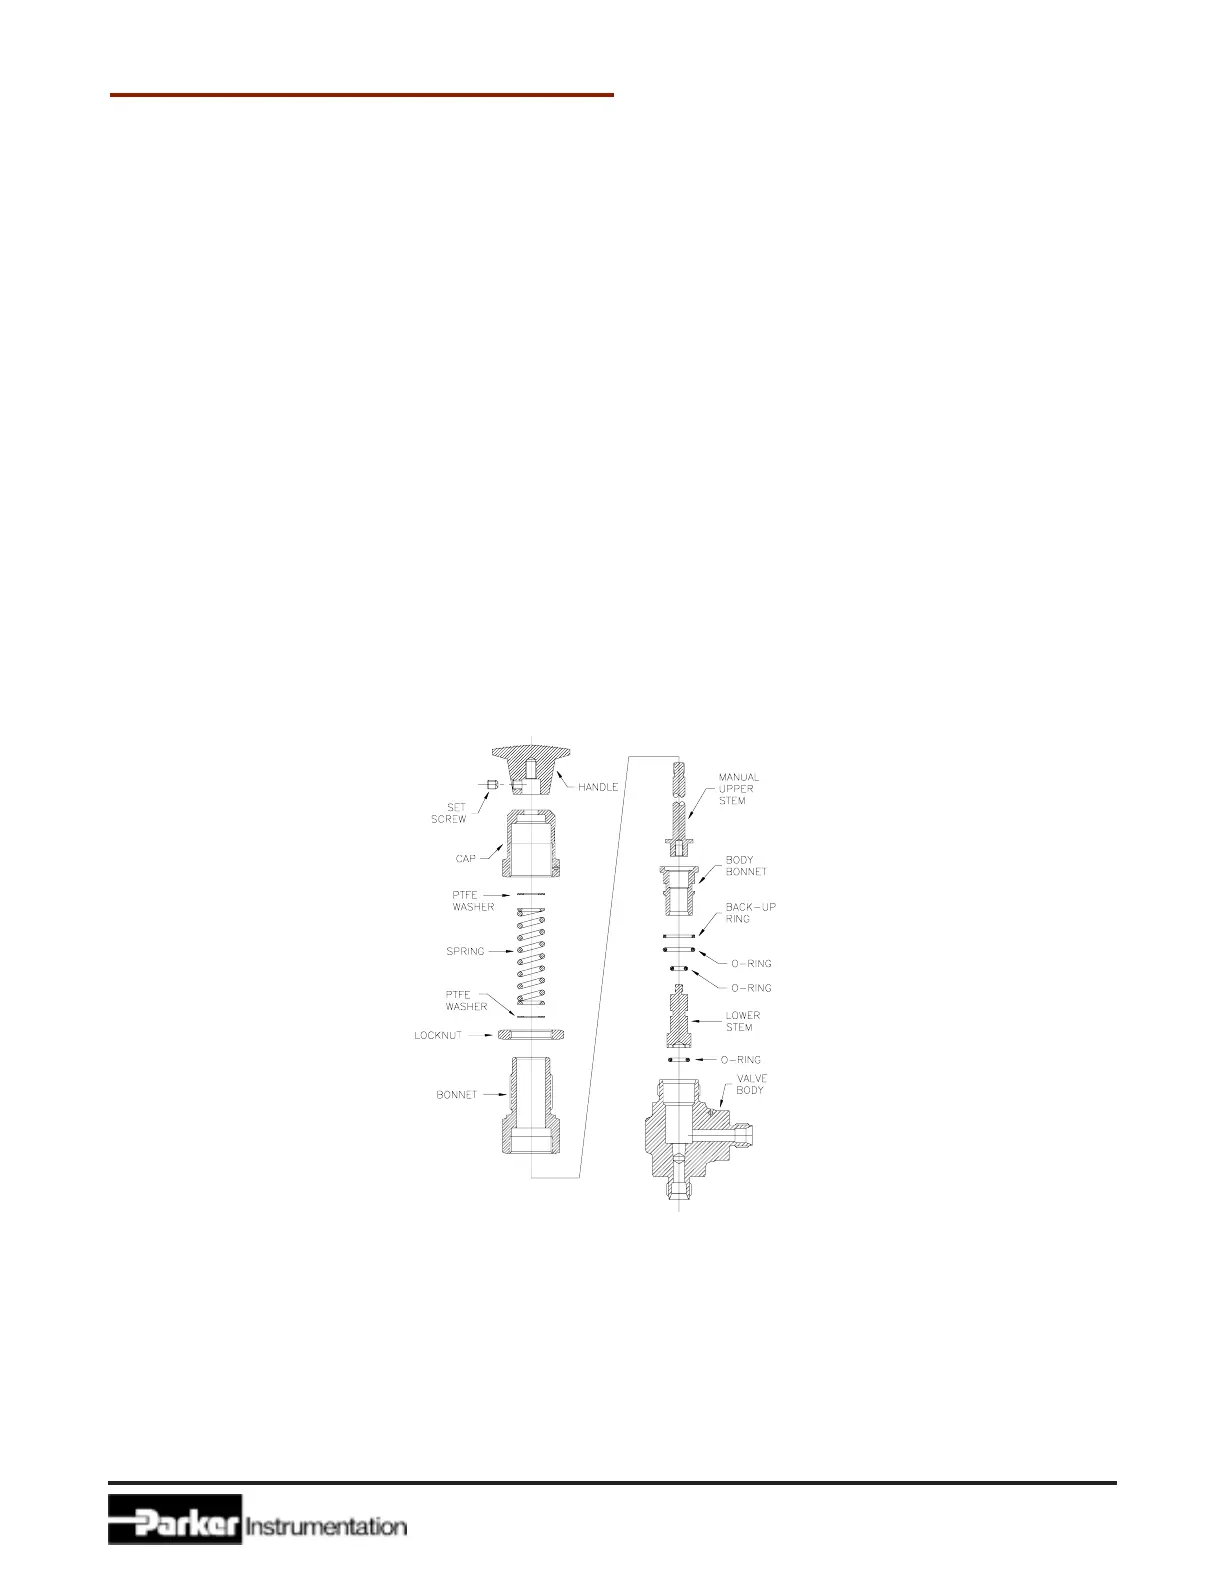
Figure 4: RL Series Relief Valve with Manual Override Exploded View
Setting Desired Cracking Pressure
1. Rotate the Cap to set the desired cracking pressure.
2. Tighten the Lock Nut against the Cap.
If required, secure the pressure setting by using the Lockwire to fasten the Cap and Valve Body together.
REASSEMBLY
MAKE CERTAIN THAT ALL PARTS ARE FREE OF DIRT OR OTHER CONTAMINANTS BEFORE REASSEMBLY.
1. Place the Teflon coated O-ring onto the Lower Stem and the O-ring and Back-up ring onto the Body Bonnet as
shown in the section titled O-Ring/Back-up Ring Insertion .
2. Insert the Lower Stem into the Body Bonnet being careful not to damage the O-ring or Back-up Ring.
3. Thread the Upper Stem/ Manual Upper Stem onto the Lower Stem and torque to 12 in-lbs by gripping the Lower
Stem with a pair of pliers and rotating the Upper Stem clockwise with a 7/16 inch hex socket torque wrench. (Do
not clamp over the crimped portion of the Lower Stem.)
4. Insert the assembly from 4 into the Valve Body being careful not to damage the O-ring and Back-up Ring.
5. Apply a liberal amount of lubricant, as consistent with the Valves service requirements, onto the body stem end
threads.
6. Install the Bonnet onto the Valve Body and torque to 30 ft-lbs by turning clockwise with a 7/8 inch hex socket
torque wrench.
7. Place a PTFE Washer into the bore of the Bonnet, insure that the washer is lying flat against the face of the Upper
Stem/Manual Upper Stem.
8. Place the Spring into the bore of the Bonnet.
9. Place the other PTFE Washer onto the top of the Spring.
10. Place an appropriate lubricant, consistent with the valves service requirements, on the internal threads of the Cap.
11. Thread the Cap onto the Bonnet. Insure that the washer remains atop the Spring during thread engagement.
12. If your system demands, lock the Cap in place by holding it with a 7/8 inch wrench and turning the Locknut counter-
clockwise until it is snug against the Cap.
13. If the valve has a Manual Upper Stem, thread the Handle onto it.
 Loading...