EasyManua.ls Logo

Parkside PESG 120 B3 - User Manual

Parkside PESG 120 B3
101 pages
Go to English
Print Icon
To Next Page IconTo Next Page
Loading...
MÁQUINA DE SOLDAR ELÉTRICA
Indicações de montagem, utilização e segurança
Tradução do manual de instruções original
ELEKTRO-SCHWEISSGERÄT
Montage-, Bedienungs- und Sicherheitshinweise
Originalbetriebsanleitung
ARC WELDER
Assembly, operating and safety instructions
Translation of the original instructions
ELEKTRISCH LASAPPARAA T
Montage-, bedienings- en veiligheidsinstructies
Vertaling van de originele gebruiksaanwijzing
SOLDADOR ELÉCTRICO
Instrucciones de montaje, de uso y de seguridad
Traducción del manual de instrucciones original
POSTE À SOUDER
Instructions de montage, d‘utilisation et consignes de sécurité
Traduction des instructions d‘origine
ELEKTRO-SCHWEISSGERÄT / ARC WELDER /
POSTE À SOUDER PESG 120 B3
IAN 281416
ELEKTRIC SV ÁŘEČKA
Pokyny k montáži, obsluze a bezpečnostní pokyny
Překlad originálního provozního návodu

Table of Contents

Question and Answer IconNeed help?

Do you have a question about the Parkside PESG 120 B3 and is the answer not in the manual?

Overview

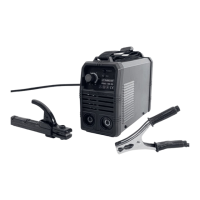
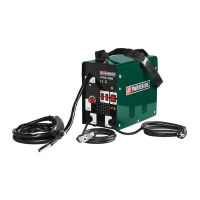
The Parkside PESG 120 B3 is an electric arc welder designed for manual metal arc welding with covered rod electrodes, suitable for household use. It comes with a welding shield, welding cables, a combination wire brush with chipping hammer, and an instruction manual.

Function Description:

The device is primarily used for manual metal arc welding. It features a handle for portability, an ON/OFF switch for operation, and a hand wheel for adjusting the electrode thickness. A control lamp indicates overheating, and the device is equipped with overheat protection that automatically interrupts the circuit if triggered. The welding shield, which is assembled by attaching a handle and protective glass, is crucial for eye protection during welding.

Important Technical Specifications:

  • Mains connection: 230V~ 50Hz
  • Max. welding current and conventional load voltage: 75A / 21V–100A / 22V
  • Rated value of the mains current (U1): 230V
  • Highest rated value of the mains current (I1max): 22.5A
  • Maximum effective input current (I1eff): 7A
  • Rated value of the no-load voltage (U0): 48V
  • Protection type: IP21S
  • Electrode thickness settings: 1.6/2.0 mm and 2.5 mm, adjustable via the hand wheel.
  • Fuse rating: The supply line fuses to the mains sockets must meet VDE 0100 requirements, with earthed wall sockets protected with max. 16 A (NDM1-63, AC 230/400V C16. IEC 60898. time lag. Manufacturer: Nader) fuses or line circuit breakers. Higher fuse ratings can result in burnt wires or fire damage.
  • EMC Classification: Class A per IEC 60974-10. Class A equipment is intended for industrial use; electromagnetic tolerance may not be warranted, or failures may occur in other areas.

Usage Features:

  • Preparation: Before welding, ensure the work area is well-ventilated and free from flammable substances. Connect the welding cables, set the ON/OFF switch to "ON," and select the appropriate electrode thickness using the hand wheel. The earth terminal should be connected directly to the workpiece or its support, ensuring good electrical contact and avoiding painted or insulated surfaces.
  • Welding Process: Insert the uncoated end of the electrode into the electrode holder. Hold the welding shield in front of your face and guide the electrode tip over the workpiece as if lighting a match to strike the arc. Maintain a consistent distance from the workpiece, corresponding to the electrode diameter, and an electrode angle of 20–30 degrees in the direction of work.
  • Safety: Always wear insulating gloves, solid insulating shoes, and appropriate protective clothing (non-synthetic). Use the welding shield with DIN Grad 9-10 safety glass to protect eyes from arc rays. Avoid direct contact with the welding circuit, as the no-load voltage can be dangerous. Do not weld on containers that have held flammable liquids or gases. Ensure adequate ventilation to avoid inhaling noxious fumes. Keep bystanders at least 2 meters away from the arc.
  • Overheat Protection: If the yellow control lamp lights up, it indicates overheating, and the device will automatically shut down. Allow the equipment to cool for a while before resuming operation.
  • Post-Welding: After use, the welding equipment should be operated in open loop for at least half an hour, or allowed to cool for one hour, before being packed and stored. Always switch the device off when not in use. Used electrodes and hot workpieces should be handled with forceps. Slag should only be removed after the seam has cooled.

Maintenance Features:

  • Regular Cleaning: Regularly clean dust and dirt off the equipment using a fine brush or a dry cloth.
  • Component Replacement: Immediately replace damaged or scratched protective glass on the welding shield. Promptly replace any damaged or heavily soiled/splashed components. If the tensioning force of the electrode holder or earth terminal subsides, replace them immediately.
  • Repairs: Only qualified electricians should perform repairs or maintenance.
  • Storage: Do not store or use the equipment in moist, wet, or rainy environments. Ensure the device is placed on a level surface and not directly against a wall, covered, or jammed between other equipment to allow for ample air circulation through the ventilation louvres.

Parkside PESG 120 B3 Specifications

General IconGeneral
BrandParkside
ModelPESG 120 B3
CategoryWelding System
LanguageEnglish

Related product manuals