6
PMST 100 A1
GB
IE
CY
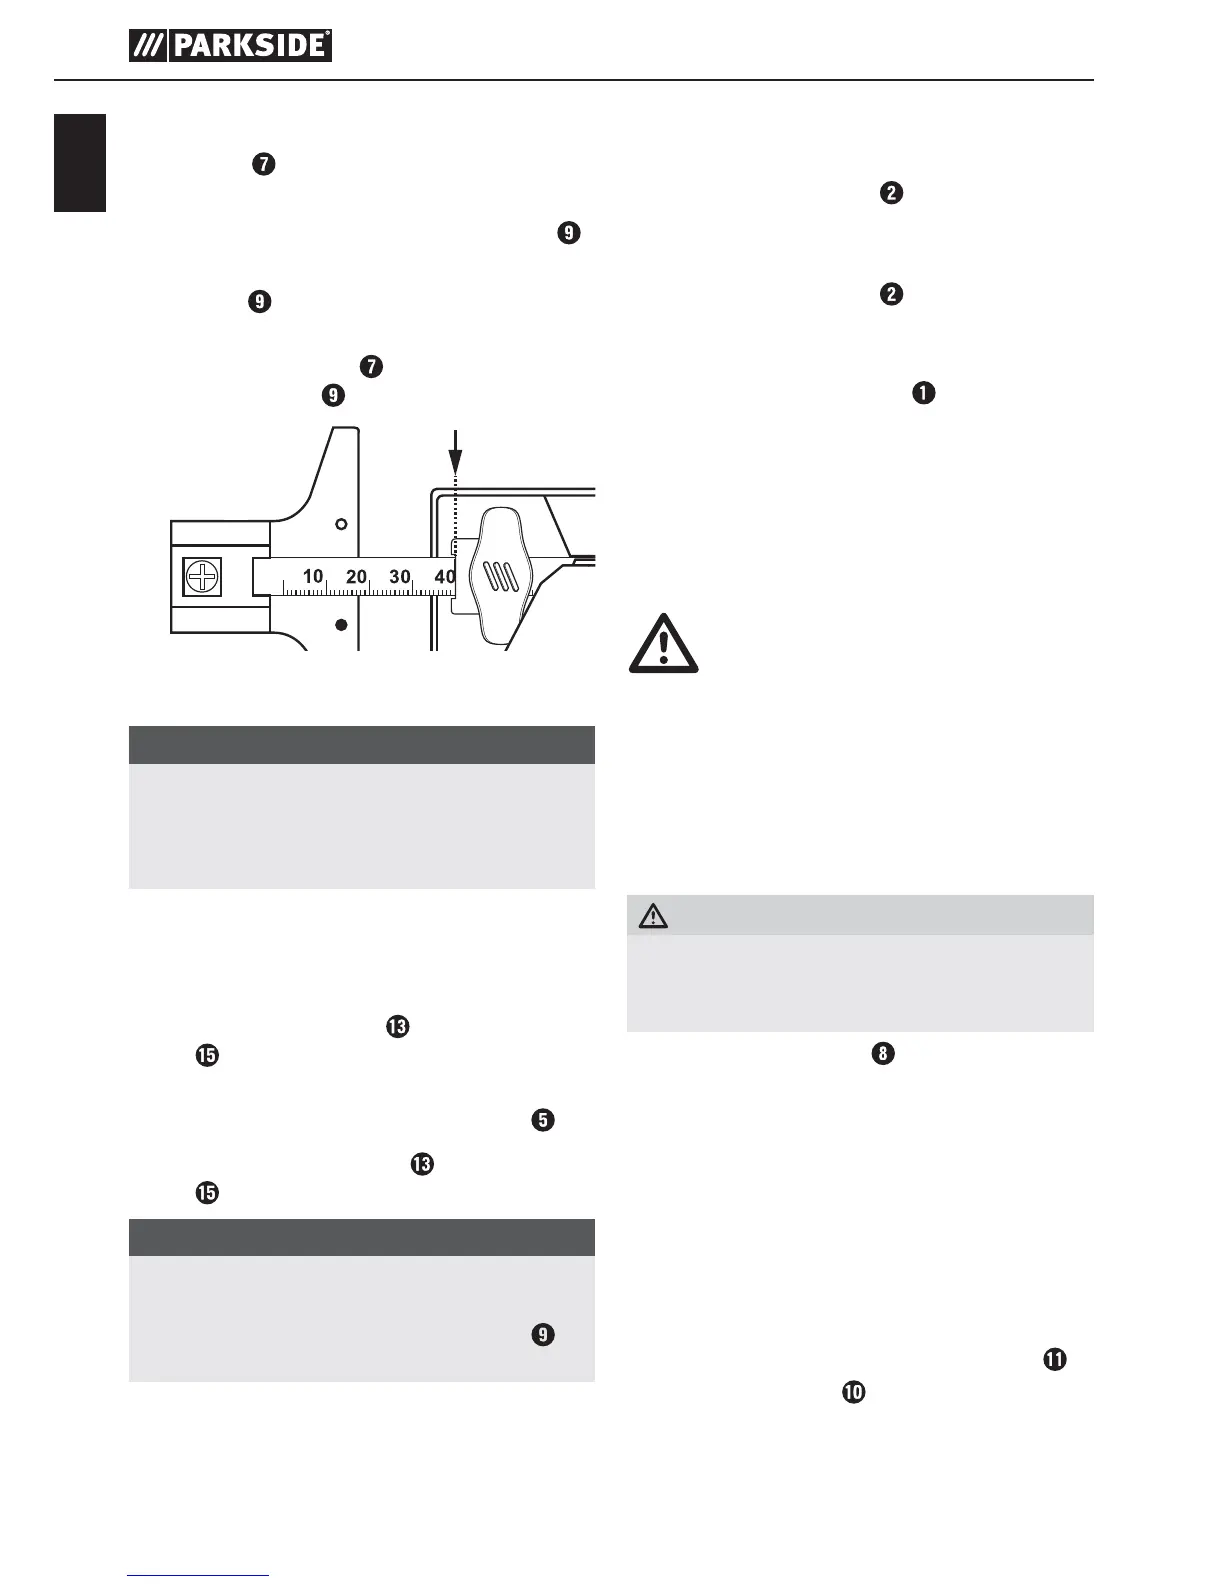
Fitting the rip fence
The rip fence can be fixed on the left- or right-
hand side of the appliance.
♦ Push the rip fence into the insertion openings
.
♦ Screw both the locking screws on the insertion
openings
.
♦ Set the desired cut width with the help of the
scale on the rip fence
and the edge of the
insertion opening (see also Fig. A).
Fig. A: Cutting width 4 cm
♦ Retighten the two locking screws.
NOTE
► If you want to use the rip fence for curved
cuts, insert a nail through the bottom hole,
which is in line with the saw blade. Otherwise
you get a wrong diameter.
Handling
Setting the cutting angle
♦ Undo the locking screws using the Hex
key .
♦ Adjust the cutting angle to 0°/15°/30°/45°
with the aid of the markings on the scale
.
♦ Retighten the locking screw
using the Hex
key .
NOTE
► If you want to set a cutting angle in combina-
tion with the rip fence, you need to remove the
locking screw from the insertion opening
so
you can tilt the appliance to the desired angle.
Switching the appliance on/off
Switching the appliance on:
♦ Set the ON/OFF switch
to "I" to switch the
appliance on.
Switching the appliance off:
♦ Set the ON/OFF switch
to "O" to switch the
appliance off.
Setting the stroke rate
♦ Use the speed control knob to set the
required stroke rate.
■ Set a higher stroke rate and use a coarse-
toothed blade for soft materials.
■ Set a lower stroke rate and use a fine-toothed
blade for hard materials.
Maintenance and cleaning
WARNING! RISK OF INJURY! Switch
the appliance off and remove the
power plug before commencing any
work to the appliance.
■ The appliance must always be kept clean, dry
and free from oil or grease.
■ Use a soft, dry cloth to clean the housing.
■ Ensure that all ventilation slits are free of
obstructions.
WARNING!
■ If the mains cord requires replacement, this
should be carried out by the manufacturer or an
approved representative to avoid safety hazards.
■ Replace the saw blade
as soon as its teeth
are blunt and proper sawing is therefore no
longer possible. Only sharp and undamaged
saw blades make an optimum cut and prevent
your appliance from being overloaded.
■ Clean the appliance after completing your
sawing work.
■ Remove any dirt (e.g. sawdust). Clean the saw
blade holder, if necessary, with a brush or by
blowing it out with compressed air.
■ Add a few drops of motor oil to the piston
and the guide roller
regularly (after approx.
30 minutes of runtime engine).
■ Pay attention to the short-term operation S2 of
max. 10 minutes.

 Loading...