PPS 200 C2
GB
│
IE
│
NI
│
CY
│
7 ■
Removal
♦ Pull the hose of the vacuum cleaner off the
nozzle4 or adapter5.
Work instructions, tips and tricks
♦ Move the appliance parallel to the surface and
in a flat circular motion or alternatively length-
wise and across the surface.
♦ Do not press the appliance down. The sanding
sheets will get clogged and the sanding perfor-
mance will deteriorate.
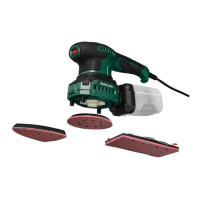
♦ Clean the sanding sheet 7 every once in a
while using a vacuum cleaner.
♦ Never use the same sanding sheet 7 for
sanding different materials (such as wood and
then metal).
In the table below, you will find some recom-
mended values which will help you determine which
sanding sheet 7 to use for which job.
Wood
Sanding
sheet/grain
Working wood 40–240
Pre-sanding, e.g. of unfinished,
unplaned beams and planks
40, 60
Surface sanding 80, 100, 120
Fine sanding of hardwoods 180, 240
Paint/varnish
Sanding
sheet/grain
Working of coats of paint/
varnish or primers such as filler
40–320
Removal of paint 40, 60
Sanding undercoat 80, 100, 120
Final sanding of primers before
painting
180, 240, 320
Maintenance and cleaning
WARNING! RISK OF INJURY!
► Always remove the plug from the mains
power socket before carrying out any work
on the appliance.
■ Always clean the appliance directly after
completion of work.
■ Do not use any sharp objects to clean the
appliance. Do not allow any liquids to get into
the appliance.
■ Use a dry cloth to clean the housing. Never
use petrol, solvents or cleaning agents that can
damage plastic. A vacuum cleaner is required
for thorough cleaning of the appliance.
■ Ventilation openings must never be obstructed.
■ Remove any adhering grinding dust with a
brush.