13
AIR FILTER
CAUTION: Do not clean filter in gaso-
line or other flammable solvent to avoid
creating a fire hazard or producing harmful
evaporative emissions.
Cleaning the air filter:
A dirty air filter decreases engine perform-
ance and increases fuel consumption and
harmful emissions. Always clean after every
5 hours of operation.
1. Clean the cover and the area around it to
keep dirt and sawdust from falling into
the carburetor chamber when the cover
is removed.
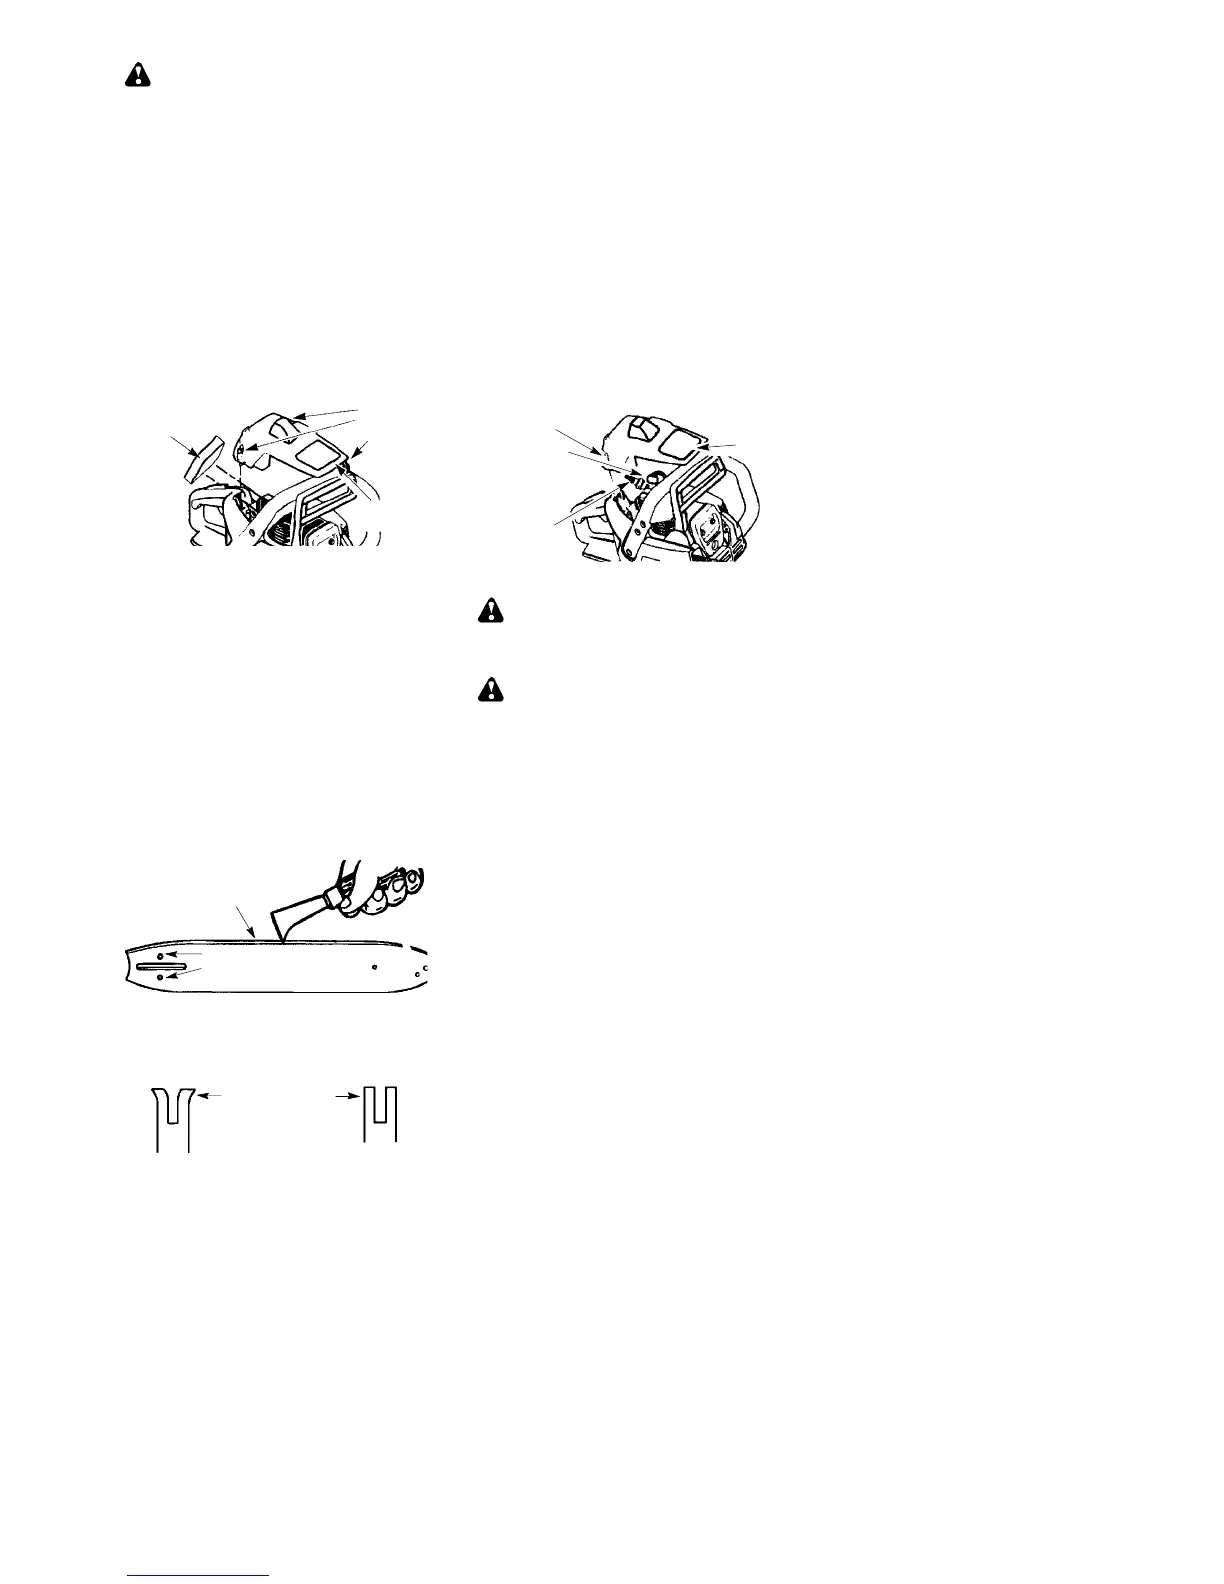
2. Remove the parts as illustrated below.
3. Wash the filter in soap and water . Rinse
in clean cool water. Air dry completely
before reinstalling.
4. Add a few drops of oil to the filter;
squeeze filter to distribute oil.
5. Reinstall parts.
Air Filter
Cylinder
Cover
Screws
Cylinder
Cover
BAR MAINTENANCE
If your saw cuts to one side, has to be forced
through the cut, or been run with an improper
amount of bar lubrication it may be necessary
to service your bar .
A worn bar will damage your chain and make
cu ttin g d iffi cult.
After each use, ensure ON/STOP switch is in
the STOP position, then clean all sawdust from
the guide bar and sprocket hole.
To maintain guide bar:
S Move ON/STOP switch to the STOP posi-
tion.
S Loosen and remove chain brake nuts and
chain brake. Remove bar and chain from
saw.
S Clean the oil holes and bar groove after each
5 hours of operation.
Remove Sawdust From
Guide Bar Groove
Oil Holes
S Burring of guide bar rails is a normal process
of rail wear. Remove these burrs with a flat
file.
S When rail top is uneven, use a flat file to re-
store square edges and sides.
Correct Groove
Worn Groove
File Rail Edges
and Sides
Square
Replace guide bar when the groove is worn,
the guide bar is bent or cracked, or when exce-
ss heating or burring of the rails occurs. If re-
placement is necessary, use only the guide bar
specified for your saw in the repair parts list or
on the decal located on the chain saw .
SPARK PLUG
The spark plug should be replaced each year
to ensure the engine starts easier and runs bet-
ter . Ignition timing is fixed and nonadjustable.
1. Loosen 3 screws on cylinder cover .
2. Remove the cylinder cover .
3. Pull off the spark plug boot.
4. Remove spark plug from cylinder and dis-
card.
5. Replace with
Torch R7 spark
plug and tighten securely with a 19 mm
socket wrench. Spark plug gap should be
0,5 mm.
6. Reinstall the spark plug boot.
7. Reinstall the cylinder cover and 3 screws.
Tighten securely.
Screws
Spark
Plug Boot
Spark
Plug
Cylinder
Cover
CHA I N SHA R PE N ING
WARNING: Improper chain sharpen-
ing techniques and/or depth gauge mainte-
nance will increase the chance of kickback
which can result in serious injury.
WARNING: Wear protective gloves
when handling chain. The chain is sharp and
can cut you even when it is not moving.
Conditions which indicate the need for chain
sharpening:
S Reduction in size of wood chips. The size
of the wood chip will decrease as the chain
gets duller until it becomes more like a
powder than a chip. Note that dead or
rotted wood will not produce a good chip.
S Saw cuts to one side or at an angle.
S Saw has to be forced through the cut.
Tools required:
S 5/32 inch (4 mm) diameter round file and
file holder
S Flat file
S Depth gauge tool
TO SHARPEN CHAIN:
1. MoveON/STOPswitchtotheSTOP
position.
2. Check chain for proper tension. Adjust
chain tension if necessary.
3. Sharpen cutters.
S To sharpen the cutters, position the
file holder level (90˚) so that it rests
on the top edges of the cutter and
depth gauge.
NOTE: The chain has both left and
right hand cutters.