This document provides an instruction manual for the Pasapair Portable Air Conditioner, model OL-A011D1-06CD. It outlines safety instructions, installation procedures, operation modes, maintenance, troubleshooting, storage, disposal, and warranty information.
Function Description
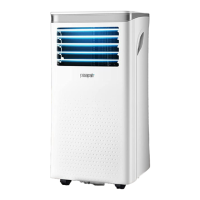
The Pasapair Portable Air Conditioner is designed for use with R410a refrigerant and offers cooling solutions for single rooms, creating a comfortable atmosphere. In addition to cooling, it provides ventilation for air circulation and dehumidifying functions to remove moisture. As a self-contained system, it does not require permanent installation, allowing for easy movement to different spaces where it is most needed. Common applications include kitchens, temporary residences, computer rooms, garages, and other areas where the installation of an outdoor air conditioner unit is limited.
Usage Features
The air conditioner features a control panel and a remote control for operation. The control panel includes buttons for LOCK, MODE, UP, POWER, DOWN, SPEED, and TIMER, along with indicators for FAN SPEED, DIGITAL DISPLAY, MODE, and WiFi.
- Power On/Off: The unit is turned on and off using the POWER button. Upon startup, it defaults to FAN mode.
- Mode Selection: Users can switch between different operation modes: Cool, Dry, and Fan.
- Cooling Mode: To cool a room, select the COOL mode using the MODE button. The desired temperature can be adjusted between 16°C and 32°C using the UP/DOWN buttons. Fan speed can also be adjusted in this mode (High or Low).
- Ventilating Mode (Fan): In this mode, the room air is circulated without cooling. The FAN indicator lights up, and the fan speed can be selected (High or Low) using the SPEED button.
- Drying Mode (Dehumidifier): When the DRY indicator lights up, the unit operates in dehumidifying mode. The fan speed automatically switches to low and cannot be adjusted. For continuous operation in this mode, a drain hose should be connected to the unit's drain outlet.
- Sleep Mode: This function is available only in cooling mode and can be activated via the remote control. After 1 hour, the preset temperature increases by 1°C, and after another hour, it increases by an additional 1°C.
- Temperature Adjustment: The UP/DOWN buttons allow for increasing or decreasing the desired temperature or timer setting.
- Fan Speed Control: The SPEED button cycles the fan speed between High and Low.
- Timer Function: The timer can be set for up to 24 hours to automatically start or stop the unit.
- Delay OFF: When the unit is powered on, pressing the TIMER key allows setting a delay OFF time using the UP/DOWN buttons.
- Delay ON: When the unit is powered off, pressing the TIMER key allows setting a delay ON time using the UP/DOWN buttons.
- Canceling Timer: The timer can be canceled by repeatedly pressing UP/DOWN until the LED shows '00', or by pressing the POWER button.
- Automatic Defrost: At low room temperatures, frost may build up on the evaporator. The unit will automatically initiate defrosting, indicated by the POWER LED blinking.
- Overload Protection: A protective 3-minute time delay is implemented for the compressor. Users should wait 3 minutes for the appliance to resume operation after an overload event.
- Child Lock Function: This feature can be turned on or off via the control panel or the mobile app. When activated, the mobile air conditioner can only be controlled through the app until unlocked.
- Temperature Unit Conversion: The unit allows toggling between Celsius and Fahrenheit.
- Self-Evaporating System: The system uses collected water to cool the condenser coils, enhancing efficiency. In cooling operation, it typically does not require emptying the drainage tank, as condensate water evaporates and is evacuated through the exhaust hose. However, in heating, drying, or high humidity conditions, continuous drainage may be necessary, requiring a drain hose to be connected to a bucket or drain.
- Louver Adjustment: The air outlet louver can be manually adjusted to control the horizontal direction of the airflow.
- WiFi Connectivity and App Control: The unit supports direct operation from a mobile phone via the "QZsmart" app.
- App Download: The app can be downloaded by scanning a QR code or searching in the App Store/Google Play.
- Account Creation: Users can sign up for a new account within the app.
- Device Connection: For first-time connection, press and hold the "Timer" button on the panel until a beep is heard and the "WIFI" light blinks. The app can then auto-connect via Wi-Fi and Bluetooth or allow manual selection of the air conditioner model. The mobile device must be connected to a 2.4GHz Wi-Fi network during pairing.
- App Features: The app provides device settings (name, location, sharing), temperature display (with +/- adjustment), mode display, fan speed display, and on/off control. It also includes "More settings" for timer, child lock, sleep mode, and temperature unit conversion.
- Unbinding Device: To connect the unit to a different phone, it must be unbound from the previous one by long-pressing "Timer" on the panel until a beep is heard and the "WIFI" light blinks.
- Cautions for App Use: There may be a 1-3 minute delay in operating the machine via the mobile phone. The app's language automatically switches with the mobile system's language.
Maintenance Features
Regular maintenance is crucial for the appliance's efficiency and longevity.
- Cleaning the Air Filter: The air filter should be cleaned every two weeks. Dust accumulation restricts airflow, reduces efficiency, and can damage the unit.
- Switch off the unit and unplug the power cord.
- Remove the filter mesh.
- Use a vacuum cleaner to remove dust from the filter.
- Rinse the filter under running water, allowing water to flow in the opposite direction of airflow.
- Allow the filter to air dry completely before reinstalling.
- Warning: Do not operate the unit without an air filter, as this can contaminate the evaporator. Avoid touching the evaporator surface with bare hands to prevent injury.
- Replacing the Charcoal Filter: This filter is packed separately and needs to be installed by the user. To install, open the frame on the back side of the unit.
- Note: The charcoal filter cannot be washed or cleaned. It is recommended to change it every three months for maximum effectiveness.
- Long-Term Storage: If the unit will not be used for an extended period (more than a few weeks), it should be thoroughly cleaned and dried.
- Unplug the unit and remove the exhaust hose and window kit, storing them with the unit.
- Drain any remaining water from the unit.
- Clean the air filter and let it dry completely in a shaded area.
- Re-install the filter.
- Store the unit in an upright position in a ventilating, dry, non-corrosive gas, and safe indoor place.
- Attention: The evaporator inside the machine must be dried out before packing to prevent component damage and mold. Unplug the unit and place it in a dry, open area for several days to ensure it is completely dry.
Troubleshooting
The manual provides a troubleshooting guide for common issues, including:
- Unit not operating: Check power connection, water level indicator (empty drain pan if lit), room temperature (operating range 5-35°C).
- Reduced capacity: Check for blocked air duct, open doors/windows, incorrect operating mode/temperature settings, or a detached exhaust hose.
- Water leakage: Indicates overflow during movement (empty water tank before transport) or a kinked/bent drain hose (straighten it).
- Excessive noise: Check if the unit is securely positioned on horizontal, firm ground, and if there are any loose or vibrating parts (secure them).
- Error Codes:
- E0: Communication faults between main PCB and display PCB. Check wire harness of display PCB for damage.
- E1: Ambient temperature sensor failure. Check connection or replace the sensor.
- E2: Coil temperature sensor failures. Check connection or replace the sensor.
- Ft: Condensate water high level alarm. Empty the drain pan by removing the rubber plug.
- Noise sounds like water flowing: This is normal and comes from flowing refrigerant.
Safety Instructions
The manual emphasizes reading the user manual and installation manual carefully before operation and installation. Service personnel are also required to read the manual.
- Intended Use: The appliance is designed for R410a refrigerant and is not intended for use by persons with reduced physical, sensory, or mental capabilities, or lack of experience, unless supervised. Children should not perform cleaning or user maintenance.
- Cables and Plugs: Ensure electricity supply matches the rating plate. Use a grounded power outlet. Unplug the cord when cleaning or not in use. Do not operate with wet hands. Do not unplug while operating or by pulling the cord. Avoid using extension cords or adapter plugs.
- Risk of Personal Injury: Failure to follow warnings can result in explosion, death, injury, or property damage. The appliance is for expert or trained users in shops, light industry, farms, or commercial use. The refrigerant loop is sealed, and only qualified technicians should service it. No open flames or ignition sources should be used near the unit. Component parts must be replaced with identical repair parts. Do not immerse the unit in liquid or expose it to rain/moisture. Do not leave unattended, tilt, or turn over. Do not put objects on or climb/sit on the unit. Do not insert fingers or objects into the air outlet or touch air inlet/aluminum fins. Do not operate if dropped, damaged, or malfunctioning. Do not clean with chemicals. Install according to national wiring regulations. Do not use unauthorized means to accelerate defrosting or cleaning. Store in a room without continuous operation sources (e.g., open flames, gas appliances, electric heaters) and prevent mechanical damage.
- Refrigerant Circuit: Any person working on the refrigerant circuit must hold a current valid certificate from an industry-accredited assessment authority.
- Location: Allow the unit to set upright for at least 24 hours if tipped more than 45°. Place on a firm, level surface with at least 50cm of free space for air circulation. Avoid operating near walls, curtains, or objects that block air inlet/outlet. Do not install near heat sources, in direct sunlight, where oil/water can splash, with mechanical vibration/shock, excessive dust, lack of ventilation, or on an uneven surface. Install in rooms exceeding 7 m² and avoid places where inflammable gas may leak.
Disposal
Releasing refrigerant into the atmosphere is strictly forbidden. Electrical appliances should not be disposed of as unsorted municipal waste. Use separate collection facilities and contact local government for information on available collection systems. Improper disposal can lead to hazardous substances leaking into groundwater, affecting the food chain and human health.
Warranty
The product comes with a 24-month manufacturer's warranty from the date of purchase against manufacturing faults. Warranties are automatically tracked in the system, so no registration is needed. For support, contact info@pasapairhome.com or visit www.pasapairhome.com. Providing a warranty card, photo, or video of issues can help in offering the best solution. A warranty card is provided for users to fill out and email within 10 days of purchase.