ANLEITUNG INSTRUCTION INSTRUCTION INSTRUCCION Ilf
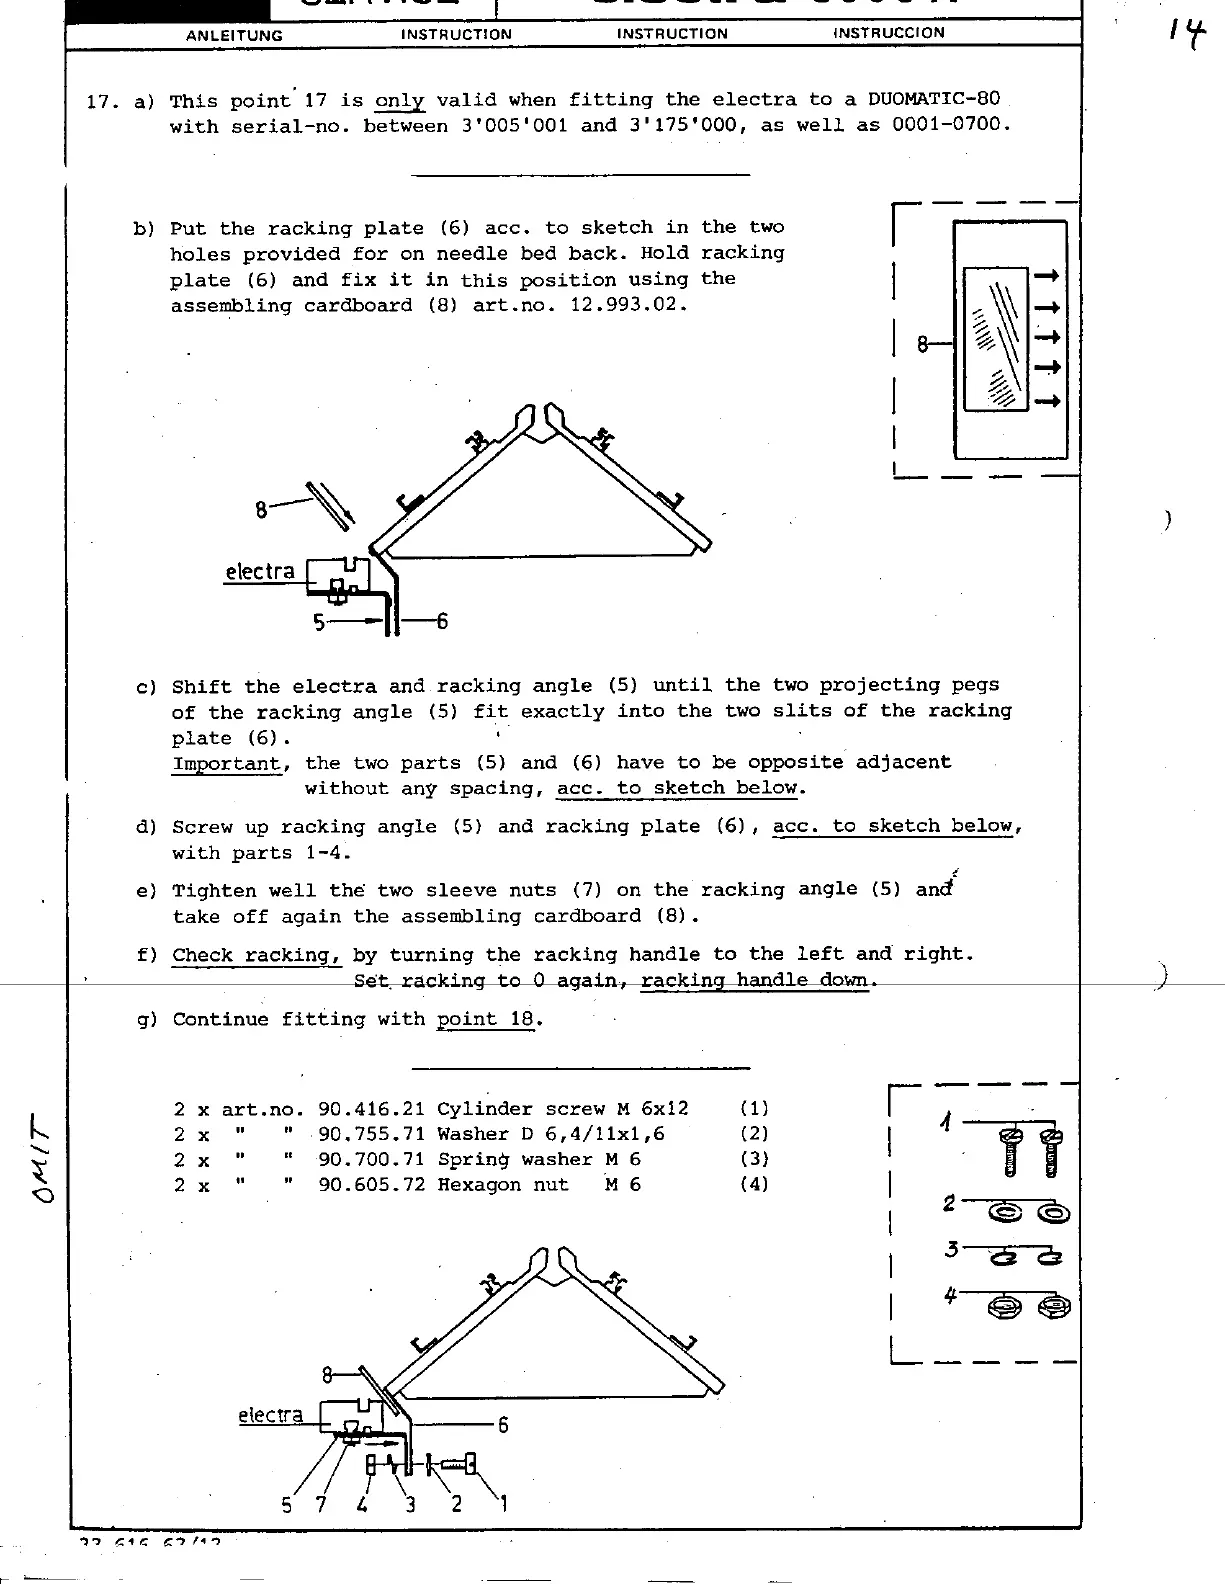
17. a) This point'17 is ~ valid when fitting the electra to a DUOMATIC-80
with serial-no. between 3'005'001 and 3'175'000, as well as 0001-0700.
b) Put the racking plate (6) acc. to sketch in the two r holes provided for on needle bed back. Hold racking
plate (6) and fix it in this position using the I -+
assembling cardboard (8) art.no. 12.993.02. ~
~~ -+
I ~
~ .
~/ ::
I ~
;.~ -+
I
L_-
8--~ )
~kf1@_(~~]~
S~r -6
c) Shift the electra and racking angle (5) until the two projecting pegs
of the racking angle (5) fit exactly into the two slits of the racking
plate (6). .
Important, the two parts (5) and (6) have to be opposite adjacent
without any spacing, acc. to sketch below.
d) Screw up racking angle (5) and racking plate (6), acc. to sketch below,
with parts 1-4.
-:
, e) Tighten well the two sleeve nuts (7) on the racking angle (5) and
take off again the assembling cardboard (8).
f) Check racking, by turning the racking handle to the left and right.
Set. racking to 0 again, racking handle down. ~)
g) Continue fitting with p~int 18.
, 2 x art.no. 90.416.21 Cylinder screw M 6x12 (1) r-- ~- ~
2 x" "90.755.71 Washer D 6,4/11x1,6 (2) I e ~
T~ 2 x" " 90.700.71 Spring washer M 6 (3) -I i
<) 2 x" "90.605.72 Hexagon nut M 6 (4) I
I 2. @@)
I .3 0 a
I "'---~- ~
L electra 6
5
')') e:1~ ~') 11')
" --
 Loading...