[
6
]
EINSTEIN
™
by Paul C. Buff
EINSTEIN
™
DIAGRAM
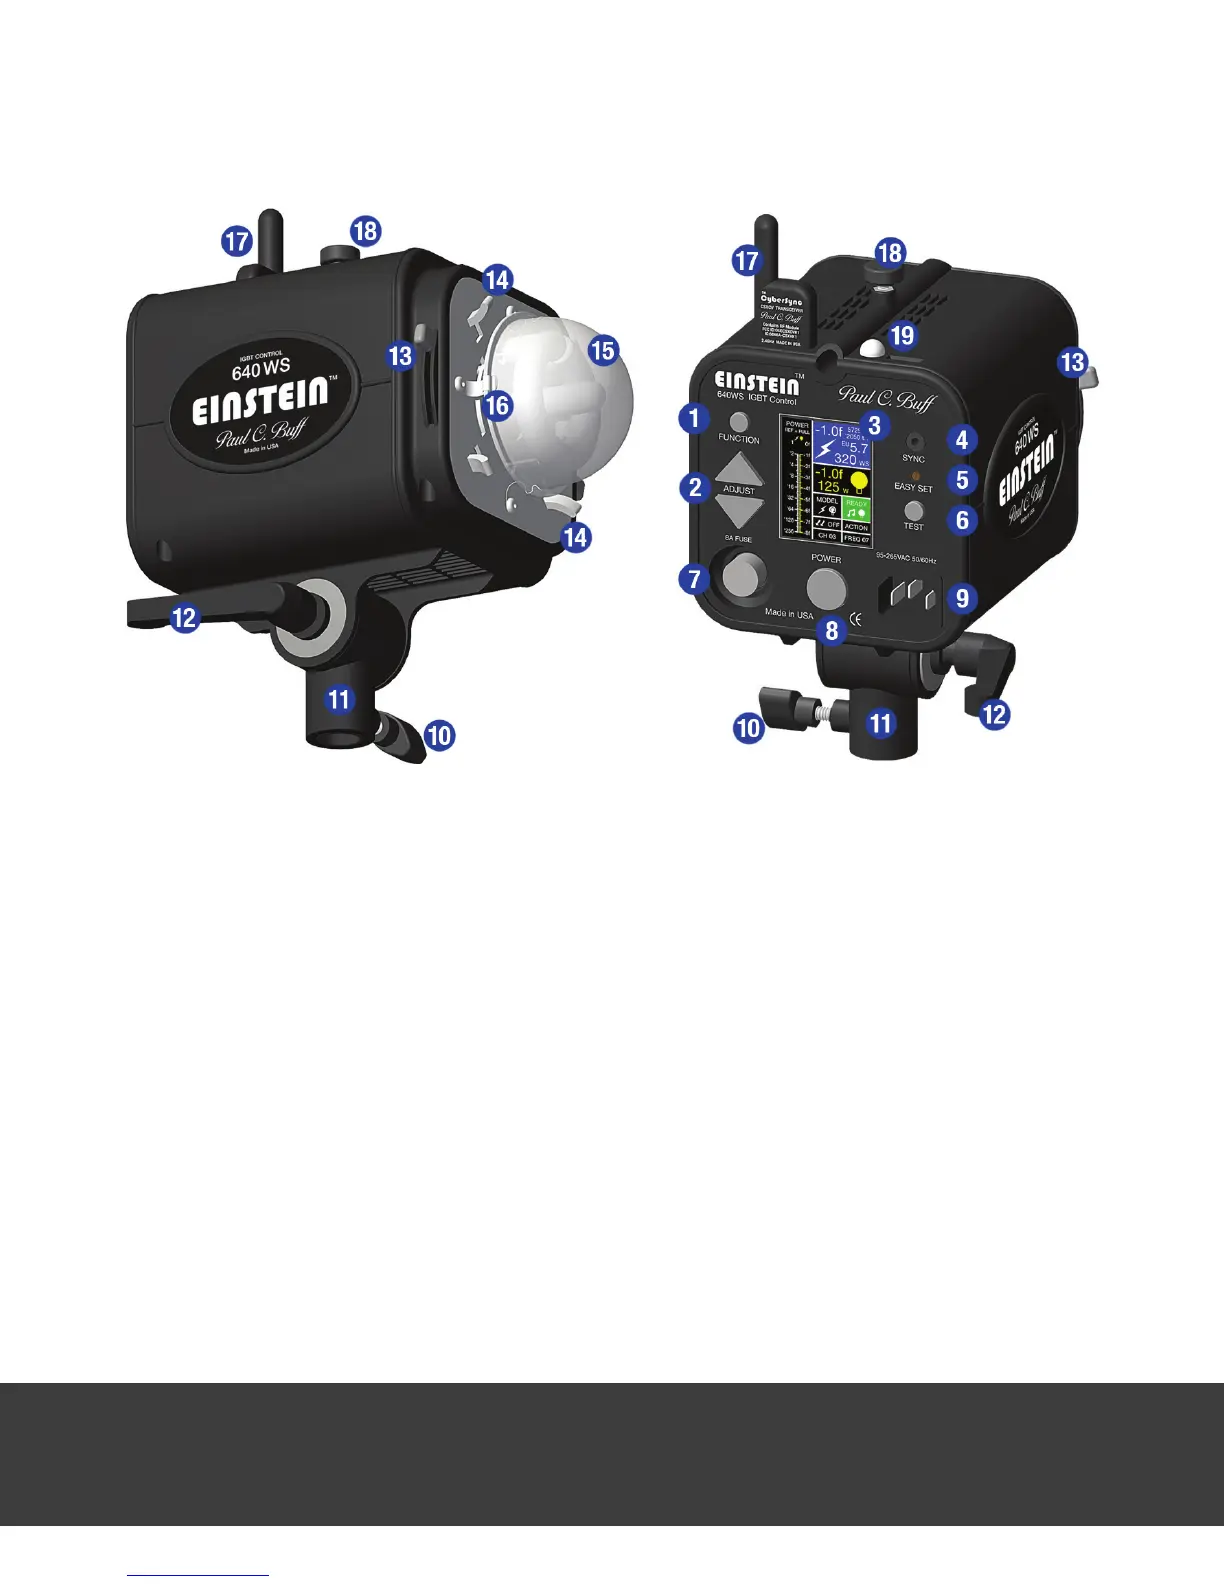
1. The FUNCTION button is used to scroll between the individual screens on the LCD display to
select which screen is active for adjustment (each “screen” is a section of the display; all nine
screens are visible at all times). The screen actively selected for adjustment is highlighted in
blue. The unit defaults automatically to the Flash Adjustment Screen.
2. The ADJUST buttons are used to adjust the light’s various settings. Once a screen is high-
lighted for adjustment, the ADJUST buttons are used to raise or lower output (for the ashpower
and modeling lamp) or to scroll through the options for the setting.
3. The LCD Display is a backlit, high resolution, color screen that is divided into nine sections /
screens to display the current status of the various light settings.
4. The Sync Jack (1/8-inch / 3.5mm) is used for hardwired connection of the ash unit to your
camera using the provided ABSC sync cord.
Note:
Inserting a sync cord or dummy plug into the
jack does not disable the slave photo sensor, which is toggled on and off in a control screen.
5. The EASY SET button clears any programming and returns the unit to its default factory set-
tings. See page 8 for more details on EASY SET.
6. The TEST button allows you to test re (ash) the unit.