6 7
tO tHe User
tO tHe User
Before using the fan, carefully read these instructions and the warranty conditions.
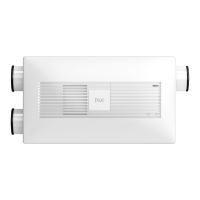
PAX passad multi is designed for fixed installation and must be installed by a
qualified electrician.
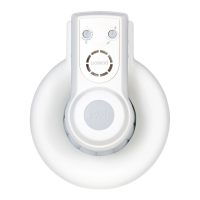
All the illustrations referred to in the text can be found on page “III”. Fold the page out to the left
so that you can see the illustrations while reading the user guide.
Thank you for choosing a PaX fan – The original!
The PAX passad multi exhaust fan is designed primarily to boost the air flow in houses* with
natural draught ventilation. It is suitable for installation in wet rooms (WC/bath/shower/laundry)
and can be installed in ducts with and without natural ventilation**.
The fan fits ducts with a diameter of Ø or
100 – Ø 140 mm. For larger ducts (up to 160 mm dia-
meter) the PAX cover plate (accessory) must be used. To ensure that the PAX passad multi does not
affect other ventilation systems and is not affected by them, the fan must always be installed in its own
duct. Make sure that the duct is clear of obstructions. Avoid insect mesh, filters and other objects that
may obstruct the flow of air. To prevent condensation in natural draught ducts (in winter), the ducts
must be insulated where they pass through unheated areas such a cold attics.
To avoid backdraughts when the fan is installed in ducts that have no natural draught** (eg through
an external wall), the PAX passad multi is set at the factory to operate continuously at a low speed,
so creating a constant basic flow of ventilation. If the fan is only required to operate with an on/off
function, the basic ventilation flow can be disabled when the fan is installed. For that situation, the fan
can be fitted with the PAX passad backdraught shutter (accessory), provided that another ventilation
system ensures the basic ventilation of the building. (Note that the backdraught fan accessory can
not be combined with the fan function “basic ventilation setting”). NOTE: A backdraught shutter is
harmful if the fan is installed in a ventilation duct with natural ventilation.
The fan is designed for use in a temperature range of 5 to 35 °C. If the fan is installed in a cold
area or if it has been stored in a cold place before installation, it may run slowly when started for
the first time. The fan will work normally when it reaches its working temperature.
Make sure that air can enter the bathroom, for example through a large gap at the door or by using
the PAX transfer air unit (accessory). We recommend the use of genuine PAX accessories (see
page II) to ensure that the fan works properly and delivers the correct capacity.
* Primarily detached houses and holiday homes, but can also be used in multi-dwelling buildings with
separate, short ventilation ducts.
** With natural draught ventilation, air is carried upwards through ventilation ducts and out of the building (see page
19). For natural draught ventilation to work, the air inside the building must be warmer (and therefore lighter)
than the air outside. Natural draught ventilation therefore works best during the winter. Natural draught ventilation
will be reduced or absent if the temperature differential (inside/outside) is small or non-existent. For this reason,
buildings are often poorly ventilated when the weather is warm
.
descriPTion of auTomaTic funcTions/oPeraTing modes
PAX passad multi includes an unique functionality that automatically activates optimized operation
mode. The fan has no controls, so there is no need for you to make any adjustments yourself.
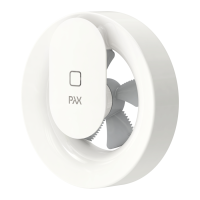
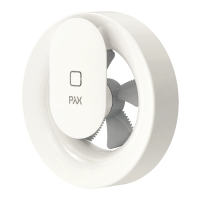
The fan has three fixed speed settings, each of which is matched to different operating modes:
Setting 1: Low speed (basic flow/basic ventilation)
Setting 2: medium speed (activated by a presence sensor)
Setting 3: High speed (activated by a humidity sensor or started manually with a switch)
Basic ventilation mode – The PAX passad multi is set at the factory to run constantly at a basic
speed (setting 1), so that it produces beneficial continuous basic ventilation which has a positive
effect on the indoor climate in the entire house. Important: Let your electrical installer know
before the fan is installed if you want this function deactivated.
Presence and light sensor – with automatic timer function
Automatic impulse o forced flow or start, when someone moves in the vicinity area (see sketch
on page 19) or if the light level changes rapidly. The fan runs in setting 2 for 15 minutes (timer
function). The fan then switches to setting 1 (basic flow) or stops. If the IR sensor registers a new
“presence”, the fan forces/starts again after 10 seconds.
Automatic humidity control – A built-in humidity sensor continuously measures the humidity
level in the room and automatically signals the fan to start/force if the humidity in the room
increases rapidly (for example if someone uses the shower). The fan then runs at setting 3
until the humidity in the room is restored to the normal level. The fan then switches to setting 2
(presence) or setting 1 (basic flow), or it stops. When the humidity in the room is above
70% RH***, the fan always runs in setting 3.
*** At certain times of the year, this may mean that the fan runs constantly for a long time.
This is good for the building and for the people in it. (A humidity level above 70% RH is
uncomfortable and encourages mould).
Airing function – If the fan has not run for at least 24 hours it starts automatically (in setting 3)
and runs for 30 minutes at six-hour intervals (in other words 4 x 30 min = two hours per day).
The airing function remains active until the fan receives a signal from the humidity sensor or the
presence sensor. NOTE: For the airing function to be activated, the basic ventilation mode must
be disabled when the fan is installed
Manual starting with a switch with 15-minute timer function
The fan can be connected to be manually forced/started with a separate switch or with the light
switch of the room. When the switch is turned on, the fan is forced/starts (setting 3). When the
switch is turned off, the fan continues to run for 15 minutes (the timer function). At the end of
the run-on time the fan switches to setting 2 (presence) or setting 1 (basic flow), or it stops.
Multi-pole switch (see Figure A3) – More information on page 9.
cleaning
For the fan to keep working and maintain its capacity it must be cleaned at least twice a year
and more often if necessary.
• Disconnect the fan from the electric power supply before cleaning it.
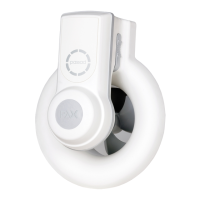
• Push the two locking buttons towards the centre (A1) and lift the motor unit out of the
frame (see Figure A). Then remove the motor unit (A2).
• Clean the opening, the duct and the motor unit with a damp cloth (a mild detergent may
be used if necessary).
• The impeller can be cleaned in place. If the impeller is very dirty you can remove it by
pulling it straight out (see Figure B). It can then be washed and rinsed.
(To avoid rust, allow the impeller to dry before refitting it to the motor shaft.)
• Do not use solvents on the fan.
• Do not immerse the fan in water or flush water jets on it.
environmenT A fan that is no longer serviceable should be recycled as electronic scrap.
for Technical daTa and informaTion visit www.pax.se
 Loading...