Fitting the latch
Step 1
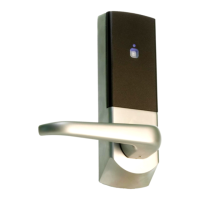
Decide on the height of the door latch from the oor and mark a height line on the edge and about 80mm across
both faces of the door. Fold the template along one of the dotted lines (right or left side) and tape it to the door
with the latch centre line positioned on the height mark. (Diagram A).
Mark the 4 x 10mm holes and 1 x 25mm holes. Remove the template and apply it to the other side of the door,
again aligning it with the height line. Mark the holes as before.
Step 2
Drill the 25mm hole on the centre line of the door edge at least 80mm deep to accept the latch.
Step 3
Drill the 4 x 10 mm holes for the xings and one 25mm hole for the square drive. To ensure accuracy you should
drill these holes from both sides of the door towards the centre. This also avoids the risk of damaging the door face
when the drill breaks through.
Step 4
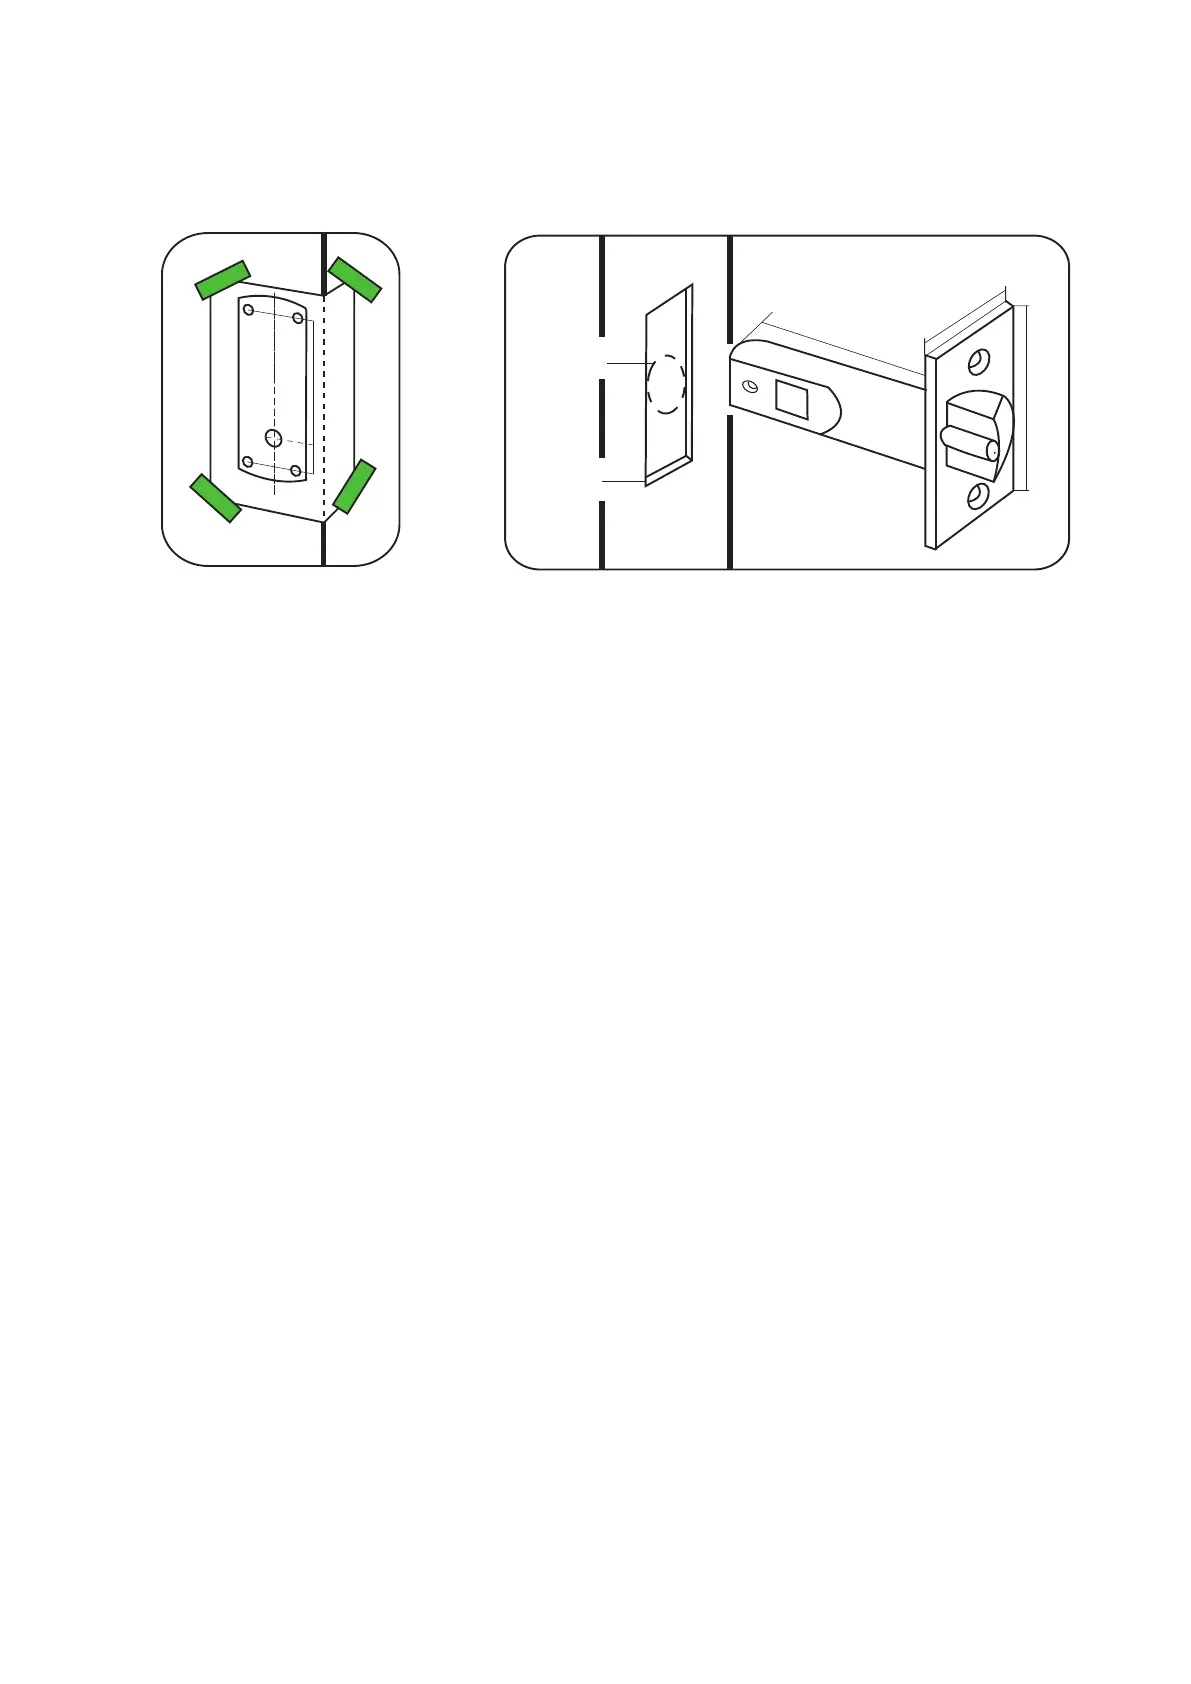
Put the latch into the hole and holding it square to the door edge, draw around the faceplate. Remove the latch and
score the outline with a Stanley knife to avoid splitting the wood when chiseling. Chisel a 3.5mm rebate allowing
the latch to t ush to the surface. (See diagram B).
Step 5
Re-t the latch with the plunger facing away from the door frame and secure with two latch screws.
NOTE. This plunger protects against the manipulation or ‘shimming’ of the latch with a credit card, etc.
Step 6
Cut the square drive to length ( Door thickness +20mm) and slide into the latch.
Step 7
Accurately measure the thickness of the door. (20mm minimum - 60mm max) For doors between 40mm to 45 mm
and 55mm to 60mm thick the supplied securing screws (long or short) can be used without adjustment.
For doors outside of this range the long screws should be cut to length of approximately Door thickness + 5 mm
Check that you have the Enrolment card and Battery Pack to hand.
Step 8
With reference to ‘Battery Replacement’ - Figs 1-3.
Remove the access plate at the rear of the unit by removing the top standoff screws. (Fig 1) Take the battery pack
and connect the lead to the white plug. (Fig 3)
The unit will click twice and then commence to beep regularly.
Step 9
Present the Enrolment card to initialise the unit. The unit will stop beeping and is now active.
Diagram A - Drilling template taped to door
Power up and Initialise
Diagram B - Latch dimensions