Page 7
Fig A Fig B
Fig C Fig D
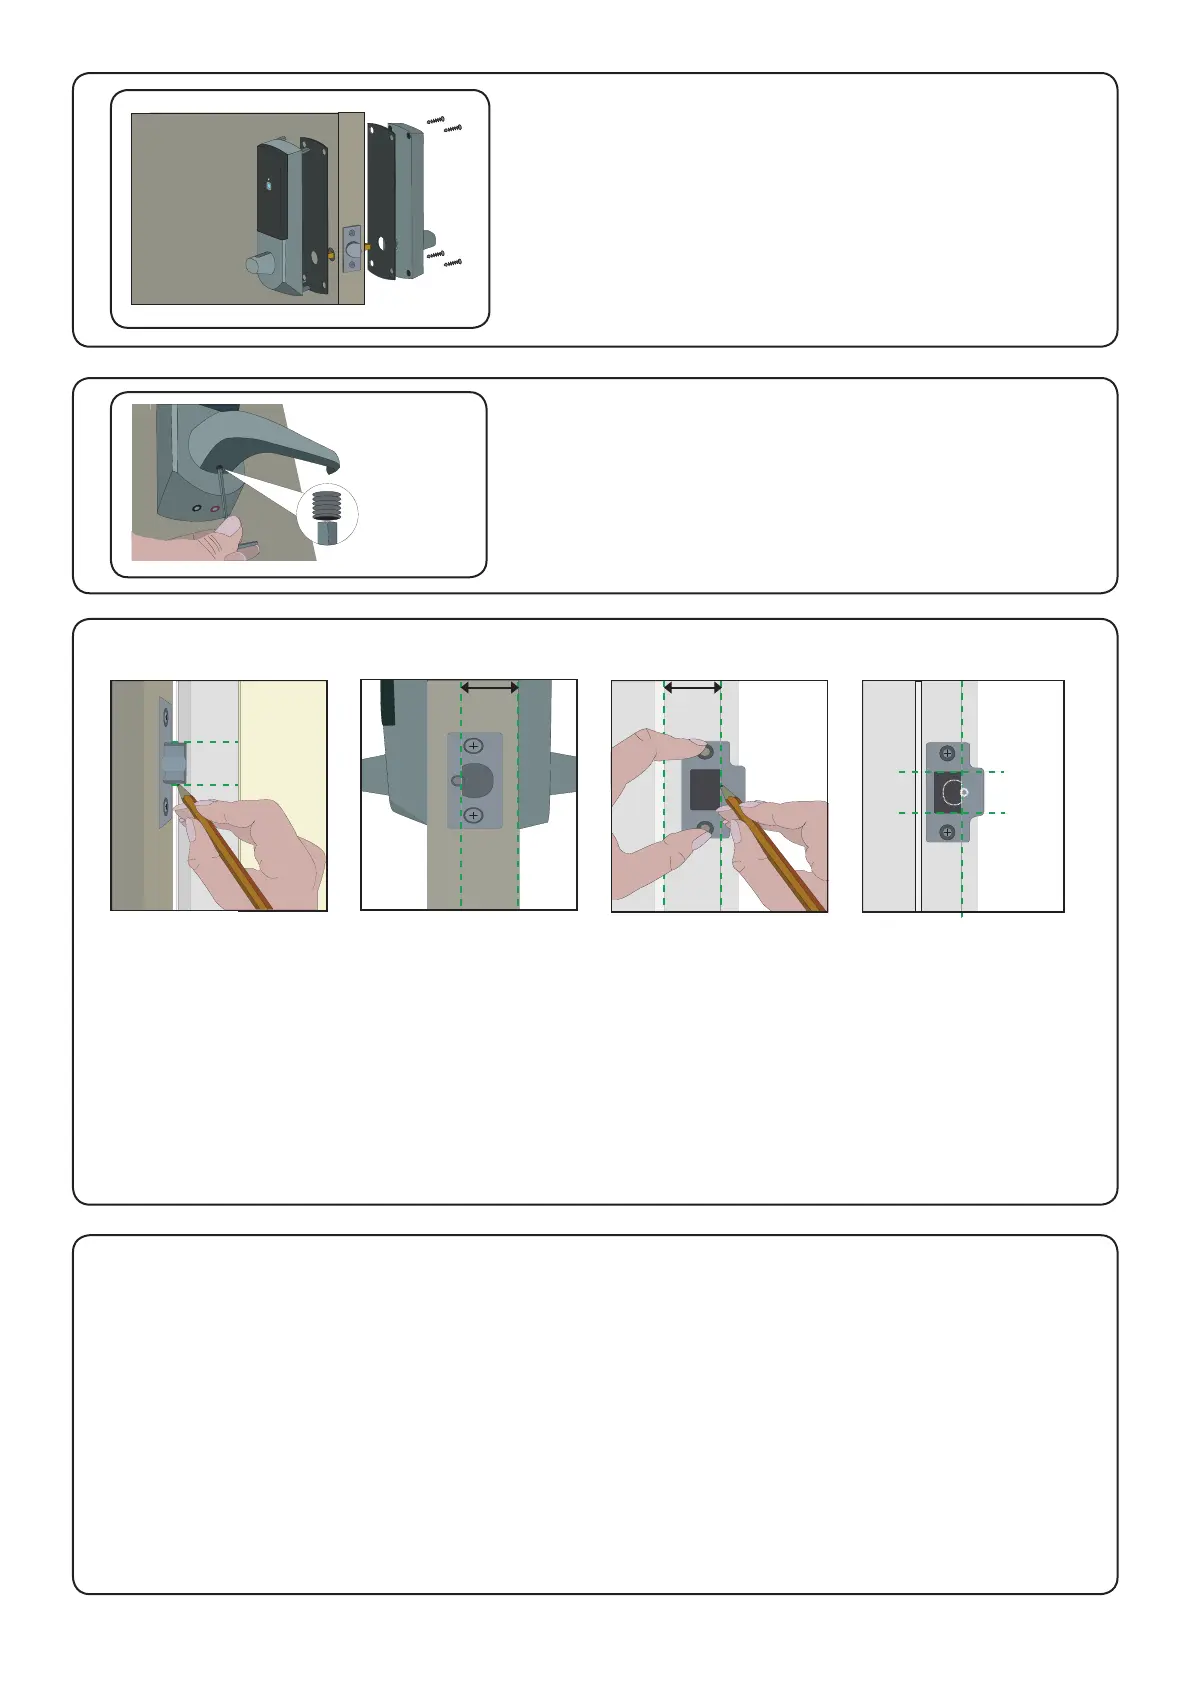
Step 5 - Mounting on the door
Step 6 - Fitting the handles
Step 7 - Marking out the strike plate
Step 8 - Fitting the strike plate
Select the short (doors thinner than 45 mm) or long
mounting screws and cut to length if required.
(door thickness + 5 mm)
Fit the rubber escutcheons to the front and back plates.
Present the front and rear lock assembly to the door, locating
the square drive in its recess and join the two parts together
with 4 mounting screws.
Fit the two handles, positioning the screw holes to the
underside and secure with the grub screws provided.
Check the operation of the lock - See Commissioning checks.
Fig A - Vertical position of the strike plate - Close the door and mark the top and bottom position of the
latch horizontally across the frame.
Fig B - Horizontal position of the strike plate - Measure the distance from the back edge of the door to
the at face of the latch. (NOT the plunger.)
Fig C - Mark this distance on the frame to show how far back the plate needs to be to hold the door closed.
Fig D - Position the strike plate within these guide lines. Mark the positions of the xing screws and draw
around the 'cut-out' in the strike plate.
Chisel out a 15 mm aperture to receive the latch bolt.
Fix the strike plate with one latch screw to the surface of the frame.
FROM THE INSIDE: Gently close the door and check that the latch enters the aperture easily with no
additional 'play' in the frame. Small adjustments can be made by moving the plate slightly. When satised,
draw around the outline of the strike plate, remove it. Score around the outline and then cut the rebate to
enable the strike plate to lie ush with the surface.
Fix the strike plate using two latch screws and check the lock operation. Remove the strike plate and
increase the aperture to accept the strike plate backbox. Now re-x the strike plate and check the operation
of the 'anti-shim' plunger and the door.
The unit is now fully operational and should be enrolled as soon as possible to preserve battery life.
 Loading...