Do you have a question about the PayFacto PAX D210 and is the answer not in the manual?
Steps to connect the terminal to a Wi-Fi network, including entering credentials and network details.
Procedure to change the default admin password to a new, secure password.
Steps to configure terminal communication with the host, including TID and IP settings.
Process to download DLL parameters and update EMV keys for terminal functionality.
Configuration options for terminal date, time, communication mode, and Wi-Fi network details.
Process to connect the terminal to the host for updating keys.
Configuration for merchant language, application mode, terminal type, and tip options.
Steps to enable various contactless payment methods like VISA PAYWAVE and MasterCard PAYPASS.
Procedure for closing the batch, confirming sales/refunds, and printing summary reports.
Configuration for receipt copies, pauses, intervals, and footer text.
Instructions to change the merchant and admin passwords.
Procedure to change the terminal's display language.
Instructions on how to activate and deactivate training mode for testing transactions.
Steps to enable password protection for various terminal functions.
Contact information for technical assistance.
| Brand | PayFacto |
|---|---|
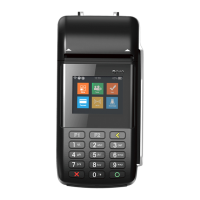
| Model | PAX D210 |
| Category | Payment Terminal |
| Language | English |