12
Functions
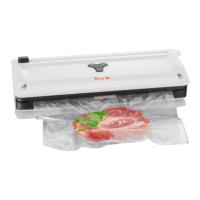
Vacuuming
Connect the device to the power supply
and place the opening of the vacuum bag
in the vacuum chamber
10
.
Close the device cover by rmly pressing
both sides of the cover down until you
hear “clicking” sound. Press the vacuum
button
2
to switch on the vacuum pump.
The LED
5
will light up blue during this
process. (The vacuum value reaches up
to -50 kPa.)
As soon as it has nished vacuuming, the
heat sealing process will begin automati-
cally. When this step has nished, the de-
vice will switch off automatically and the
blue LED
5
will fade out.
Note: In the case of an emergency you can
switch off the device at any time using the
stop button
1
.
Note: The vacuuming process can take up to
2 minutes. If a complete vacuum cannot be
created within a vacuum bag, after 2 minutes
the display
5
will ash blue. Press the vacu-
um button
2
again. The heat sealing process
will begin automatically after this.
Press the stop button
1
to interrupt the
process for products which are not meant
to be completely vacuumed.
Then, press the heat seal button
3
to
continue the process.
When the heat sealing process has nished,
the device will stop automatically.
Note: We recommend that you wait 20 sec-
onds between individual vacuuming and heat
sealing processes.
Heat sealing
Connect the device to the power supply
and place the opening of the bag to be
heat sealed in the vacuum chamber
10
.
Press the heat seal button
3
to close
the bag directly without vacuuming be-
forehand.
Note: We recommend that you wait 20 sec-
onds between individual vacuuming and
heat sealing processes.
Important notes:
The device is not suitable for vacuuming
liquid food products.
The width of the vacuum bag and rolls
of lm should be up to 30 cm maximum.
Use a vacuum bag to vacuum. Normal
bags are only suitable for heat-sealing
and not for vacuuming.
Vacuuming prolongs the shelf life of
food products but cannot prevent them
from spoiling.
Cleaning and maintenance
Unplug the mains plug from the power
supply before cleaning.
Never immerse the device or the cable
in water or another liquid to clean them.
After the device has cooled down, use a
soft sponge or a soft cloth to clean the de-
vice surface and the vacuum chamber
10
.
Do not use brushes to clean it as this
could scratch the device surface.
Use a handkerchief or a soft towel to
clean food remnants and liquids from the
vacuum chamber
10
.
Keep the inside and the outside of the
device dry so that the device is ready for
use.
English