Do you have a question about the peerless-AV SA752P and is the answer not in the manual?
Locate studs, mark holes, drill, and attach wall plate using screws and fastener caps.
Mark holes, drill, insert anchors, attach wall plate with screws, and tighten fasteners.
Install M10 x 15mm screws into dedicated PLP plate and adapter plate for display attachment.
Change display orientation between portrait and landscape by adjusting the rotation block.
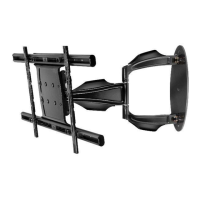
Adjust tilt tension knob and roll display angle using M5 x 10mm screws.
Adjust vertical height by tightening or loosening M8 x 40mm screws.
Route power and signal cables through arm slots and secure with covers or ties.
Increase or decrease arm pivot tension by turning the socket screw with a 5mm allen wrench.
| Height Adjustment | Yes |
|---|---|
| VESA Mount Compatible | Yes |
| Tilt | Yes |
| Pan | Yes |
| Lift | Yes |
| Material | Steel |
| Color | Black |
| Compatibility | Universal |
| Placement | Ceiling |
| Mounting Type | Ceiling |