9 of 13
ISSUED: 01-10-07 SHEET #: 009-9039-14 01-11-11
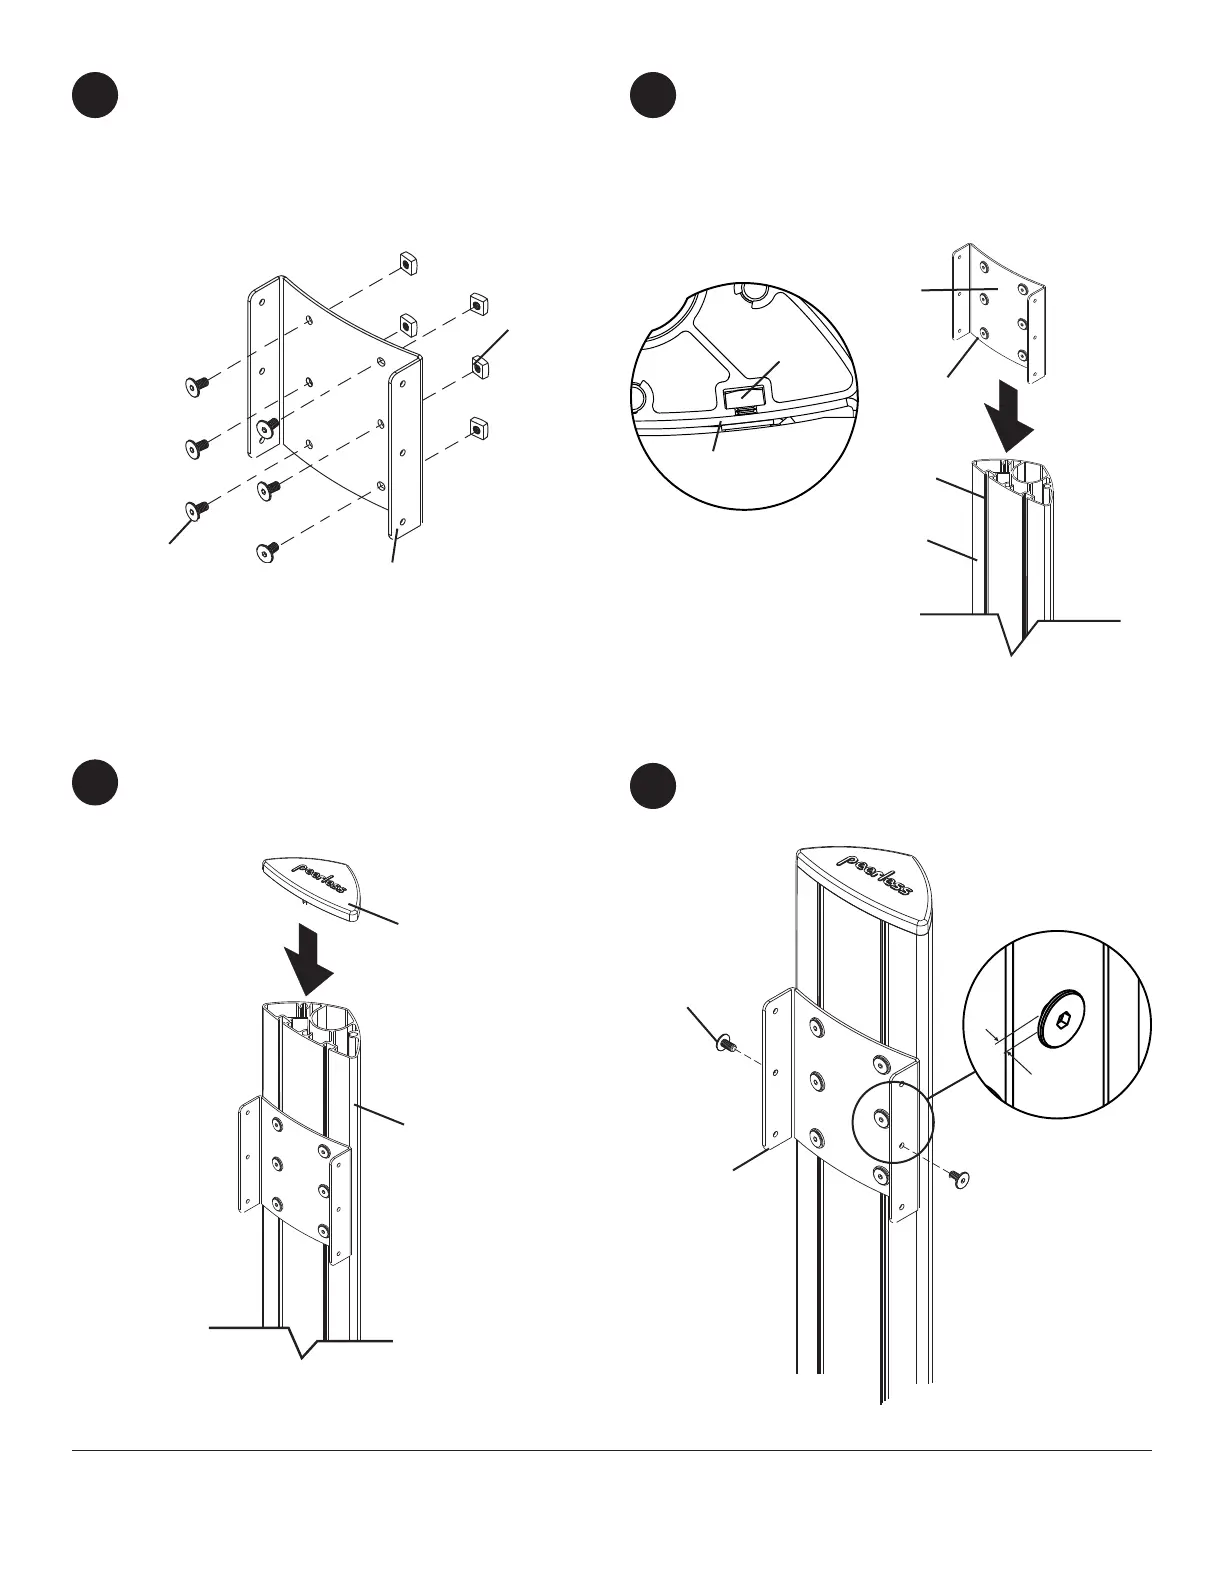
Insert two 1/4-20 x 12 mm screws (I) into screen
mount bracket (A), leaving 3/16" of exposed thread
as shown in gure 10.1 and detail 3.
H
G
Snap top cover (H) onto upright (G).
10
9
fi g. 10.1
Loosely attach six 1/4-20 x 12 mm screws (I) and
1/4-20 nuts (J) to screen mount bracket (A).
7
Slide screen mount bracket (A) onto upright (G) so
that 1/4-20 nuts (J) slide into slots of upright (G) as
shown in gure 8.1 and detail 2. Slide screen mount
bracket to desired position, level, then tighten 1/4-20
x 12 mm screws (I) using 4 mm allen wrench (N).
8
I
A
J
A
G
SLOT
fi g. 8.1
I
DETAIL 3
3/16"
DETAIL 2
J
G
I
A