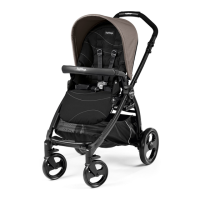
can vary its distance from the seat (fig_b).
9 ADJUSTING THE LEG REST: To switch from “sitting” to “lying”
or vice versa, simply press on the leg rest to obtain the
configuration you wish.
10 FRONT BAR: The front bar can be removed by pushing the
buttons on the sides (fig_a), or it can be opened on one
side pressing one button only (fig_b).
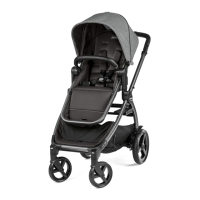
11 BED POSITION: the seat can be adjusted in three positions,
from “sitting” to “lying”, with an intermediate position
(fig_a). To switch from one position to another, pull the
lever shown in the picture (fig_b).
12 FOOT MUFF: to fasten the foot muff onto the Ypsi Seat,
close the zip on the side (fig_a) and do up the buttons on
the side of the corresponding uprights (fig_b).
13 The foot muff can be opened at the front using the zip for
that purpose, as shown in the picture.
14 5-POINT SAFETY HARNESS: to fasten, insert the two buckles
into the waist strap (with the straps attached in the crotch
strap) until you hear a click (fig_a). To unfasten them, press
the button which is situated at the centre of the seatbelt
buckle and pull the waist strap outwards (fig_b).
15 To tighten the waist strap, pull on both sides in the direction
of the arrow; to loosen it, do the opposite.
16 The safety harness can be adjusted in 3 positions according
to the child’s height. You must use the higher positions as
the child grows bigger.
17 Adjust the height, inserting the straps with shoulder pads
through the eyelet in the backrest (fig_a) and pull them
through the desired eyelets (fig_b).
18 FOLDING THE YPSI SEAT ATTACHED ONTO THE CHASSIS:
the Ypsi Seat can be folded attached on the chassis only in
world-facing position (fig_a).
To do this:
- the leg rest must be in “sitting” position,
- fold down the hood,
- pull the levers on the up-right (fig_b)
- fold Ypsi Seat onto itself (fig_c).
19 WARNING: If Ypsi Seat is in mum-facing position, it must be
unfastened before folding (fig_a). It can take up less room
when folded (fig_b) and can be conveniently carried using
the supplied handle (fig_c).
20 OPENING THE CHASSIS WITH YPSI SEAT ATTACHED:
Press the side attachment fastener downwards, grip the
upper ends of the handle bar and rotate them towards you
until the chassis opens completely (fig_a). Ypsi chassis open
(fig_b). A “click” sound means it has opened correctly and
corresponds to the attachment onto the base. Next, open
the Ypsi Seat from the ends, pulling it until it clicks (fig_c).
21 FOLDING THE CHASSIS WITH YPSI SEAT ATTACHED: put the
front wheels in locked position (fig_a), lower the handle bar
to the lowest position (fig_b). Rotate the safety lever to the
left (fig_c) and, at the same time, pull the frame’s internal
handle bar towards you (fig_d).
Lift the handle bar until the frame is completely folded
(fig_e).
WARNING: If the seat is mum-facing it cannot be folded
attached onto the chassis. It must be unfastened.
22 To fold correctly, check the side fastener is engaged (fig_a).
If it has not engaged automatically, compress the frame
slightly. The folded stroller is free-standing (fig_b).
23 TRANSPORT: the stroller can be conveniently carried (with
the front wheels in locked position) using the central
handle.
24 REMOVING THE SOFT COVER: to remove the hood cover,
unfasten the 2 buttons near the pivots (fig_a), then press
the buttons on the two attachments and remove the hood
(fig_b). Lastly, extract the two rigid supports (fig_c).
25 To remove the soft cover from the seat, undo the straps on
the side of frame.
26 Open the zip that attaches the sack to the horizontal bar
(fig_a) and open the zip along the frame (fig_b), then
remove the sack.
27 Remove the metal rod from the back of the leg rest.
28 To remove the sack, remove the rigid panel from the back
weight; the front bar has not been
designed to lift the seat with the
child’s weight. The front bar does
not replace the seat belt.
_ Do not use the item near stairs or
steps; do not use near heat sources,
open flames or dangerous objects
that are within reach of the child.
_ Use only spare parts supplied
or recommended by the
manufacturer/distributor.
_ WARNING: do not use the rain
canopy (if present) in interiors and
check the child is not too hot; do
not leave near sources of heat and
keep away from cigarettes. The
rain canopy must not be used on a
stroller without a hood or parasol it
can attach to. Use the rain canopy
only under adult supervision. Check
the rain canopy does not interfere
with any moving mechanism in the
chassis or stroller. Remove the rain
canopy before folding the chassis or
stroller.
_ WARNING: do not add any mattress
that is not approved by the
manufacturer.
_ Do not use accessories that
have not been approved by the
manufacturer.
The images referring to the textile details may
differ from the collection purchased.
For more information, consult our website:
www.pegperego.com
INSTRUCTIONS
1 OPENING: Before opening the Ypsi Seat, remove (without
using blades) any die-cut cardboard.
Open the seat from the ends, pulling until it clicks.
2 ATTACHING THE SEAT ONTO THE CHASSIS: To fasten the
Ypsi Seat, position it on the chassis (fig_a) and press down
with both hands until it clicks (fig_b).
Ensure the Ypsi Seat is properly attached.
3 The Ypsi Seat can be attached onto the chassis in “world-
facing” (fig_a) or “mum-facing” position (fig_b).
4 Always engage the brake on the chassis before fastening
and unfastening the seat.
5 REMOVING THE YPSI SEAT FROM THE CHASSIS: To unfasten
the Ypsi Seat, press the levers near the chassis attachments
(fig_a) and lift the seat at the same time (fig_b).
6 HOOD: to use the hood, stretch it until it clicks (so it is
completely open).
7 The hood comes with a mesh insert so that the baby can be
seen from any position. To use it, open the zips (fig_a) and
slide the hood’s insert backwards (fig_b). Alternatively, the
hood can be stretched further forwards (fig_c).
8 Sliding the hood’s attachments on the uprights (fig_a), you
- 16 -
 Loading...