EasyManua.ls Logo

Pella Roto Operator User Manual

Pella Roto Operator
2 pages
To Next Page IconTo Next Page
Page #1 background imageLoading...
Page #1 background image
Rev. 06/22/07© Pella Corporation 2007 Page 1 of 2
Part Number: NA
A. Remove the screws hold ing the operator to the sash
and frame. Remove the operator.
Awning windows: Remove the jamb frame
stop. See Supporting Document–Jamb Stop
Replacement–in web browser.
Casement windows: Remove sill frame stop.
See Supporting Document–Sill Frame Stop
Replacement–in web browser.
Architect Series:
1990-1994
Designer Series:
1992
Awning
Casement
Architect Series and Designer Series Casement ONLY
Architect Series:
1995-12/1999
Designer Series:
1993-12/1999
ProLine:
1991-3/2000
1
Replacing the Roto Operator:
optional locations
Sash Stop Screw
1A 1A
Note: For egress roto operators, do the following:
1. Remove the sash stop screw from sash slide.
2. Align cutout in sash slide with end of operator arm.
Once aligned, press down on end of arm to re lease
from slide.
These instructions apply to:
Architect Series
®
1990-12/1999
Designer Series
®
1992-12/1999
Designer Series CLassic 1994-1998
ProLine
®
1991-3/2000
Tools Required:
• Screw driver
• Sealant Gun
• Sealant
Roto Operator Replacement
Service Instruction
Question and Answer IconNeed help?

Do you have a question about the Pella Roto Operator and is the answer not in the manual?

Pella Roto Operator Specifications

General IconGeneral
BrandPella
ModelRoto Operator
CategoryIndoor Furnishing
LanguageEnglish

Summary

Replacing the Roto Operator

Remove Operator Screws and Operator

Remove screws holding the operator to the sash and frame, then remove the operator.

Egress Roto Operator Specific Steps

For egress roto operators, remove sash stop screw and align cutout to release arm.

Reseal Weatherstrip

Reseal weatherstrip to the full width of the frame sill.

Attach New Operator and Reattach Sill Frame Stop

Attach the new operator with original screws and reattach the sill frame stop.

Check Unit Operation

Verify the proper functioning of the window unit after replacement.
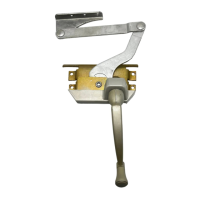
Related product manuals