A421 Series Standard Electronic Temperature Controls Installation Instructions
12
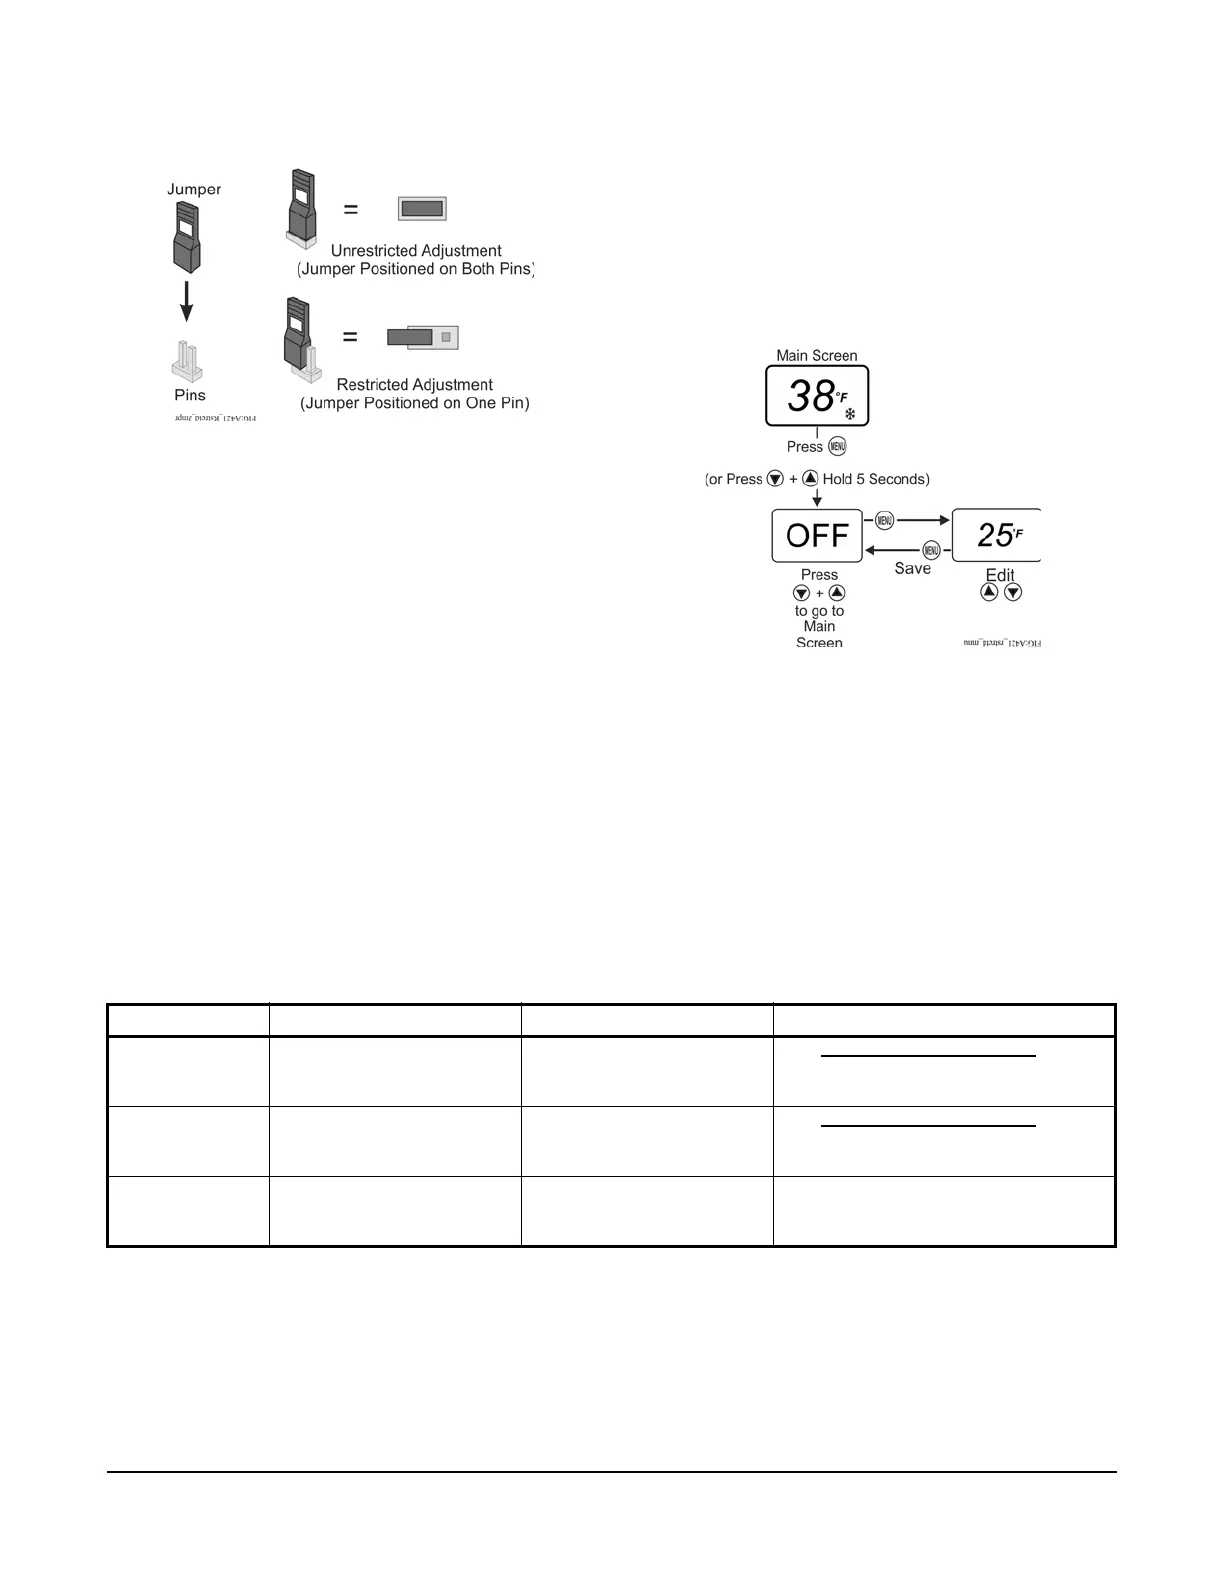
4. Disconnect power to the control and reposition the
jumper to one pin (Figure 10). Reconnect power.
Control adjustment is now restricted to changing only
the OFF value, which shifts the On/OFF control band
within the restricted adjustment range defined by HtS
and LtS (Figure 9).
Note: To completely restrict (and lockout) all user
adjustment on the control, set HtS = On or OFF and
LtS = OFF or On. Then the (On to OFF) control band is
equal to the restricted adjustment range (LtS to HtS)
and the OFF value cannot be adjusted in the restricted
mode.
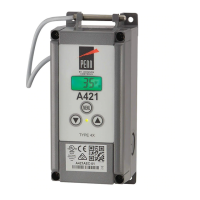
Adjusting the Control In Restricted Mode
To adjust the OFF value (and shift the On/OFF control
band) within the restricted adjustment range, when the
control is in the restricted adjustment mode:
1. In the Main Screen, press MENU to go to the
restricted adjustment mode menu and display the
OFF parameter code screen (Figure 11).
2. Press MENU again to go to the OFF value screen.
3. In the OFF value screen, press or to change
the OFF value (only within the restricted
adjustment range).
4. Press MENU to save the selected OFF value and
return to the OFF code screen.
5. Press and simultaneously to return to the
Main screen.
Troubleshooting
Fault Codes
A421 Series controls display fault codes on the LCD as
described in Table 5.
Troubleshooting Procedure
1. Check for proper voltage to the A421 control.
a. Remove the cover by loosening the two
captive cover screws.
b. Use an AC voltmeter to check the voltage
between the COM and 120V or 240V terminals
on line-voltage models and the two 24V
terminals on low-voltage models. See Figure 4.
c. The voltage must be between:
• 20 and 30 VAC for 24 VAC applications
Figure 10: Repositioning the Jumper to
Restrict Control Adjustment
Figure 11: Adjusting Temperature in the
Restricted Menu (Factory Default Values
Shown)
Table 5: Fault Codes Defined
Fault Code Definition System Status Solution
SF flashing
alternately with
OP
Open temperature sensor or
sensor wiring
Output functions according
to the selected sensor failure
mode (SF)
See Troubleshooting Procedure
. Cycle
power to reset the control.
SF flashing
alternately with
SH
Shorted temperature sensor
or sensor wiring
Output functions according
to the selected sensor failure
mode (SF)
See Troubleshooting Procedure
. Cycle
power to reset the control.
EE Program failure Output is off Reset control by pressing the MENU
button. If problems persist, replace the
control.