®
Heat Pump Installation and User’s Guide
Pin Configuration for the Heat Pump Control Board to IntelliTouch
®
Control System
1. Heat Pump Control Board: Connect pin 2 (green) to
IntelliTouch screw terminal pin 2 (green).
2. Heat Pump Control Board: Connect pin 3 (yellow) to
IntelliTouch screw terminal pin 3 (yellow)
IntelliTouch
COM PORT (J7/J8)
screw terminal
BLK
GRN
YEL
RED
IntelliTouch
ScrewTerminal
COM PORT (J7 / J8)
COMMUNICATION PORT
Pin Configuration for connecting IntelliFlo
®
to IntelliTouch
®
:
Strip back the cable conductors 1/4”. Insert the two wires into either of the
COMPORTS
(
J7
and
J8
) screwterminals. Secure the wires with the screws.
Note:
Multiple wires may be inserted into a single screwterminal.
Acommunication expansion module with 3 extra COMports and 4 IntelliFlo
pump ports is available (P/N520818).
•
IntelliFlo: Connect pin 6 (green) to IntelliTouch screwterminal pin 2 (green)
•
IntelliFlo: Connect pin 7 (yellow) to IntelliTouch screwterminal pin 3 (yellow)
INDOOR CONTROL(AND/OR) RFTRANSCEIVER
(AND/OR) iS10 SPA-SIDE REMOTE.
PIN 2
(Green)
PIN 3
(Yellow)
J8 RS-485
INTELLITOUCH
CONNECTION
PIN CONFIGURATION
Heat Pump Control Board
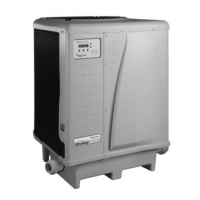
Connecting the IntelliTouch or EasyTouch
to Heat Pump
1. Turn off the power to both the remote pool/spa control
system and the UltraTemp
®
Heat Pump.
2. Remove the front left panel of the heat pump cabinet,
(you do not need to remove the star-head screw at
the top left corner).
3. Remove the electrical service panel to the heat pump.
Remove the 4 bezel retaining screws from above
the electrical compartment and rotate the bezel
downward. This will allow you to access the Remote
terminals on the back of the heat pump control board
for the remote control installation.
4. Run the wires from the pool/spa remote control
system into the upper electrical compartment.
7. Replace the electrical service panel.
8. Replace the front left panel.
9. Restore power to the heat pump and the pool/spa
remote control system.
10. Press the MENU SELECT button to scroll to the
Remote Mode screen. Toggle the selection by
pressing one of the arrows until the screen displays
“RS-485.”
11. Once the heat pump has been correctly configured, a
“heartbeat” indicator will appear on the main screen
each time a message is received from the automation
system.
5. Connect the wiring from the IntelliTouch Personality
Board COM PORT to the RS-485 IntelliTouch
POOL HEATING F
SET= N/A ACT= 74
Heartbeat
Indicator
connection (J8) on the heat pump control Board.
Connect the green wire to J8 pin 2 and yellow wire
to J8 pin 3. Do NOT use pin 1 (red) or pin 4 (black)
wires.The connections are shown in the image above.
6. Rotate the bezel back upwards into position and
reinstall the 4 retaining screws.
Note: If the system is put into Service Mode at the
automation control panel the heat pump will neither
heat nor cool, although it will remain powered on.
PWR
J7
IMPORTANT — Do NOT use pin 1 (black) or pin
4 (red) on the AutoSet board or the IntelliTouch
mother board.
AutoSet Board
(4-wire cable)
3 (YEL)
GREEN (PIN 2) 2 (GRN)
IntelliTouch
screw terminal
OUTPUTS
J3
DEF
TEMP
J5
WTR
TEMP
J4
INPUT
SWITCHES
J9
 Loading...