Pre 2011 DCT
1 Switch off electricity supply.
2 Remove cash box.
3 Unlock front cover and lift upwards allowing lower part of cover to come
towards you. Pull cover forwards and away from wall bracket and disconnect
lead from the power supply board (PSU). See Figure 5.
4 Disconnect electrical connections marking the position of wires and remove
wall bracket from the wall.
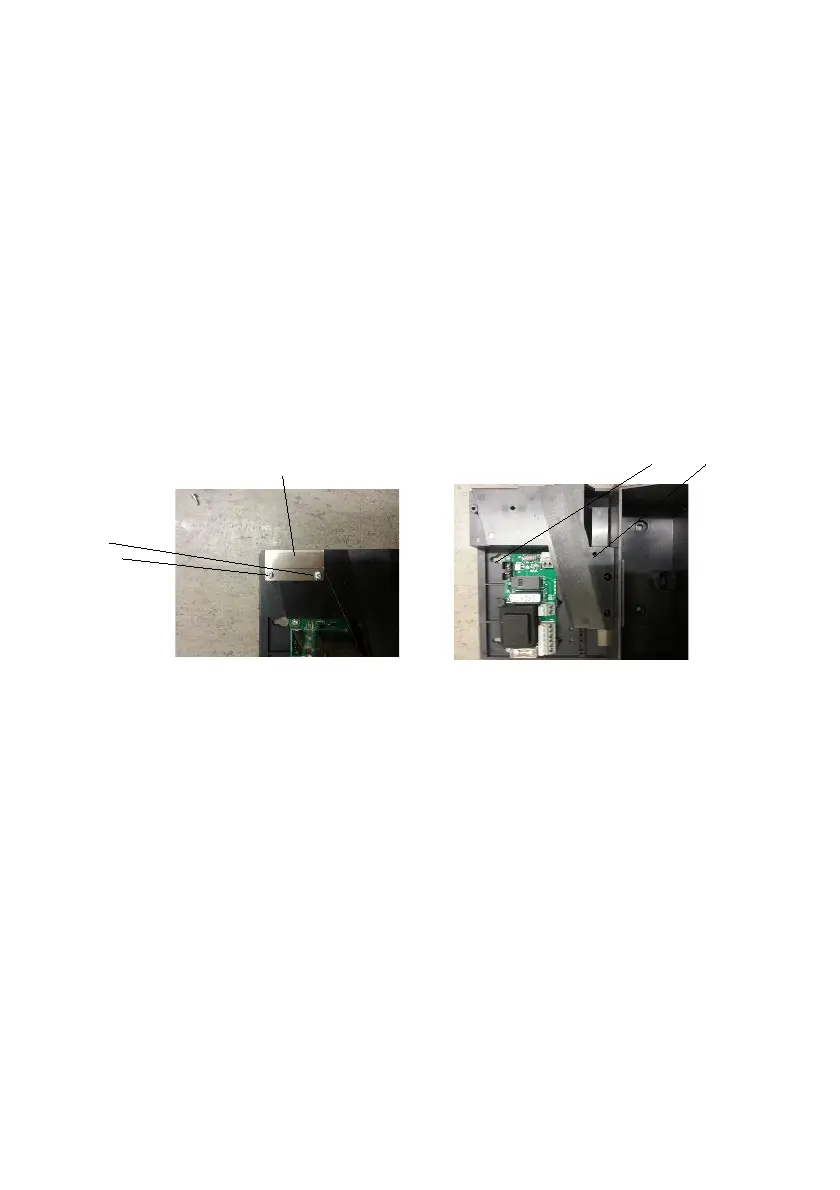
5 Remove two screws from coin bracket and insulation plate (Figure 1) and
remaining screw holding runway cover (Figure 2) and lift off. Discard coin
bracket and put two screws, insulation plate and runway cover to one side.
Coin Bracket (& Insulation Plate DCT)
Figure 1 Figure 2
6 Remove two screws and the spacer from power supply board, two nuts from
terminal block and carefully prise relay from side of bracket. If fitted remove
earth terminal block and lift out complete power assembly (Figure 4).
7 Discard old wall bracket and fit power assembly to the new wall bracket
using the fixings from the old wall bracket and double sided tape supplied.
Remove screws
Remove
screws