CCTVSETW1
V. 02 – 07/01/2014 7 ©Velleman nv
1. Insert an SD card into the monitor [5] (up to 32 Gb).
2. Connect the power adapter to the monitor and then to a wall outlet [1].
3. Flip out the camera stand [4].
4. Press and hold the power button for about 3-4 seconds [2].
A Welcome screen appears for a few seconds, then the camera view appears.
Mounting the camera
See images B1 to B3 on page 3.
1. Attach the camera mount at about 2.5 m from the floor.
2. Loosen up the thumb screw.
3. Choose a proper viewing angle and secure the joint.
4. Mount the camera onto the bracket
Note: SD card
• If you are planning to record long videos, it is recommended to use a SD card with high capacity.
• Always turn off the display before removing an SD card.
7. Use
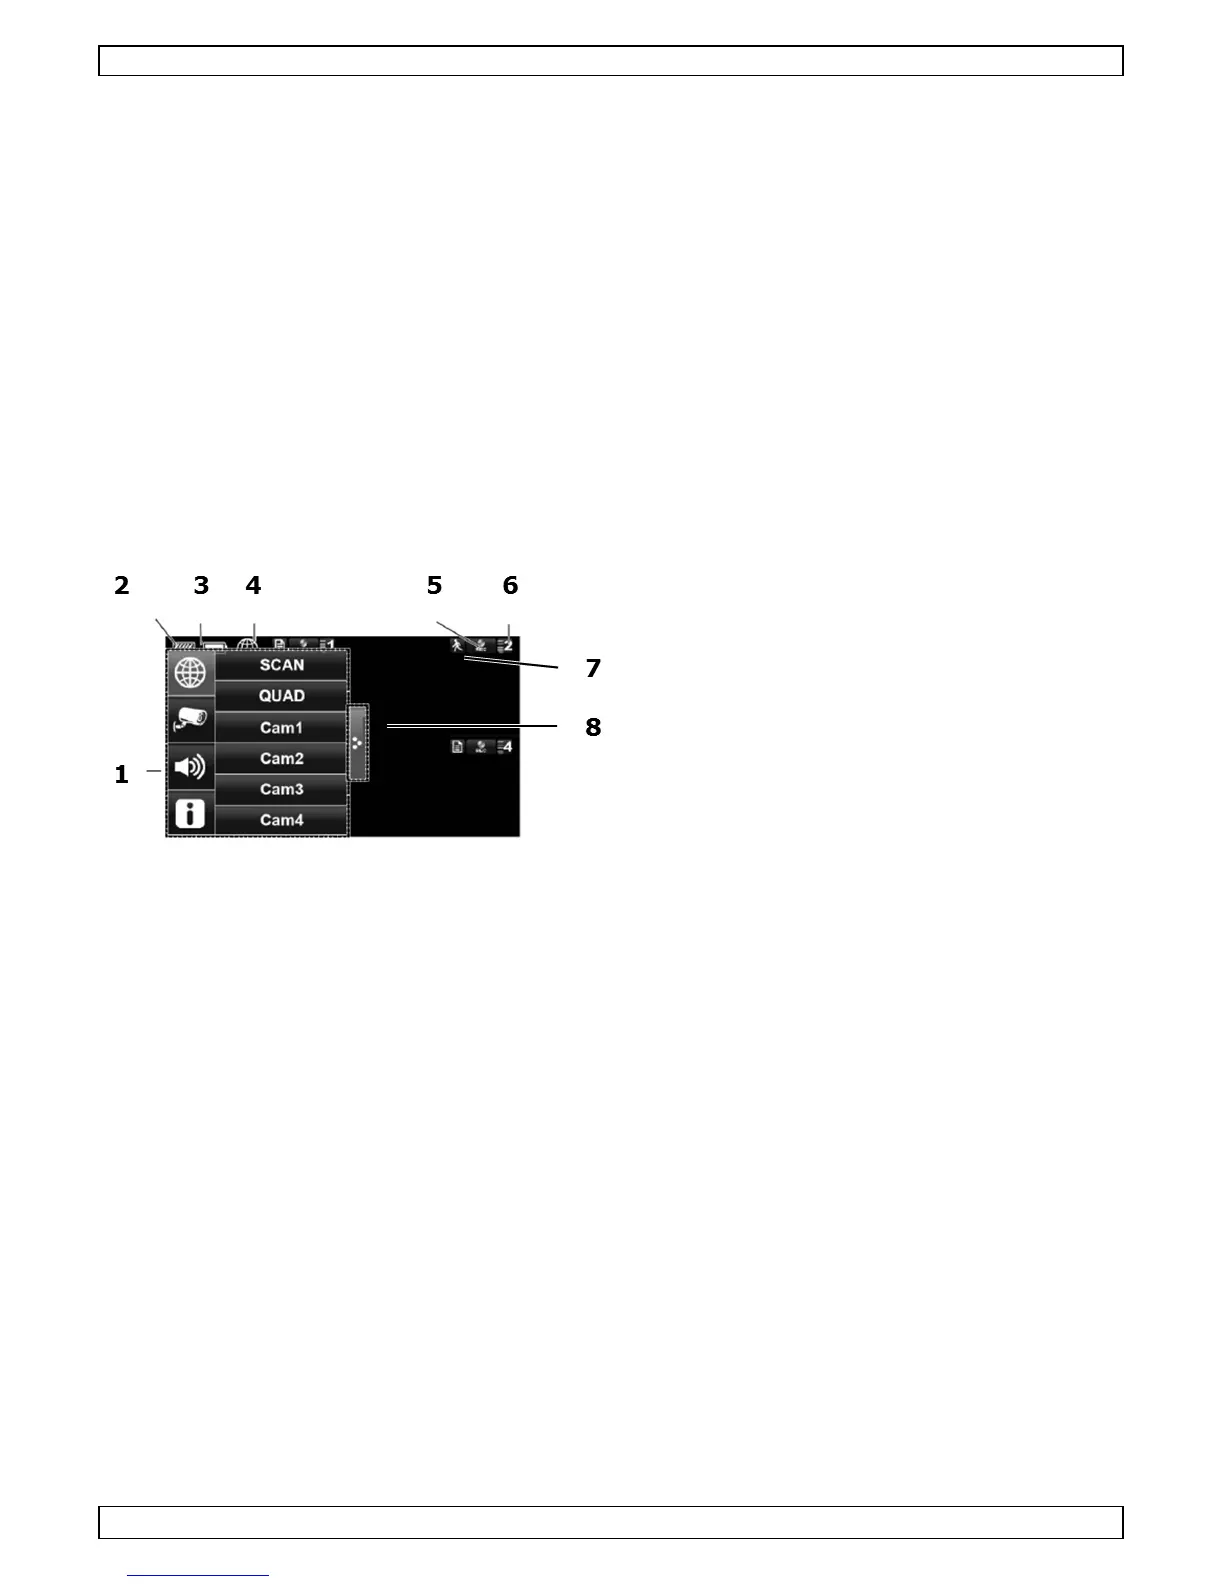
Parts of the screen
1 pop-up menus
2 SD card status
3 battery status
4 internet connection status
5 record status
6 camera number - signal strength
7 motion indicator
8 pop-up menu tab
Turn on the the display
• Press and hold the Power button for about 3-4 seconds.
A Welcome screen appears for a few seconds, then the camera view appears.
Turn off the display
• Press and hold the Power button until the display shuts off.
Camera modes: quad view and full screen
• When you switch on the display, the display shows the quad view (up to 4 cameras in a single
screen).
• Tap one of the camera views to display it full screen.
• Tap on the full view to return to quad view.
Zooming
• Zooming only works in full screen view.
• If the display is in quad view, tap a camera view to set it full screen.
• Tap the Zoom icon.
• Select the area you want to zoom in.
o Tap the zoom out icon to turn off zoom.
o Tap again to return to full screen view.
Manually recording video
• In quad view, tap the Record icon.
• The icon flashes during recording.
• Tap the icon again to stop recording.