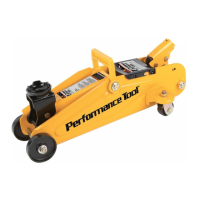
This document is the owner's manual for a 30 TON HYDRAULIC BOTTLE JACK, identified by Item Number W1636, manufactured by Performance Tool.
Function Description
The 30 Ton Hydraulic Bottle Jack is a lifting device designed for raising heavy loads. It operates hydraulically, using a pump handle to elevate a ram, which in turn lifts the load. It is explicitly stated that this jack is for lifting purposes only, and loads must always be supported by jack stands immediately after lifting. It is not designed to maintain heavy loads for long periods. The jack is intended for use in various applications, including vehicle maintenance, where it can lift a vehicle to allow for repairs or other work.
Important Technical Specifications
The key technical specifications for the W1636 Hydraulic Bottle Jack are as follows:
- Capacity: 60,000 lbs. (30 tons)
- Minimum Lift Height: 11-1/4 in.
- Maximum Lift Height: 18-1/4 in.
- Base Length: 6-3/4 in.
- Base Width: 5-7/64 in.
- Hydraulic Fluid: For refills, use only hydraulic fluid with a rating of SAE 20.
These specifications are subject to change without notice.
Usage Features
The manual provides detailed instructions for the safe and proper operation of the hydraulic bottle jack.
Safety Guidelines:
- Read and Understand: Users must read, understand, and follow all instructions and warnings before operating the tool. Failure to do so may result in personal injury, property damage, and will void the warranty.
- Rated Capacity: Do not exceed the rated capacity of 60,000 lbs. Overloading can cause damage or failure of the jack.
- Surface: Use only on a hard, level surface capable of sustaining the load. Using the jack on uneven surfaces can lead to instability and potential loss of load.
- Support: This is a lifting device only. Immediately after lifting, support the load with appropriate means, such as jack stands. Ensure no personnel pass underneath the load until it is securely supported.
- Safety Valve: Do NOT adjust the safety valve.
- Personal Protective Equipment: Wear ANSI approved safety goggles and heavy-duty work gloves during use.
- Clearance: Keep clear of the load while lifting and lowering.
- Lowering: Lower the load slowly.
- Aircraft Use: Do NOT use for aircraft purposes.
- Vehicle Preparation: Apply the parking brake and chock tires before lifting a vehicle. Lift vehicles only at manufacturer-recommended lift locations.
- Inspection: Inspect the jack before every use; do not use if parts are loose or damaged.
- Alterations: Do not alter this product in any way.
- Work Area: Keep the work area clean, well-lit, and free of bystanders, children, and visitors.
- Alertness: Stay alert and use common sense. Do not operate the jack while tired or under the influence of drugs, alcohol, or medication.
- Storage: Store idle jacks out of reach of children and untrained persons.
- Service: Jack service must be performed only by qualified repair personnel using identical replacement parts.
- Labels: Maintain labels and nameplates on the jack.
- Vehicle Manual: Before use, read the manufacturer's instruction manual for the vehicle or object being lifted.
- Jack Stands: When lifting one wheel, support the load immediately with one jack stand. When lifting an entire front or rear end, support the load immediately with two jack stands, aligning them under the vehicle's frame or recommended lifting points at the same height. Do not work under the vehicle without proper support.
- Traffic: Avoid dangerous oncoming traffic. Use the jack as far away from the roadside as possible.
- OSHA: Industrial applications must follow OSHA requirements.
- Occupants: Do not allow anyone inside the vehicle while using the jack.
- Simultaneous Lifting: Do not support both ends of the vehicle at the same time.
- Clearance Before Lowering: Before lowering the jack, remove all tools and equipment from under the vehicle.
Before Use (Purging Air):
During shipment or handling, air can become trapped in the hydraulic system, causing malfunction. To purge air:
- Place the pump handle over the release valve and turn it counter-clockwise no more than two turns to open.
- Slowly loosen the oil filler plug.
- Pump the jack about 6 full strokes to ensure complete distribution of hydraulic fluid.
- Repeat steps as needed.
- Re-tighten the oil filler plug.
To Raise:
- Park the vehicle on a hard, level surface away from traffic.
- Turn off the vehicle's engine.
- Place the vehicle's transmission in PARK (automatic) or lowest gear (manual).
- Set the emergency brake and block the wheels not being lifted.
- Refer to the vehicle owner's manual for jacking procedures and lift only on specified areas.
- Ensure the load is centered on the saddle.
- Place the pump handle over the release valve and turn clockwise to close it.
- Insert the handle into the handle socket and pump to raise the load to the desired height.
- ALWAYS support the load with jack stands of appropriate capacity at manufacturer-recommended locations. Do NOT get under the vehicle without jack stands.
- SLOWLY turn the release valve counter-clockwise to lower the vehicle onto the jack stands and remove the jack.
- Important: Never move the jack when the handle is in the operating lever or valve sleeve, as this can damage the pumping unit.
To Lower:
- Remove all tools and parts from under the vehicle.
- Position the saddle under the lifting point. Turn the handle firmly clockwise to close the valve release screw, and pump the upper/lower handle to raise the vehicle slightly above the jack stands. Then, collapse and remove the jack stand(s).
- SLOWLY turn the release valve counter-clockwise with the handle just enough to allow controlled descent of the vehicle onto the ground (never more than two full turns).
- Lower the jack completely and store it in a safe, dry location out of reach of children.
Maintenance Features
Monthly maintenance is recommended to ensure the jack's longevity and performance. Lubrication is critical due to the heavy loads supported.
General Maintenance:
- Pre-Use Inspection: Before each use, inspect the jack for broken, cracked, bent, loose, or missing parts, or any condition affecting proper operation. Remove any damaged jack from service and have it repaired by qualified personnel.
- Part Replacement: Replace worn or damaged parts with Performance Tool replacement parts.
- Pre-Use Test: Thoroughly test the jack for proper operation before actual use. If it malfunctions, follow the bleeding instructions on page 3.
- Storage Position: When not in use, the ram and pump piston should be in the fully down position to prevent corrosion of machined surfaces.
- Cleanliness and Lubrication: Keep the jack clean and well lubricated at the points illustrated in Figure 3 of the manual.
- Hydraulic Fluid: For best results, use only hydraulic fluid with a rating of SAE 20 for refills. Check the fluid level with the jack in the fully down position; the fluid level should be up to the bottom of the oil fill port.
Changing Hydraulic Oil (Every Three Years):
- With the jack fully lowered, remove the oil filler plug on the side of the housing.
- Tip the jack to allow the old hydraulic oil to drain completely from the housing. Dispose of the old oil according to local regulations.
- With the jack upright, completely fill the housing with a high-quality hydraulic oil (not included) until the oil just begins to run out of the oil fill hole. Be extremely careful not to allow dirt or foreign matter into the system.
- Reinstall the oil filler plug.
- Clean the jack with a clean cloth using a detergent or mild solvent. Store the jack in a safe, dry location with the ram and pump piston in the fully down position, out of reach of children and other non-authorized people.
Troubleshooting:
The manual includes a troubleshooting guide for common issues:
- Will not lift load: Possible causes include low fluid, air bound, or valve not closing completely. Solutions involve adding fluid, purging air, or seating the valves.
- Will not hold load: Possible cause is the valve not closing completely. Solution involves seating the valves.
- Will not lift to full height: Possible causes include low fluid or air bound. Solutions involve adding fluid or purging air.
- Pump feels "spongy" under load: Possible cause is air bound. Solution involves purging air.
- Handle raises under load: Possible cause is air bound. Solution involves purging air.
- Handle lowers under load: Possible cause is the valve not closing completely. Solution involves seating the valves.
Warranty:
The product comes with a 1-year limited warranty from Performance Tool, covering defects in materials and workmanship under normal use and service. A defective product can be returned for a free replacement within 90 days of purchase. After 90 days and up to one year, Performance Tool will replace defective parts at no charge, provided a sales receipt accompanies the return. The warranty excludes consumables (blades, bits, punches, dies, bulbs, fuses, hoses) and does not cover products used for unintended purposes, repaired or altered in a way that affects performance, or subjected to misuse, neglect, accident, or wear and tear. Performance Tool does not authorize any other person to make warranties or assume liability. The warranty disclaims implied warranties of merchantability and fitness for a particular purpose, except for goods purchased for personal, family, or household use. It also states that Performance Tool is not liable for consequential, incidental, or special damages.