1. Check the Hydraulic Fluid Level, following
the instructions in the Bleeding the pump
section, if needed.
2. Determine which direction the frame
needs to be bent.
3. Remove any obstructions that could be
damaged or are in the way.
Note: When using the Pump (1) in a verti-
cal position, keep the Hose (3) end
of the Pump downward.
4A. Using Ram (2):
a. Connect the appropriate Base
(13,15,17) to the stationary side of
the Ram (2), and connect the ap-
propriate head to the pushing end of
the Ram.
GENERAL OPERATION
NOTICE During shipment or handling, air in the pump can become trapped in the
hydraulic system causing the pump to malfunction.
BEFORE USE
Bleeding The Pump:
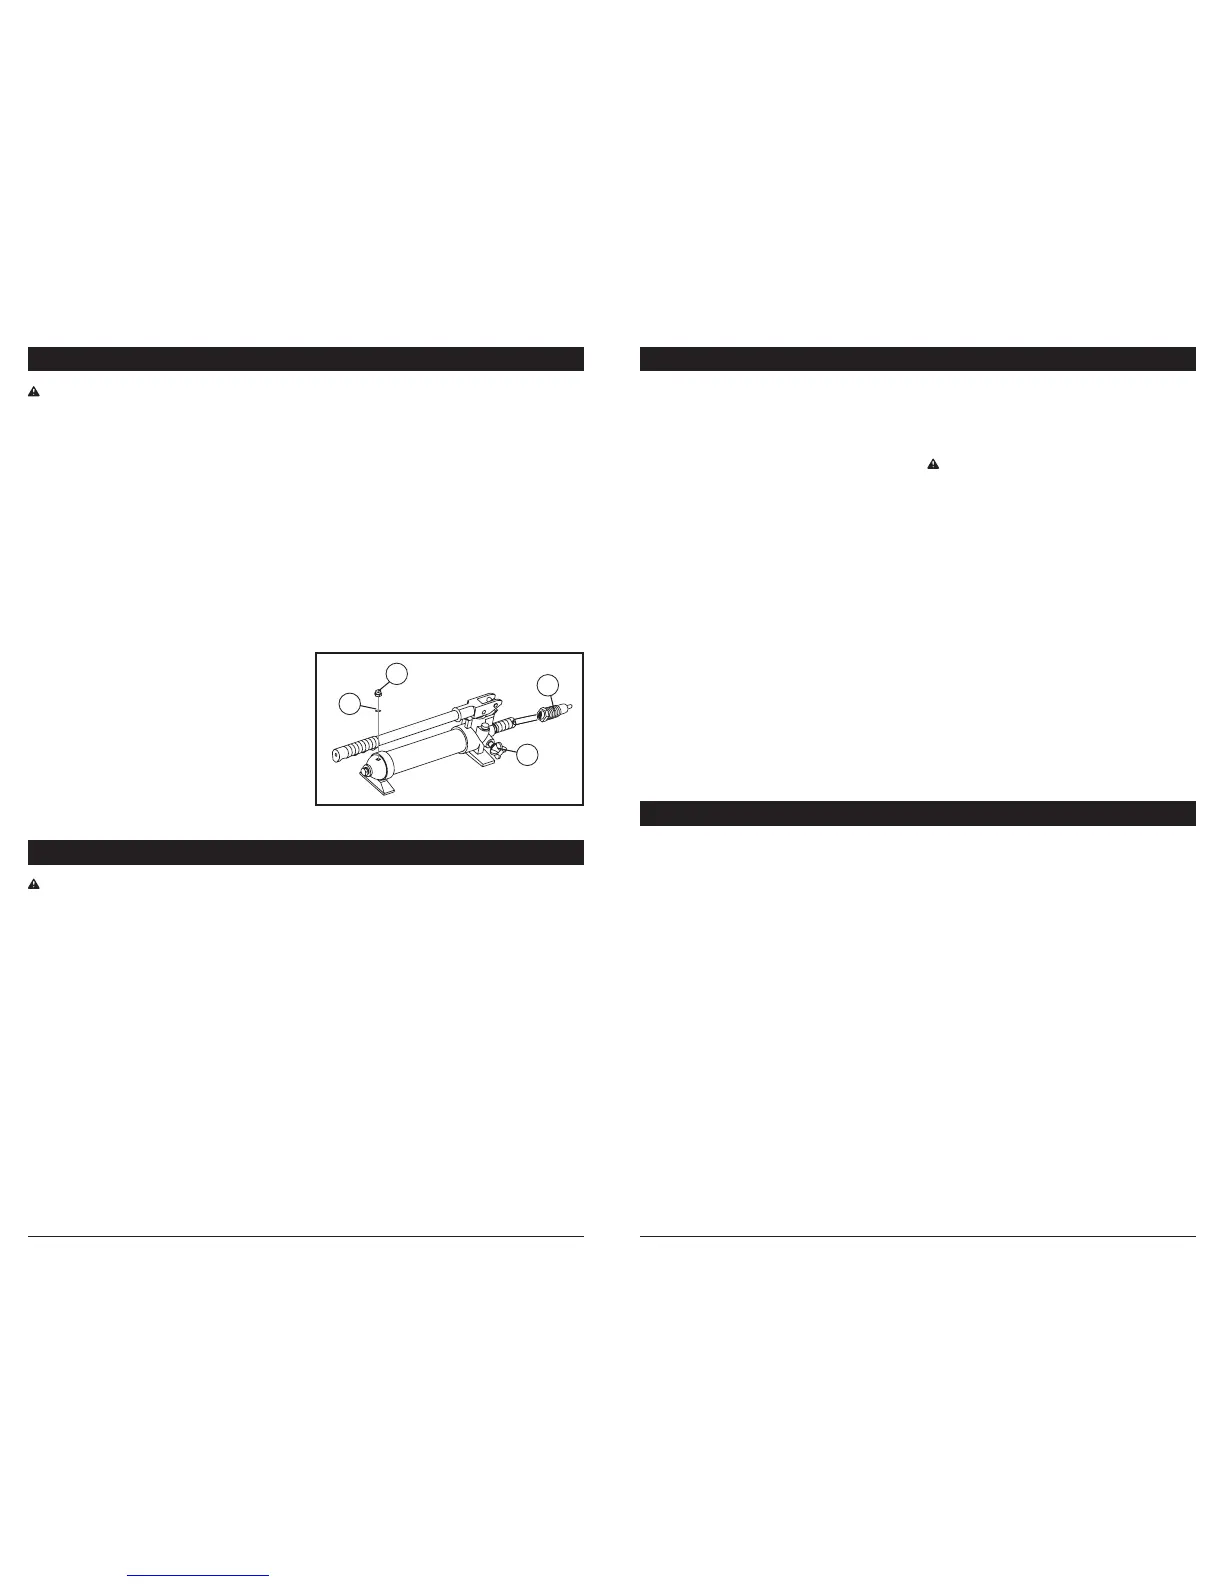
1. SetPump(1)atonalevelsurface.
2. Remove the Fill Screw (A). The O-ring (B) should come off with it.
3. Theuidlevelshouldbenearthebottomoftheopening.Ifrequired,addhighgrade
hydraulicuid.
4. Make sure the O-ring (B) is still in place around the Fill Screw (A) and thread the Fill
Screw into the Pump securely. Do not use thread seal tape.
5. Firmly close the Release Valve (C) by turning it clockwise.
6. Press the tip of the Coupling (D) against a hard surface and pump the pump handle.
7. Continuepumping,untilthehydraulicuidcomingouttheendofthecouplertipisfree
of air bubbles.
8. Rechecktheuidlevelandadduidif
necessary.
9. Turn the Release Valve counterclock-
wise to release the pressure in the pump
and hose.
10.Changethehydraulicuidyearly.
Remove the Fill Screw (A) and tilt the
Pump(1)todrainouttheolduid.Rell
thehydraulicuidandbleedthesystem
several times to ensure all air is out of
the system.
A
B
C
D
Fig. 4
WARNING: Read and understand all the previous sections before use of this product. Failure to
comply with those sections may result in serious personal injury and/or property damage!
Note: When repairing larger body panel
dents such as a dented door, fender
or quarter-panel use the Rubber
Head (11) on the pushing end.
b. If using the Flange Base (15) or
Flange Head (14): Thread the Flange
Base onto the Ram completely and
align the Flange Head to it. The
Flange Base and Flange Head must
only be used together to prevent off-
center load.
c. Position the Ram (2) so that the Base
is resting against a frame member
opposite the damaged area. It must
also be in line with the direction in
which the damaged area needs to
be pushed. The vehicle body part
1. Before each use, inspect the general
condition of the product. Check for
broken, cracked, or bent parts, loose or
missing parts, and any condition that
may affect the proper operation of the
product. Any equipment that appears
damaged in anyway must be removed
from service. Have the problem cor-
rected before further use. DO NOT use
damaged equipment.
2. Replace worn or damaged parts with
Performance Tool® replacement parts.
Besurethatonlyqualiedperson-
nel perform repairs. DO NOT attempt
to weld, rivet or otherwise repair this
device.
CARE & MAINTENANCE
Monthly maintenance is recommended. Lubrication is critical to the ram and
pump as they support heavy loads. Any restriction due to dirt, rust, etc. can cause
either slow movement or cause extremely rapid jerks, damaging the internal com-
ponents. The following steps are designed to keep the pump and ram maintained
and operational.
GENERAL OPERATION
must be stronger than the area to be
bent or it may be damaged. A block
of wood or a towel may be used to
protect the body part.
d. Aim the pushing end towards the
area that needs to be repaired,
and slowly apply pressure with
the Pump (1).
Note: To prevent damage, do not overex-
tend the Ram.
4B. Using Spreader Wedge (10):
a. Place the Spreader Wedge (10) so
that the hinged (pushing) arm is rest-
ing against the part to be moved and
the stationary arm is resting against a
non-movable base.
b. Carefully hold the Spreader Wedge
in position and apply the Pump (1)
pressure.
5. Once both ends have made contact, move
as far away as possible and continue to
slowly apply pressure to the damaged area
until the desired bend has been made.
CAUTION Keep hands away from contact
areas and tight spaces. The
tool may slip and cause injury.
6. When the damaged area has been bent to
the desired position, slowly turn the Release
Valve (10C) counterclockwise to release the
hydraulic pressure and remove the Ram (2)
or Spreader Wedge (10).
7. Clean all hydraulic ports and cover them
with clean End Plugs to prevent contamina-
tion and damage.
3. Before each use, thoroughly test the
equipment for proper operation prior to
its actual use. If the equipment appears
not to be working properly, follow bleed-
ing instructions on page 6.
4. When the product is not in use, ram and
pump piston should be in fully down
position to keep their machined surfaces
free from corrosion.
5. Keep the surface of this equipment and
itsaccessoriesfreeofhydraulicuid
and grease. Use only a mild detergent
and damp cloth when cleaning. Do not
useaammableorcombustiblesolvent
to clean this tool or its accessories.
 Loading...