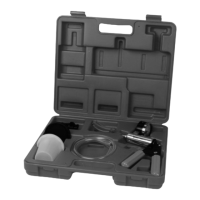
7
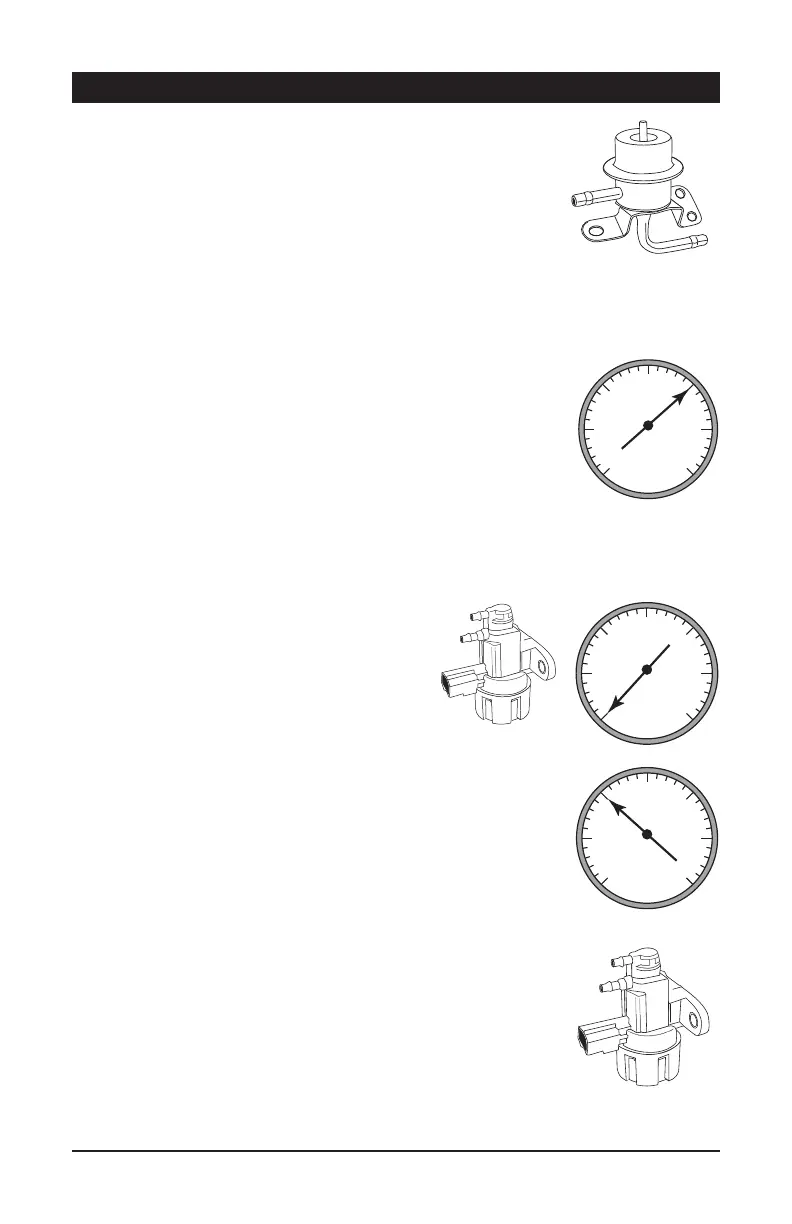
FUEL PRESSURE REGULATOR
NOTE: To verify a Fuel Pressure Regulator is functioning
properly you’ll need a Fuel Pressure Tester along with your
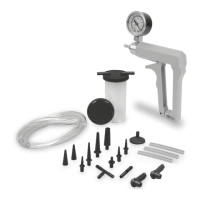
W87032 Vacuum Tester.
1. Do a visual check for leaks around the regulator or signs of
cracks or fuel in the vacuum line at the diaphragm.
• If you find a leak or fuel in the vacuum line replace the regulator.
2. Install the Fuel Pressure Tester to the rail.
3. Start the engine and bring it to temperature and let idle.
4. Disconnect the vacuum line from the fuel pressure regulator at the diaphragm.
• Looking at the pressure tester, the fuel pressure should have increased 10 to 12 psi.
If nothing changes the regulator or vacuum line is bad.
5. Confirm the condition of the vacuum line by connecting it to
the Vacuum Pump.
• The needle should hold steady at 16 to 22 inches of Hg.
• If you have a low, or no reading the vacuum hose is
plugged or bad.
6. Disconnect the Vacuum Pump from the vacuum
hose and plug it.
7. Attach the Vacuum Pump to the diaphragm on the
pressure regulator.
8. Apply vacuum to the regulator and watch the gauge of the Fuel Pressure Tester. The
fuel pressure should increase approx. one pound for every two inches of vacuum
applied to the regulator. If it doesn’t the regulator is bad and needs to be replaced
ELECTRICAL /VACUUM SOLENOID
1. Disconnect vacuums and electrical connectors,
make note of the hose locations.
2. With no power to the solenoid, attach the
vacuum pump to port “A”.
3. Apply vacuum, and watch the gauge.
• The vacuum should reduce to zero after each pump.
The vacuum is released through the other port, “B”.
4. Apply power to the solenoid by using alligator leads.
Ground the negative side to a good metal bracket or
frame. Add 12 volts to the positive side from the battery.
5.
Now when you apply vacuum it should not bleed off, holding steady.
6. With the solenoid still connected to power, switch the hose from
your pump to the other side of the solenoid port “B”.
7. Now apply vacuum, again it should bleed of. This time through
the intake system.
THERMAL VACUUM VALVES
NOTE: Called different names depending on the make of vehicle:
GM - Thermal Vacuum-Switches (DTVS)
Chrysler/Jeep - Thermal Ignition Control (TIC)
Ford - Ported Vacuum Switches (PVS)
These two-port valves all have the same function, control
exhaust gases from recirculating. When the engine is cold
the valve should be closed.
TESTING PROCEDURES CONT.
0
5
10
15
20
25
30
Hg Hg
Vacuum
Gauge
0
5
10
15
20
25
30
Hg Hg
Vacuum
Gauge
0
5
10
15
20
25
30
Hg Hg
Vacuum
Gauge
0
5
10
15
20
25
30
Hg Hg
Vacuum
Gauge
0
5
10
15
20
25
30
Hg Hg
Vacuum
Gauge
0
5
10
15
20
25
30
Hg Hg
Vacuum
Gauge
Nornal
Leaking Intake Valve Timing
Ignition Timing
Misre
Clogged Exhaust
0
5
10
15
20
25
30
Hg Hg
Vacuum
Gauge
Broken Valve Spring
0
5
10
15
20
25
30
Hg Hg
Vacuum
Gauge
0
5
10
15
20
25
30
Hg Hg
Vacuum
Gauge
0
5
10
15
20
25
30
Hg Hg
Vacuum
Gauge
Blown Head Gasket
Worn Valve Guides
Leaking Valve
0
5
10
15
20
25
30
Hg Hg
Vacuum
Gauge
0
5
10
15
20
25
30
Hg Hg
Vacuum
Gauge
Fuel mixture
Leaking Piston Ring
0
5
10
15
20
25
30
Hg Hg
Vacuum
Gauge
Vacuum Solenoid
0
5
10
15
20
25
30
Hg Hg
Vacuum
Gauge
0
5
10
15
20
25
30
Hg Hg
Vacuum
Gauge
0
5
10
15
20
25
30
Hg Hg
Vacuum
Gauge
0
5
10
15
20
25
30
Hg Hg
Vacuum
Gauge
0
5
10
15
20
25
30
Hg Hg
Vacuum
Gauge
0
5
10
15
20
25
30
Hg Hg
Vacuum
Gauge
0
5
10
15
20
25
30
Hg Hg
Vacuum
Gauge
0
5
10
15
20
25
30
Hg Hg
Vacuum
Gauge
0
5
10
15
20
25
30
Hg Hg
Vacuum
Gauge
Nornal
Leaking Intake Valve Timing
Ignition Timing
Misre
Clogged Exhaust
0
5
10
15
20
25
30
Hg Hg
Vacuum
Gauge
Broken Valve Spring
0
5
10
15
20
25
30
Hg Hg
Vacuum
Gauge
0
5
10
15
20
25
30
Hg Hg
Vacuum
Gauge
0
5
10
15
20
25
30
Hg Hg
Vacuum
Gauge
Blown Head Gasket
Worn Valve Guides
Leaking Valve
0
5
10
15
20
25
30
Hg Hg
Vacuum
Gauge
0
5
10
15
20
25
30
Hg Hg
Vacuum
Gauge
Fuel mixture
Leaking Piston Ring
0
5
10
15
20
25
30
Hg Hg
Vacuum
Gauge
Vacuum Solenoid
0
5
10
15
20
25
30
Hg Hg
Vacuum
Gauge
0
5
10
15
20
25
30
Hg Hg
Vacuum
Gauge
0
5
10
15
20
25
30
Hg Hg
Vacuum
Gauge
EXHAUST GAS RECIRCULATION (EGR)
FUEL PRESSURE REGULATOR
ELECTRICAL /VACUUM SOLENOID
EXHAUST GAS RECIRCULATION (EGR)
FUEL PRESSURE REGULATOR
ELECTRICAL /VACUUM SOLENOID
EXHAUST GAS RECIRCULATION (EGR)
FUEL PRESSURE REGULATOR
ELECTRICAL /VACUUM SOLENOID
 Loading...