CHARGING THE BATTERY
1. Place the cordless screwdriver near a
120 V, 60 Hz electrical outlet.
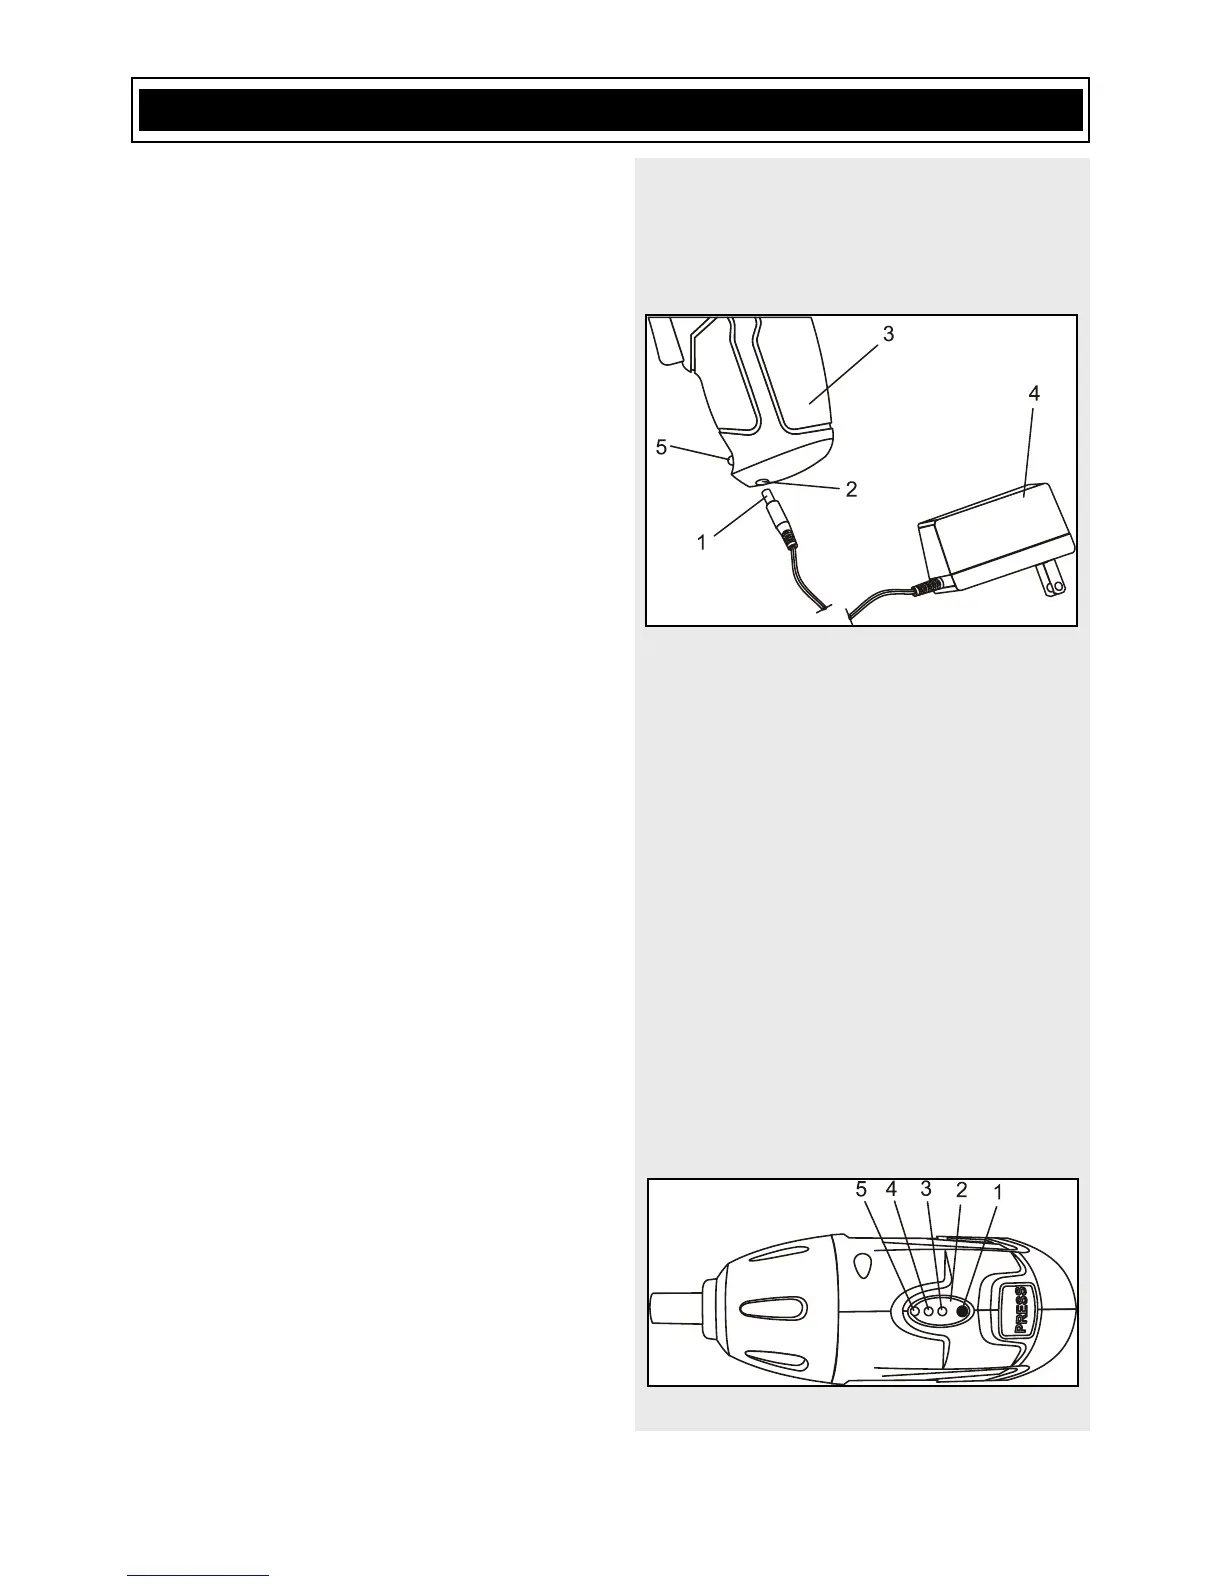
2. Insert the battery charger plug (1) into
the charger receptacle (2) in the
handle of the cordless screwdriver (3)
(Fig. 1).
3. Plug the battery charger (4) into a
120 V 60 Hz wall receptacle. The RED
charging LED indicator light (5) will
turn ON when the battery is being
charged. It will turn OFF when the
battery is fully charged.
NOTES: A new battery or one that is
completely exhausted should be charged
for 5 hours. After normal use, the battery
should be fully charged in about 3 hours.
BATTERY CHARGE INDICATOR
The level of charge remaining in the
battery can be checked by using the
battery charge indicator system that is
located in the top of the screwdriver
housing.
NOTE: The battery charge remaining must
be checked with the ON/OFF switch turned
OFF. DO NOT check the battery charge
remaining while the battery is being
charged. You will get a false reading and
you may also damage the battery status
system.
1. Press and hold the battery status
button (1) located in the top of the
screwdriver housing (Fig. 2).
2. One or more of the three LED lights in
the LED window (2) will come ON to
indicate the amount of charge that is
remaining in the battery as follows:

 Loading...