SHELVING
IMPORTANT NOTE: Interior louver openings and
fan guard openings should never be obstructed
to achieve maximum performance.
IMPORTANT NOTE: All shelving is inter-change-
able with all products.
Full-extension Shelving - Pull the shelf out to its
farthest point. Locate the tabs in the middle on both
sides of the extenders. Press left tab up and right tab
down; pull shelf out.
Move each extender separately. Hold the
middle of one extender, pull the front up then move
extender ½-inch to the inside of unit. Pull up then
pull out. Place extender at desired height, place rear
stando screw into rear pilaster; slide back. Place
front stando screw into front pilaster; slide down.
To return shelf, rst push both extenders completely
in then line up the shelf grooves and slide easily into
the unit.
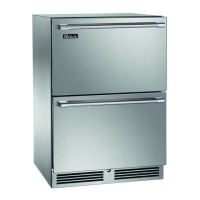
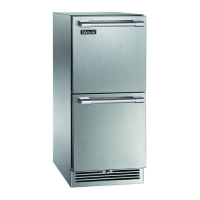
DRAWERS
Full-extension Drawers – Pull the drawer out to its
farthest point. Locate the tabs in the middle on both
sides of the extenders. Press left tab up and dright
tab down; pull shelf out.
Move each extender separately. Hold the middle of
one extender, pull the front up then move extender
½-inch to the inside of unit. Pull up then pull out.
Place extender at desired height, place rear stando
screw into rear pilaster, slide back. Place front stand-
o screw into front pilaster, slide down.
To return drawer, rst push both extenders com-
pletely in then line up the shelf grooves and slide
easily into the unit.
CAUTION completely empty the drawer before
removing
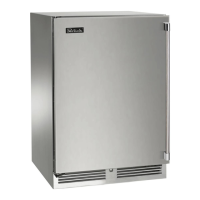
Freezer/Refrigerator
The single door unit comes standard with black vi-
nyl-coated adjustable full-extension pullout shelves.
Shelving positions are adjustable.
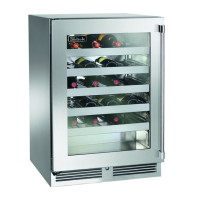
Wine Reserve
The 24” wine reserve comes standard with ve full-
extension black vinyl coated wine racks capable of
storing 40 total wine bottles with additional room on
the bottom for storage. The second and third com-
partment on 48” and 72” units feature six full-exten-
sion wine racks capable of storing 48 wine bottles.
All wine racks comes standard with sleek stainless
steel front (wood fronts are optional). Shelving posi-
tions are adjustable.
Beverage Center
All Beverage Center units comes standard with two
full-extension black vinyl coated wine racks with
stainless steel fronts (wood fronts are optional) and
one full-extension pullout shelf allowing for storage
of both wine and beverages. Shelving positions are
adjustable.
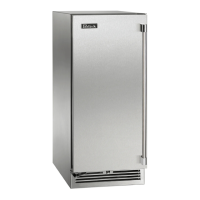
SINGLE DOOR FREEZER & SINGLE DOOR
REFRIGERATOR
The single door freezer (HP24F) and the single door
refrigerator (HP24R) come standard two full exten-
sion pullout.
SINGLE DOOR WINE COOLER
The single door wine cooler (HP24W) comes stan-
dard with ve full extension black vinyl coated wine
racks capable of storing 40 total wine bottles.
TWO DOOR ALL-REFRIGERATOR
The two-door all-refrigerator (HP48RO) comes stan-
dard with four black vinyl coated pullout shelves and
a bottom step shelf. Up to two additional black vinyl
coated pullout shelves can be used in these cabinets.
TWO DOOR REFRIGERATOR/WINE RESERVE
The two door refrigerator/wine reserve (HP48RW)
comes standard with one black vinyl coated pull-out
shelf and six full extension black vinyl coated wine
racks capable of storing 48 total wine bottles.
TWO DOOR ALL WINE RESERVE
The two door all-wine reserve (HP48WW or HP-
48WO) comes standard with ten full extension black
© 2011 24”, 48” & 72” Cabinet Installation / Operation Manual
Document No. Z2305
23
 Loading...