Perlick is committed to continuous improvement. Therefore, we reserve the right to change specications without prior notice
6
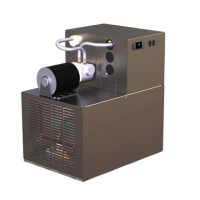
4400 SERIES POWER PAKS GENERAL INFORMATION
Operation/Installation Manual
CONNECTING POWER PAK TO TRUNK HOUSING
400 Series Power Paks require rigid fittings with a
minimum pressure rating of 150 psig. Use Coolant
Connector Kit #63335 to connect Power Pak to Trunk
Housing.
• Inspect pump outlet port for debris. Insert barbed
fitting #63307 into pummp outlet port.
• Inspect Glycol Return Manifold inlet for debris.
Insert barbed fitting #63307 into return manifold
inlet port.
• Cut supplied coolant tubing, #54588, to required
length to reach from Power Pak to Trunk Housing
connection point.
• Cut tubular insulation sleeve, #C12700, in half and
install over previously cut coolant tubing.
• Take Oetiker clamps, #54871-210, and install over
coolant tubing ends.
• Push coolant lines, one each over pump outlet
barbed fitting #63307 and return manifold barbed
fitting #63307.
• Position Oetikers over barbed fitting and clamp
securely.
• Slide tubular insulation sleeves tightly against
connection points. Use insulation tape as necessary
to ensure an air tight seal to prevent excessive heat
gain or condensation problems.
• Drill a 3-1/2” diameter hole in walk-in cooler to
accommodate coolant lines.
• Install insulation donuts over hole (both inside and
outside of cooler walls.
• Slide large insulation sleeve, #57478, over
remaining coolant tubing exposed to warm air
conditions including inside walk-in cooler from
Power Pak to Trunk Housing connection point. Seal
and tape all seams to prevent excessive heat gain
or condensation problems.
• Slide coolant lines through 3-1/2” donut hole
previosly cut in walk-in cooler wall.
• Position Trunk Housing coolant lines and Coolant
Connector kit lines in horizontal position, to alleviate
condensation runoff into Trunk Housing.
• Cut Trunk Housing coolant lines with tubing cutter to
ensure clean burr free ends.
• Take Oetikers clamps #54871-210, and install over
coolant connector kit tubing ends.
• Slide coolant connector kit tubing over the trunk
housing coolant lines and secure using the Oetikers.
• Complete the insulation process by ensuring that all
coolant lines are well insulated including all seams
to prevent excessive condensation and heat gain.
• Seal donut hole to ensure an air tight seal to prevent
walk-in cooler problems as well as condensation.
CONNECTING TRUNK HOUSING COOLANT LINES
TO DISPENSING HEAD
• Position the trunk housing so that beverage lines
can be connected with a minimum cutting.
• Split trunk housing approximately 12 inches from
the end to allow working room for the connections.
• Cut and deburr copper coolant lines coming from
trunk housing and dispensing head. Stagger the
lengths.
• Connect trunk housing coolant lines to dispensing
head coolant lines using clamps, hose and 3/8”
x 1/2” union, included in Head connecting kit,
#63486. Ensure that coolant lines are fully clample
to guarantee a leak free connection.
 Loading...