Commercial Back Bar Installation & Operation Manual
Form No. Z2604
Rev A 04.20.23
PRIOR TO INSTALLATION
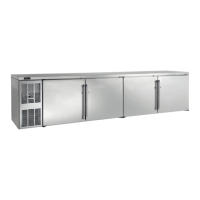
Uncrating and Inspection
Remove all crating material. Carefully inspect
cabinet for hidden damage. If damage is
discovered, le your claim immediately with the
transport company. Perlick is not responsible for
damage in transit.
Take caution when
handling, moving and
using the product to avoid damaging the
refrigerant tubing or increasing the risk of a
leak.
All service work shall be
performed by factory
authorized service personnel and all
component parts shall be replaced with like
components to minimize the risk of possible
ignition due to incorrect parts or improper
service.
If service is necessary,
repair work must be
performed by a Perlick authorized servicer.
Work done by unqualied individuals could
potentially be dangerous and will void the
warranty.
Do not cut cardboard
sleeve covering the unit.
Cutting may result in damage to the exterior
of the cabinet. Failure to follow this procedure
may damage the compressor and void
warranty.
1. Uncrate the unit on at, level surface. Remove
the cardboard sleeve by removing the banding
securing the sleeve to the shipping base.
Carefully lift the cardboard sleeve up over the
top of the unit.
2. Carefully lift unit o the base and onto a hand
truck or dolly. Make sure unit is balanced
on transporting device using soft, exible
strapping. Protect unit surfaces with cloth
material where strapping contacts unit.
Do not lift unit by drawer,
shelving or door handles
or damage to the unit could occur.
To prevent personal injury,
two people minimum
required to lift the unit. Larger units may
require additional personnel.
3. Before moving unit, secure door(s) to unit with
tape to prevent from opening.
4. Carefully move unit to installation site and
place in front of opening.
Finished ooring should
be protected with
appropriate material to avoid damage from
moving the unit.
Plumbing
Do not over-tighten drain
tting or damage to the
threads could occur.
Plumbing
Self-Contained
Condensate from the cooling coil is automatically
evaporated from the condensate pan located in
the condensing unit housing on self-contained
models.
Self-Contained & Remote
Each unit is equipped with a oor drain located
in the right rear corner of the cabinet. The drain
can be plumbed to an external oor drain by
connecting to the 3/4” NPT thread connection on
the side, or the 1” NPS thread connection out the
bottom, of the unit. Both drain ports come plugged
from the factory and can be removed if needed.
Remotes
Dispensing head drainers should be plumbed to
a dump tank or oor drain. Always rinse drainer
with sucient amounts of water daily to prevent
drain from clogging.
Remote evaporator condensate plumbing should
be routed out on of the cabinet side access holes
or to one of the oor drains and should always
be sloped to the drain with no rise to prevent
drainage. A trap should be used, however, trap
peak must be below condensate drain pan nipple.
Electrical
The cabinet must be connected to a separately
fused power source (see Electrical Specication
Plate axed to unit) in accordance with National
and Local electrical codes.
Self-contained Perlick units come equipped with a
NEMA 5-15P 90° plug with an 6'5" cord extending
beyond the rear of the cabinet. The electrical
outlet must be ush with, or recessed into, the
wall surface.
NOTE: Never use an extension cord to extend the
power cord to the electrical receptacle.
 Loading...