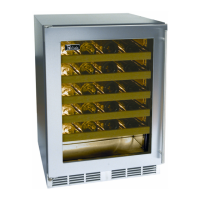
PERLICK RESIDENTIAL UNDERCOUNTER REFRIGERATION USE & CARE GUIDE
perlick customer service (800)558-5592 | 9
TOUCH-SCREEN CONTROL OPERATION - FREEZER MODELS
MAINTENANCE
SEASONAL MAINTENANCE FOR UL-APPROVED
OUTDOOR MODELS
Thisprocessshouldoccurwhenthedailylowtemperaturesisat
orbelowthetemperaturesstatedbelow:
Freezermodels:32°F
Refrigeratormodels:38°F
BeverageCenter:42°F
WineReserve:45°F
Itisbesttowinterizeyourunitbeforethelowtemperatures
listedabove.
1.TurntheunittoOFFposionbypressingtheOFFbuonon
thecontroller.Thecontrollerdisplaystheword“OFF” and,
forSignatureSeriesmodels,turnthemasterswitchlocated
behindthegrilleo(ifthepowercordisaccessible,unplug
the power cord. If not, turn o the circuit breaker to the
electricalreceptaclethecabinetispluggedinto).ForC-Series
units,unplugorturnothecircuitbreaker.
2.Removeallcontentsfromtheunit.
3.Removethefrontgrille.
4.Clean the condenser by using avacuumcleaner to remove
loose debris (leaves, dirt, etc.)that mayhaveaccumulated
insidethegrille.
5.Reinstallthefrontgrille.
6.Clean the interior of the unit using stainless steel cleaner and
polish(seepage9).
7.Cleantheexterioroftheunitusingstainlesssteelcleanerand
polish(seepage9).
NOTE: Do not place a cover over the unit. While not required,
you may choose to remove the unit from the outdoor locaon
and store indoors.
Thisprocessshouldoccuraerthedailylowtemperaturesis
abovethetemperaturesstatedbelow:
Freezermodels:32°F
Refrigeratormodels:38°F
BeverageCenter:42°F
WineReserve:45°F
1.Removethegrille.
2.Checkthecondensingunittoensureitisclearofloosedebris,
andcleanasnecessarywithavacuumcleaner.
3.Reaachfrontgrilletotheunit.
4.Clean the interior of the unit using stainless steel cleaner and
polish(seepage9).
5.Cleantheexterioroftheunitusingstainlesssteelcleanerand
polish(seepage9).
6.Plug the unit into the electrical receptacle or turn on the
circuitbreaker.
7.Turnonthemasterswitchlocatedbehindthegrilleifmodel
is Signature Series. Press the OFF buon one me to turn
the unit on. The controller display will show the actual
temperatureinsidethecabinet.
8.The cooling process will begin to bring the unit to the set
temperature.It’srecommendedyouruntheunitfor24hours
tostabilizetheoperangtemperaturebeforeusing.
CallyourPerlickFactoryAuthorizedServiceCenter.Forthe
locaonoftheServiceCenterinyourarea,contactyourselling
dealer,inquireviathewebatwww.perlick.com,E-mailusat
warrantyserv@perlick.com,orcall(800)558-5592during
normalbusinesshours.
Toreplaceadefecveorburntoutbulb,removetheglasslight
coverbypullingoutonthecover,unscrewthebulbandreplace
itwithanidencalorsmallerbulb.ThePerlickreplacement
partnumberis63716-1.
DANGER!
CAUTION!

 Loading...