3
ENGLISH
ENGLISH
2
2. ELECTRICAL INTERFERENCE
This door contains a sensive radio receiver. Excessive levels of electrical interference can aect
the range of the system. The following guidelines will help to reduce electrical interference.
Do not install the door near other RFID microchip readers or similar low frequency devices.
• Avoid obvious sources of electrical noise such as ickering lights
• Avoid roung mains cables an DC mains adaptors close to the door
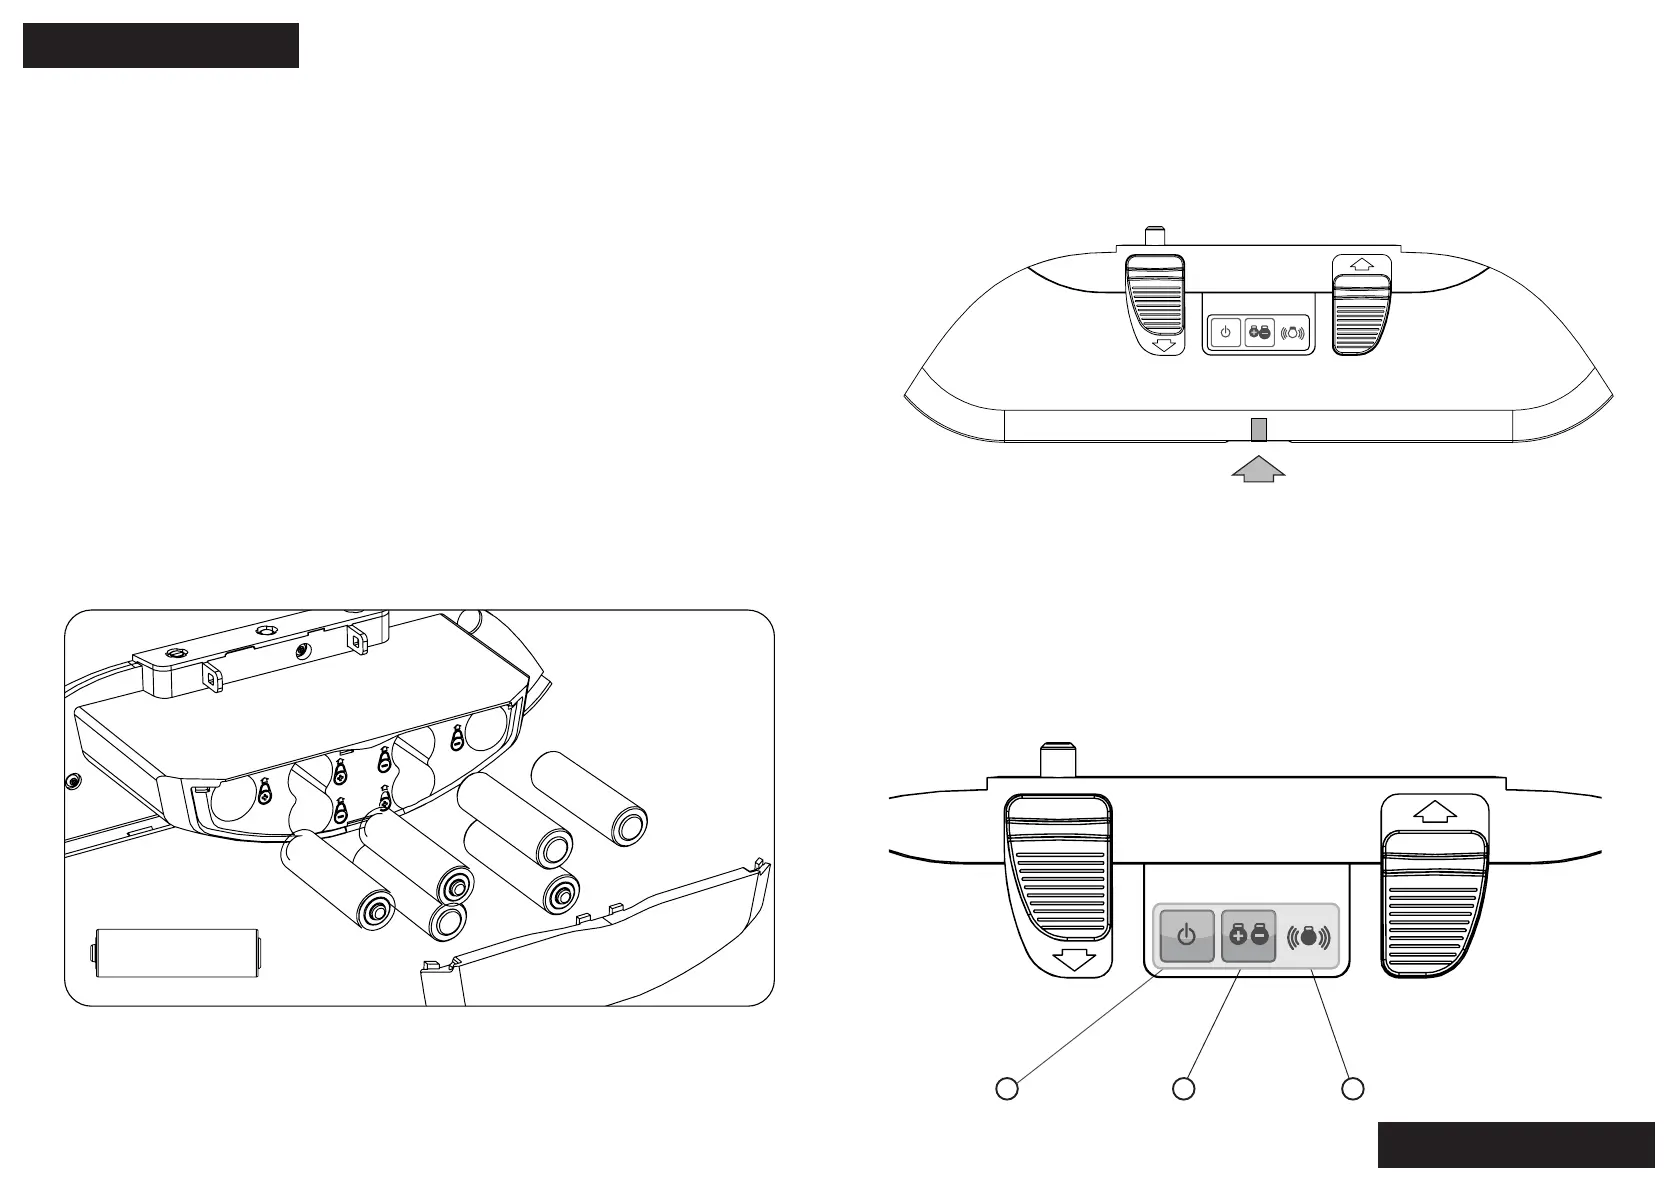
3. INSERTING BATTERIES
To insert or change the baeries remove the cartridge as per the above instrucons. Then
remove the baery cover from the back of the cartridge.
Insert AA baeries. Be sure to insert the baeries the correct way around. Use the markings on
the plasc case as a reference. Check the diagram to see the baery pairs
The door can operate with two, four, or six baeries. Two baeries will give an approximate
lifeme of 9-12 months, 4 baeries will give 18-24months and 6 will give 2-3 years (based on 1
cat entering up to 15 mes per day) Cold weather can aect baery life.
We recommend using good quality AA Lithium baeries to oer the best lifeme.
WARNING: Do not mix old and new baeries.
The arrow indicates where to insert DC socket in the boom of the cartridge
1 2
3
1. Power Buon
2. Tag buon
3. LED light indicator
Insert baeries correctly using + and - icons for correct placement.
-
+
4. OPTION FOR CONNECTING TO POWER
To connect in simply plug it into the DC socket in the boom of the cartridge. Be sure to place
the power pack somewhere where it won’t overheat or get wet. Plug the other end into a power
outlet nearby or get a registered electrician to hardwire it in for you.Avoid roung mains cables
an DC mains adaptors close to the door.
5. TURNING ON/OFF
Before turning on the door ensure the ap is closed. Turn the door on by pushing the Power
Buon for 5 seconds or more (but less than 10). A ashing Green LED will indicate that the door
is on.
To turn the door o press and hold the Power Buon for 5 seconds or more (but less than 10), a
Red LED will ash for 2 seconds to indicate that the door has been turned o. When the door is
turned o the ap will be unlocked. The manual locks can be used instead.