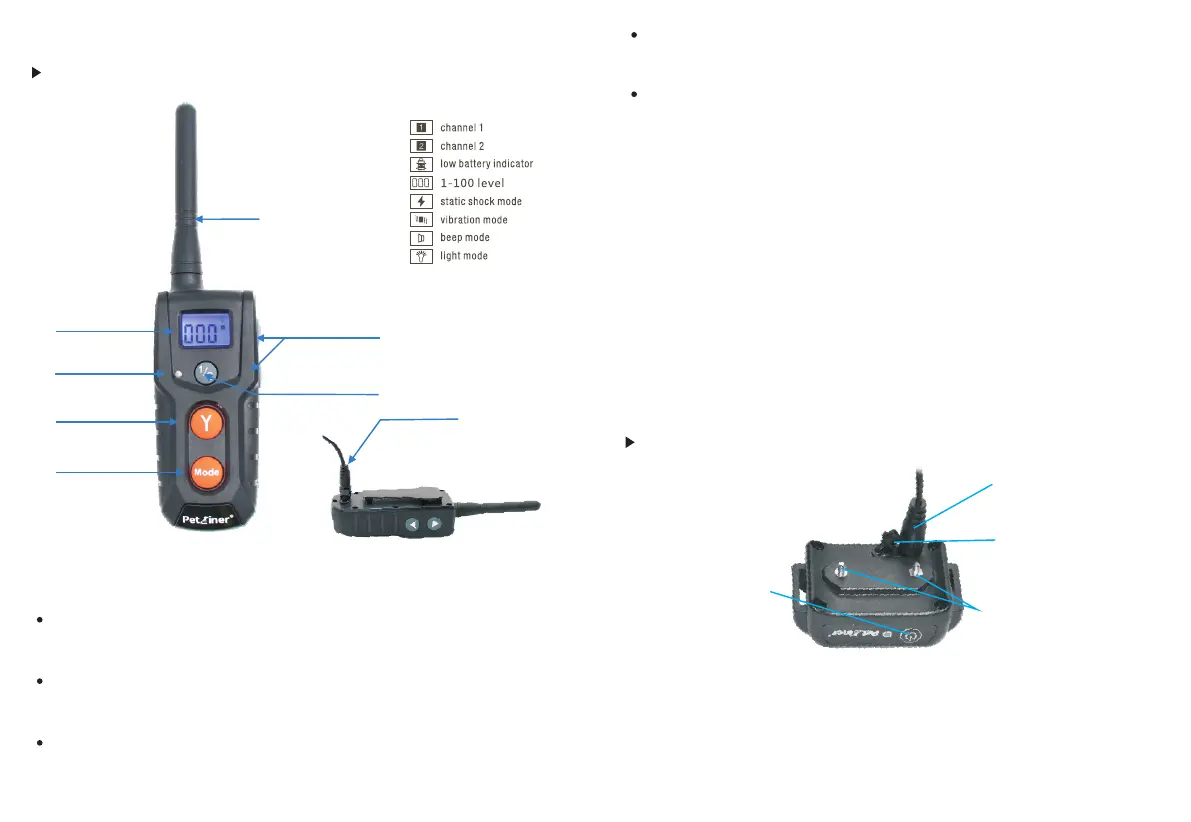
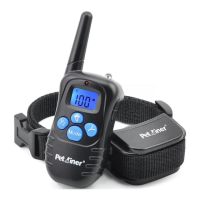
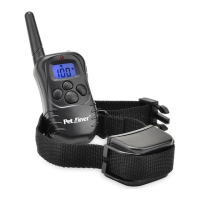
1. Antenna: Transmits signal to the collar-receiver
3. LED Indicator: It will flash when “Y” button is pressed and serves as battery
charging indicator
2. LCD Screen:
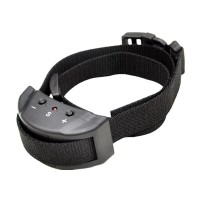
Static Mode: Under this mode, when “Y” button is pressed, the collar-receiver
will shock; static levels can be adjusted from 0 to 100 by pressing the UP/DOWN
button.
Vibration Mode: Under this mode, when “Y” button is pressed, the collar-
receiver will vibrate; vibration levels can be adjusted from 0 to 100 by pressing
the UP/DOWN button.
Beep Mode: Under this mode, when “Y” button is pressed, the collar-receiver
will give a warning beep.
Light Mode: Under this mode, when “Y” button is pressed the green LED light
the receiver will flash every one sec, rendering it convenient to locate your pet:
(esp. in the dark).
½ button indicates channel 1 or 2 on the transmitter, select one channel for
use with one collar-receiver.
6. Up/ Down button: Press the Up/Do wn buttons on the right hand sid e of the
transmitter to set the level of correction you wish to administer. (WARNING:
ALWAYS BEGIN WITH A LOW-LEVEL SETTING IN THE INITIAL TRANINING
STAGES).
7. Channel Button: When the CHANNEL button “1/2” is pressed, you can sync the
collar-receiver and the transmitter via different channel.
4. Y Button: It indicates the LAUNCH button, which will send the correction signal
to the collar-receiver.
5. Mode Button: It indicates audio, vibration and static-shock correction modes
on the LCD-display screen.
8. Charging Hole: for remote transmitter charging.
1. Metal Probes: Deliver vibration and static stimuli.
2. ON/OFF/Encode Button: Turn on/off the collar-receiver; hold it for a few seconds
to encode the receiver.
-5-
-6-
Collar receiver:
Key Definitions
Antenna
LCD screen
LED indicator
Y button
Mode button
Up/Down button
Channel button
Charging hole
ON/OFF/Encode Button
Rubber Cover
Metal Probes
Charging Hole
Remote Transmitter
3. Rubber Cover: After completion of charging please put the cover in place to
safeguard the internal unit from dust and water.