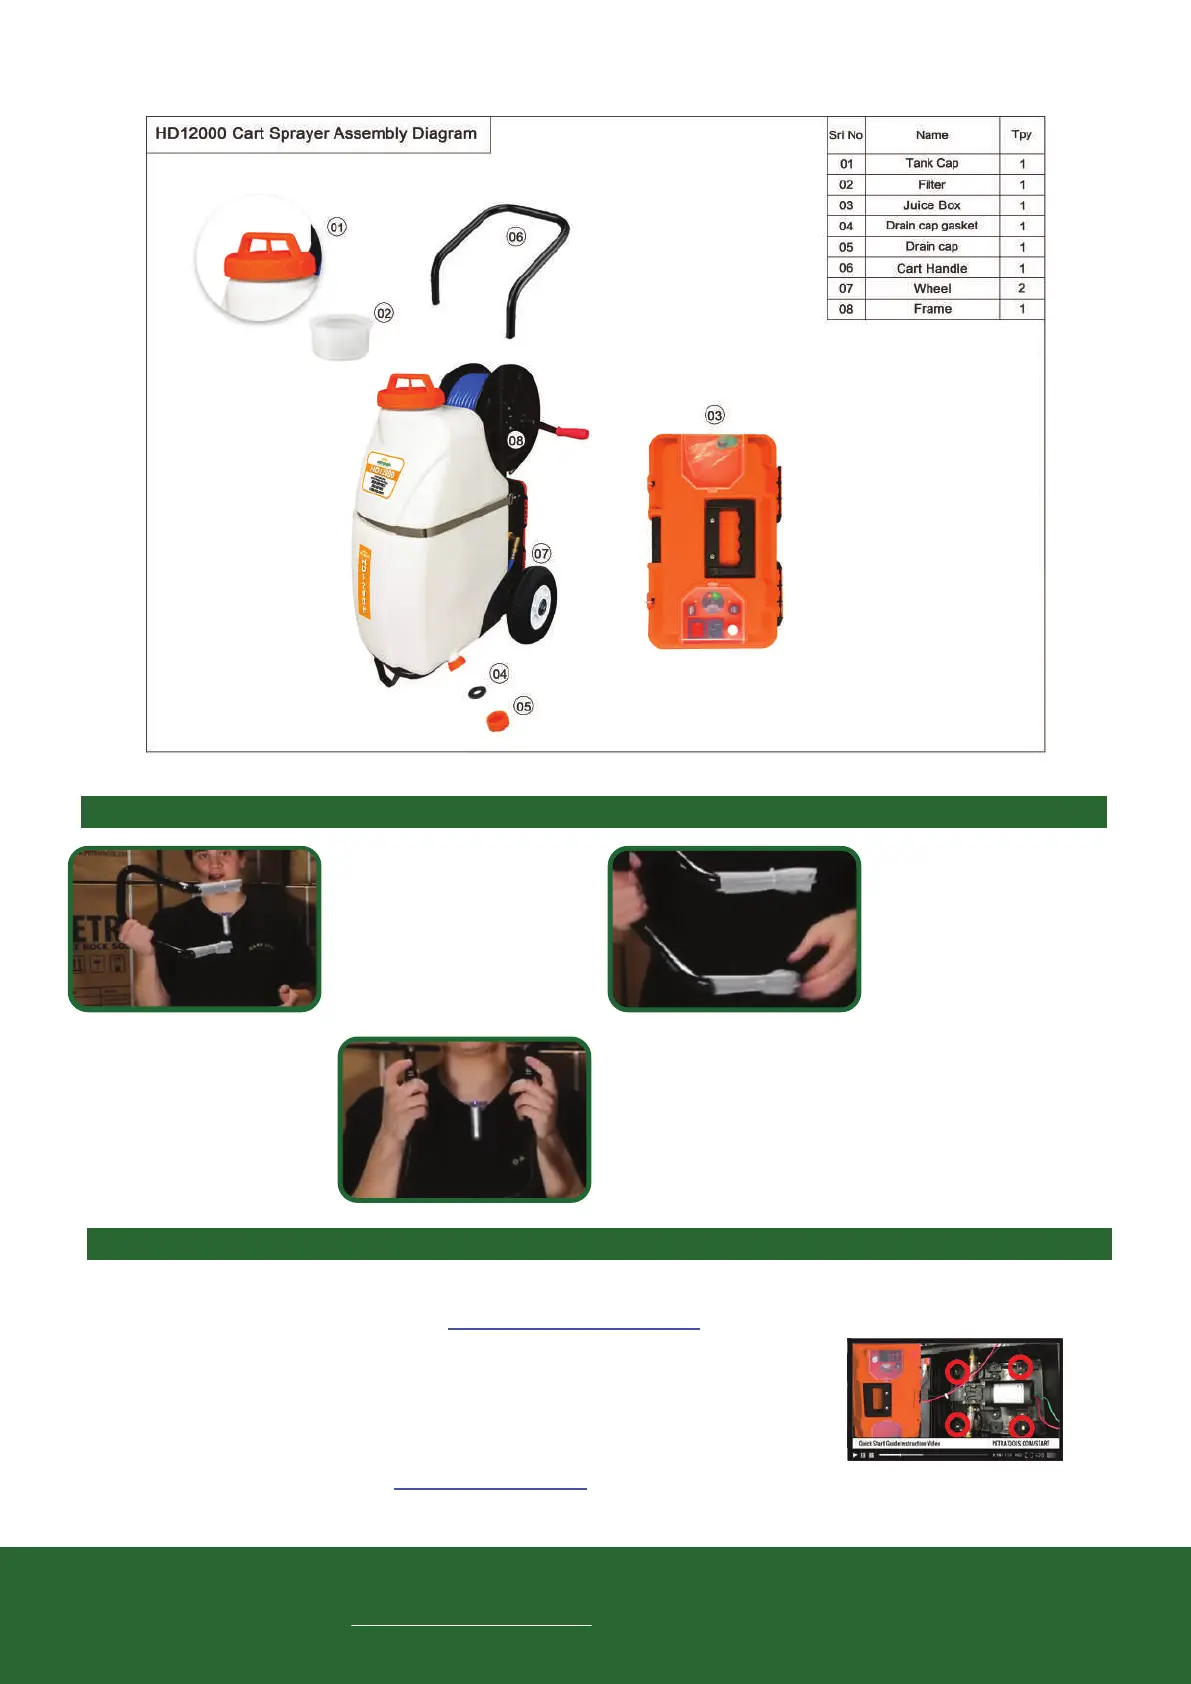
HD12000 Cart and Handle Assembly
Questions/Issues
with your product?
We’re here to help!
Please visit the page
petratools.com/support
to get the fastest resolution to your problem.
Toll free: 1-800-613-6889
Contact us: support@petratools.com
Website: www.petratools.com
TOOL-BOX INSTRUCTIONS – Visit Petratools.com/start for full instructions and videos.
There may come a point where you need to change your battery, pump or other parts inside of the
removable “Tool-Box”. Please visit www.petratools.com/start and watch the video for instructions on
how to remove and/or replace.
Step 1: Open the Tool-Box.
Step 2: Use a drill or screw driver to remove the 4 screws holding Tool-Box
(screw locations circled in red in picture to the right).
Step 3: Follow instructions at petratools.com/start to replace battery or pump.Repeat steps in
reverse to connect juice box back to the sprayer. Make sure c-clamps are tight.
The HD12000 Connecting Handle to Cart Instructions – Visit Petratools.com/start for full instructions and videos.
When you open your box,
you’re going to see the
handle that will be connected
to the cart.
Remove the plastic around
it to connect to the top part
of the cart.
To attach the handle, press
the silver buttons on the
unit and press the handle
onto the cart until they click
into place.
02
03
01
Line Flush Bulb