The Petrust PP002 Automatic Pet Feeder is designed to provide scheduled and manual feeding for pets, ensuring they receive their meals even when owners are away. This device supports both battery and external power supply, offering flexibility and reliability.
Function Description
The primary function of the Petrust PP002 is to automatically dispense pet food at scheduled times and in specified portions. It features a built-in clock for accurate timing and allows for up to six meals per day. The feeder also includes a voice recording function, enabling owners to record a personalized message that plays during feeding times, helping to establish good feeding habits for pets.
Important Technical Specifications
- Power Supply: The feeder can be powered by a Micro USB power cord or by three No. 1 batteries. The battery backup ensures continuous operation even without an external power supply.
- Food Compatibility: It is recommended to use only dry pet food with a size between 5mm and 15mm. Wet and damp food are strictly prohibited to prevent mechanical issues.
- Feeding Schedule: The device supports scheduling up to six meals per day.
- Voice Recording: A maximum of 10 seconds of audio can be recorded and played back during feeding. The default playback is three times, but this can be customized up to five times.
- Alarm System: The feeder includes alarms for low battery and insufficient food. It also indicates when food is stuck in the bucket.
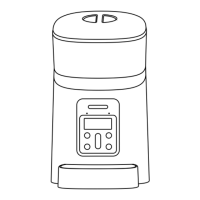
- Display: An LCD screen displays time, settings, and alarm messages. An indicator light and buzzer provide additional alerts.
Usage Features
Hardware Installation:
- Open the battery compartment at the bottom.
- Insert the Micro USB power cord into the connector and route it along the wire guide.
- Optionally, insert three No. 1 batteries for backup power.
- Open the top cover and place the feeding tray into the feeder from the front.
Time Settings:
- Press and hold the "Setting" button for 2 seconds until the clock icon flashes on the LCD screen.
- Press "OK" to confirm and enter time setting mode.
- Use the "Up/Down" selection buttons to set the 24-hour clock.
- Press "OK" to confirm the hour.
- The minute display will flash; use "Up/Down" buttons to set the minutes.
- Press "OK" to confirm/save and exit.
- Note: All operations during setup can be returned or canceled via the "Return/" button.
Manual Feeding:
- In standby state, quickly press the "Down" button twice within 1 second to dispense one portion of food.
- To schedule manual feeding portions:
- Press and hold the "Setting" button for 2 seconds.
- Press the "Down" button to switch the flashing icon to the feeding icon.
- Press "OK" to confirm.
- Use the "Up/Down" buttons to choose the desired number of portions.
- Press "OK" to confirm the setting. The feeder will dispense immediately, and the screen will show remaining portions.
Scheduled Feeding:
- Press and hold the "Setting" button for 2 seconds.
- Press the "Down" button to switch the flashing icon to the digital meal number icon (e.g., "1").
- Press "OK" to select the portions for that meal.
- Use the "Up/Down" buttons to set the desired portions.
- Press the "Setting" button to move to time setting for that meal.
- Set the time using the "Up/Down" buttons and confirm with "OK".
- Press the "Setting" button again to save and return.
- Repeat these steps for multiple meals (up to six).
- To cancel a scheduled meal, set its portion to "0".
Feeding Voice Recording:
- In standby state, press and hold the "Recording" button for 3 seconds until the feeder makes a "Drip" sound.
- Start recording your message at the microphone position. Keep the button pressed for the entire 10-second recording duration.
- After recording, the feeder will make two "Dripping" sounds.
- To preview the recording, short press the "Recording" button.
- To re-record, repeat the process.
- The closer you are to the microphone, the louder the recorded voice will be.
- The default playback is 3 times, but this can be customized up to 5 times. To change playback times, enter the setting interface (hold "Setting" for 2 seconds), select the recording button icon, press "OK", and use "Up/Down" buttons to adjust. Press "OK" to save.
- To cancel recording playback, set the number of playback times to "0".
Feeder Alarm:
- Low Battery: The screen will display a low battery sign.
- Insufficient Food: The screen will display a low food storage sign.
- Food Totally Fed: The screen will display an alarm message, and the indicator light will flash red.
- Food Stuck: The screen will display "E-01" or "E-02" (error codes), and the indicator light will flash red.
- In all alarm cases, the indicator light will be in a red breathing state. After addressing the issue (renewing battery, adding food, cleaning stuck food), the alarm signs will disappear within 60 seconds.
Battery Backup Limitations:
When operating on battery backup:
- There will be a 60-second delay for screen display and scheduled feeding.
- The feeding voice recording will play only once before feeding.
- The indicator light will only flash every 60 seconds, not continuously.
- If the screen is off, press any button to wake up the feeder from sleep mode.
Defaulting the Feeder:
In standby state, press and hold the "Setting" button and "OK" button simultaneously for 3 seconds until the feeder makes a short beep. This will delete all previous settings.
Maintenance Features
- Cleaning: For your pet's health, regularly wash the grain bucket and feeding tray. The feeder body should not be filled with water; use a wring-able wet cloth to wipe it clean.
- Food Blockage: If food gets stuck, manually clean the stuck food and reboot the pet feeder.
- Battery Replacement: When the feeder battery is low, replace it promptly. If the external power is cut off, the feeder may not work correctly with a low battery.