6
7. Play back recorded Voice Message
1) Press the PLAY key
2) Your recorded message will now play
3) At each Feeding your recorded message will play back 3 times
8. Battery Replacement
Change all batteries when the Red LED (Low battery indicator) flashes. Use only
new Alkaline batteries.
9. Disassembly and Assembly
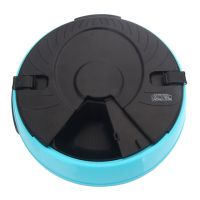
Your Automatic Pet Feeder comes pre-assembled. However, there may be times
when you wish to remove some parts of the bowl for cleaning, load food, or to
replace the batteries.
Disassembly
(refer to diagram on pg. 7)
LOCK-(marked F on diagram) – Push in the middle of each LOCK and pull up
using your fingertips. Now remove the LID-(marked A on diagram), being careful
not to pull the LID off from only one side as this can damage the locking pins. The
SLIDE COVER-(marked B on diagram) easily lifts off, as does the FOOD BOWL-
(marked D on diagram)
Assembly
(refer to diagram on pg. 7)
LID-(marked A on diagram) – Place the SLIDE COVER on top of the FOOD
BOWL so the FINGER TAB is in the opening of the LID. Now align LID pins with
the FEEDER BASE and push down. The LID pins only align one way on the
FEEDER BASE. Do not use excessive force when installing the LID. Check for
proper alignment if you have trouble getting the LID to lock down on the FEEDER
BASE
SLIDE COVER-(marked B on diagram) – For keeping your pet from eating until
the 1
st
programmed feeding starts.
FINGER TAB-(marked C on diagram) – For closing the SLIDE COVER which will
lock into the LID
FOOD BOWL-(marked D on diagram) – The FOOD BOWL will seat into the HUB
in the FEEDER BASE in only one position. Be sure the FOOD BOWL seats
properly onto the HUB
HUB-(marked E on diagram) – The FOOD BOWL slides into this and is what
rotates the FOOD BOWL
3
Instruction Manual
Automatic 6 Meal LCD Clock Pet Feeder (PF-18)
Features
12 or 24 hour clock display
6 second personal voice message recorder
Personal Voice message calls your pet when its feeding time
Food Bowl rotates according to your set time
The 6 Feeding times can be set for any time of day or night
C size alkaline batteries (4pc’s required) last over 1 year
Red LED indicates Low batteries
Extra compartment atop for ice-pack or water
Control Panel Keys
MODE - switches between clock or feeding time display. Also increases clock time
during clock / feeding-time Set mode
SET – enters settings mode. Also confirms the time you enter and advances to
next setting
START NOW – starts the feeding timer immediately
START TOMORROW- starts the feeding timer the next day
REC – records your personal voice message
PLAY – plays back your recorded voice message
ON SWITCH – turns the feeder on / off. For when the feeder will not be used for
an extended period of time. Turning this switch off will RESET all time and feeding
settings
Getting Started
1) Carefully turn the pet feeder upside down. Remove both battery doors by
squeezing the two tabs and gently pulling each door away
2) Keep the ON switch set to OFF
3) Insert four C size alkaline batteries into the battery tray. Do NOT use old or
-cheap- carbon batteries
4) Close the battery doors, rotate the feeder right-side up and switch ON
5) The feeder will cycle one time until “12:00” is on the LCD display
Note: Your pet feeder makes the food available in this sequence: Tray 1, Tray 2, Tray 3,
Tray 4, Tray 5 and last Tray 6. When you want only one tray of food, you should fill only
Tray 1; for only 2 feedings, fill Trays 1 and 2 and so on.


 To Next Page
 Loading...