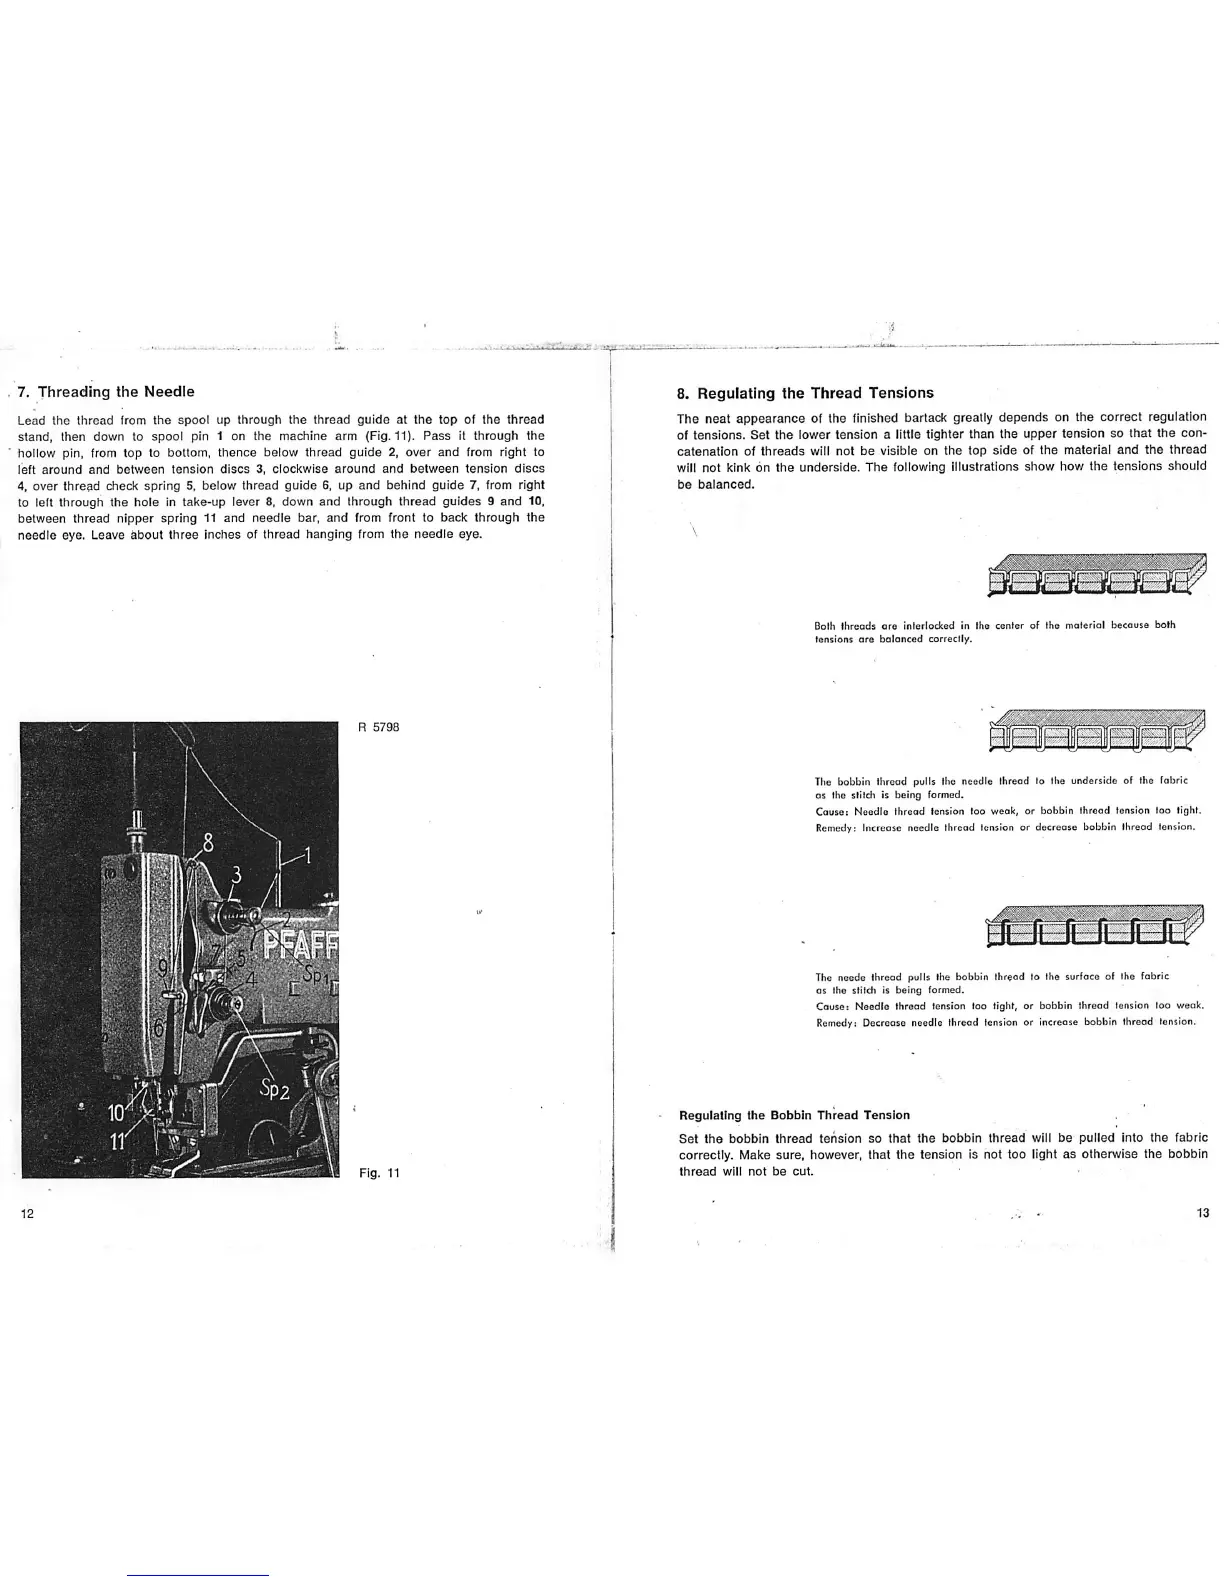
7.
Threading
the
Needle
Lead
the
thread
from
the
spool
up
through
the
thread
guide
at
the
top
of
the
thread
stand,
then
down
to
spool
pin 1 on
the
machine
arm
(Fig. 11).
Pass
It
through
the
hollow pin, from top to bottom,
thence
below
thread
guide
2,
over
and
from right to
left
around
and
between
tension
discs
3,
clockwise
around
and
between
tension
discs
4,
over
thread
check
spring
5,
below
thread
guide
6, up
and
behind
guide
7, from
right
to left through
the
hole in
take-up
lever 8. down
and
through
thread
guides
9
and
10,
between
thread
nipper
spring
11
and
needle
bar,
and
from front to
back
through
the
needle eye. Leave
about
three
inches of thread hanging from the
needle
eye.
8.
Regulating
the
Thread
Tensions
The neat appearance of the finished bartack greatly depends on the correct regulation
of
tensions.
Set
the
lower
tension
a little
tighter
than
the
upper
tension
so
that
the
con
catenation
of
threads
will not be visible on the top
side
of the material and
the
thread
will not kink on
the
underside.
The
following illustrations
show
hov/
the
tensions
should
be
balanced.
Both
threads
are
Interlocked
In the
center
oF the
material
because
both
tensions
are
baloneed
correctly.
The bobbin threod pulls the needle thread to the underside of the fabric
OS
the stitch Is being formed.
Causei Needle thread tension too weolc, or bobbin thread tension too tight.
Remedy: Increase needle threod tension or decreose bobbin thread tension.
The neede thread pulls the bobbin thread to the surface of the fabric
as the stitch is
being
formed.
Cause:
Needle
thread
tension too tight, or
bobbin
threod
tension too
weak.
Remedy: Decrease needle thread tension or increase bobbin thread tension.
Regulating
the
Bobbin
Thread
Tension
Set
the bobbin
thread
teiislon so
that
the bobbin thread will be pulled into the fabric
correctly. Make sure, however,
that
the
tension is not too light as otherwise the bobbin
thread
will
not
be
cut.
 Loading...