Having
cdiusted
the
forward
in relation to the
backward
stitch length,
tighten
screw
N securely.
The longer the maximum
forward
stitch is
set,
the
shorter
will
be
the
corresponding
stitch length for
reverse
sewing.
32.
Dismantling
Oil
Reservoir
and
Oil
Pump
As all
settings
of the feeding mechanism, the mechanical
opener
and
ithe
hook
can
be
performed
on the
outside
of
the machine,
there
is
normally
no
need
to strip the oil reservoir. If the oil
pump
should
cause
trouble
and
has
to
be
removed,
proceed
as
follows:
1. Drain the oil completely.
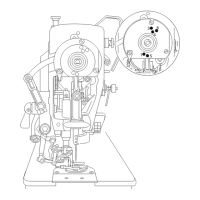
2. Unscrew pinch nuts y (Photo 28)
and
strip the
knee
lifter mechani&m
on
the
bottom
of
the
oil
reservoir.
3.
Tilt
the
machine
back
and
take
out
all
screws
in
the
oil
reservoir
bottom
trough,
except
for
two
screws
at
the
corners
which
need
only be
loosened.
4. Remove the
bottom
trough
and
rinse it tharoughly with
kerosene
.until
all
grit
is
removed.
5.
Disconnect
all oil
tubes
from
the
pump.
6. Take
out
both
screws
No. 855
and
strip the
cover
plates.
(Photo 27).
7. Unscrew the four
set
screws
and
dismantle
the oil pump.
8. Rinse the
pump
with gasoline
and
replace
it.
9. Clean the
packing
surfaces
along
the rim
of
the
bottom
trough
end
mount
it on
the
machine.
Make
sure
the
packings
are
correctly
positioned.
10. Insert all position screws
and
tighten them crosswise.
As the machine is provided with a speciol type
gasket
which is located
between the bed plate and the oil reservoir, be cautious that this
gasket
will
not
be
damaged
when removing or replacing the
bottom
trough. A
damaged
gasket
is completely useless.
37