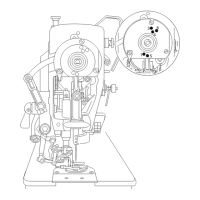
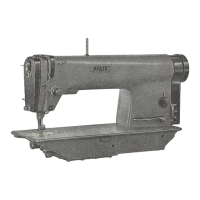
27.
Timing
the
Sewing
Hook
Remove the
needle
plate
and
slacken
hook
set
screws
v
and
w (Photo 21),
then
turn the
hook
on the hook
shaft
to the position
described
in the
pre
ceding
section
(point
of
hook
opposite
center
line
of
needle
end
about
.04"
above
top
of
needle eye).
Use
great
care
in setting the
hook
to the
needle
so
thot
there
will be a
clearonce
of
about
.004"
between
both.
When
making
the
above
adjustment
or
inserting a
new
hook,
make
sure
that
the hook
shaft
front
bushing is
moved
well enough
forward
to
ensure
o
clearance
of
.012"-.016"
between
its
face
and
the
hook.
This
distance
can
be
easily
measured
between
the
point
of
the
hook
and
the
needle.
The
clearance
of
.008"-.012"
which
will
exist
between
the
hub
of
the
hook
and
the hook
shaft
bushing
after
setting the hook to the needle is
ob-
solutely
necessary
in
order
to ensure
proper
lubrication
of
the
hook.
28.
Exchanging
fhe
Sewing
Hook
1. Remove
needle,
needle
plate
and
position finger
bracket.
2. Loosen
set
screw c
and
pull
off
mechanical
opener
b.
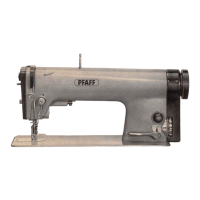
3. Slacken hook
set
screws
v
and
w. (Photo 21).
4. Turn
the
balance
wheel
until
the
feed
dog
is in its
highest
position.
5.
Pull
fhe
hook
off
its
shaft.
6. With the feed dog in its highest position, push the new hook
onto
the
hook
shaft
and
replace the position finger bracket.
7. Time fhe
hook
as
instructed
in
Section
27
and
tighten
set
screws
v
and
w
securely.
8. Replace
and
screw on the mechanical
opener
as instructed in par. 12,
Section
18.
9. Screw on
feed
dog
and
needle
plate.
29.
Timing
fhe
Bobbin
Case
Opener
Despite the fact that many mechanics find it rather difficult to lime
th©
mechanical opener correctly, it is of
great
importance to perform this
adjustment meticulously in order to ensure that the
advantages
afforded
by
the bobbin cose
opener
may
take
full
effect.
There
are
two
different
adjustments
required:
31