Justierung
21
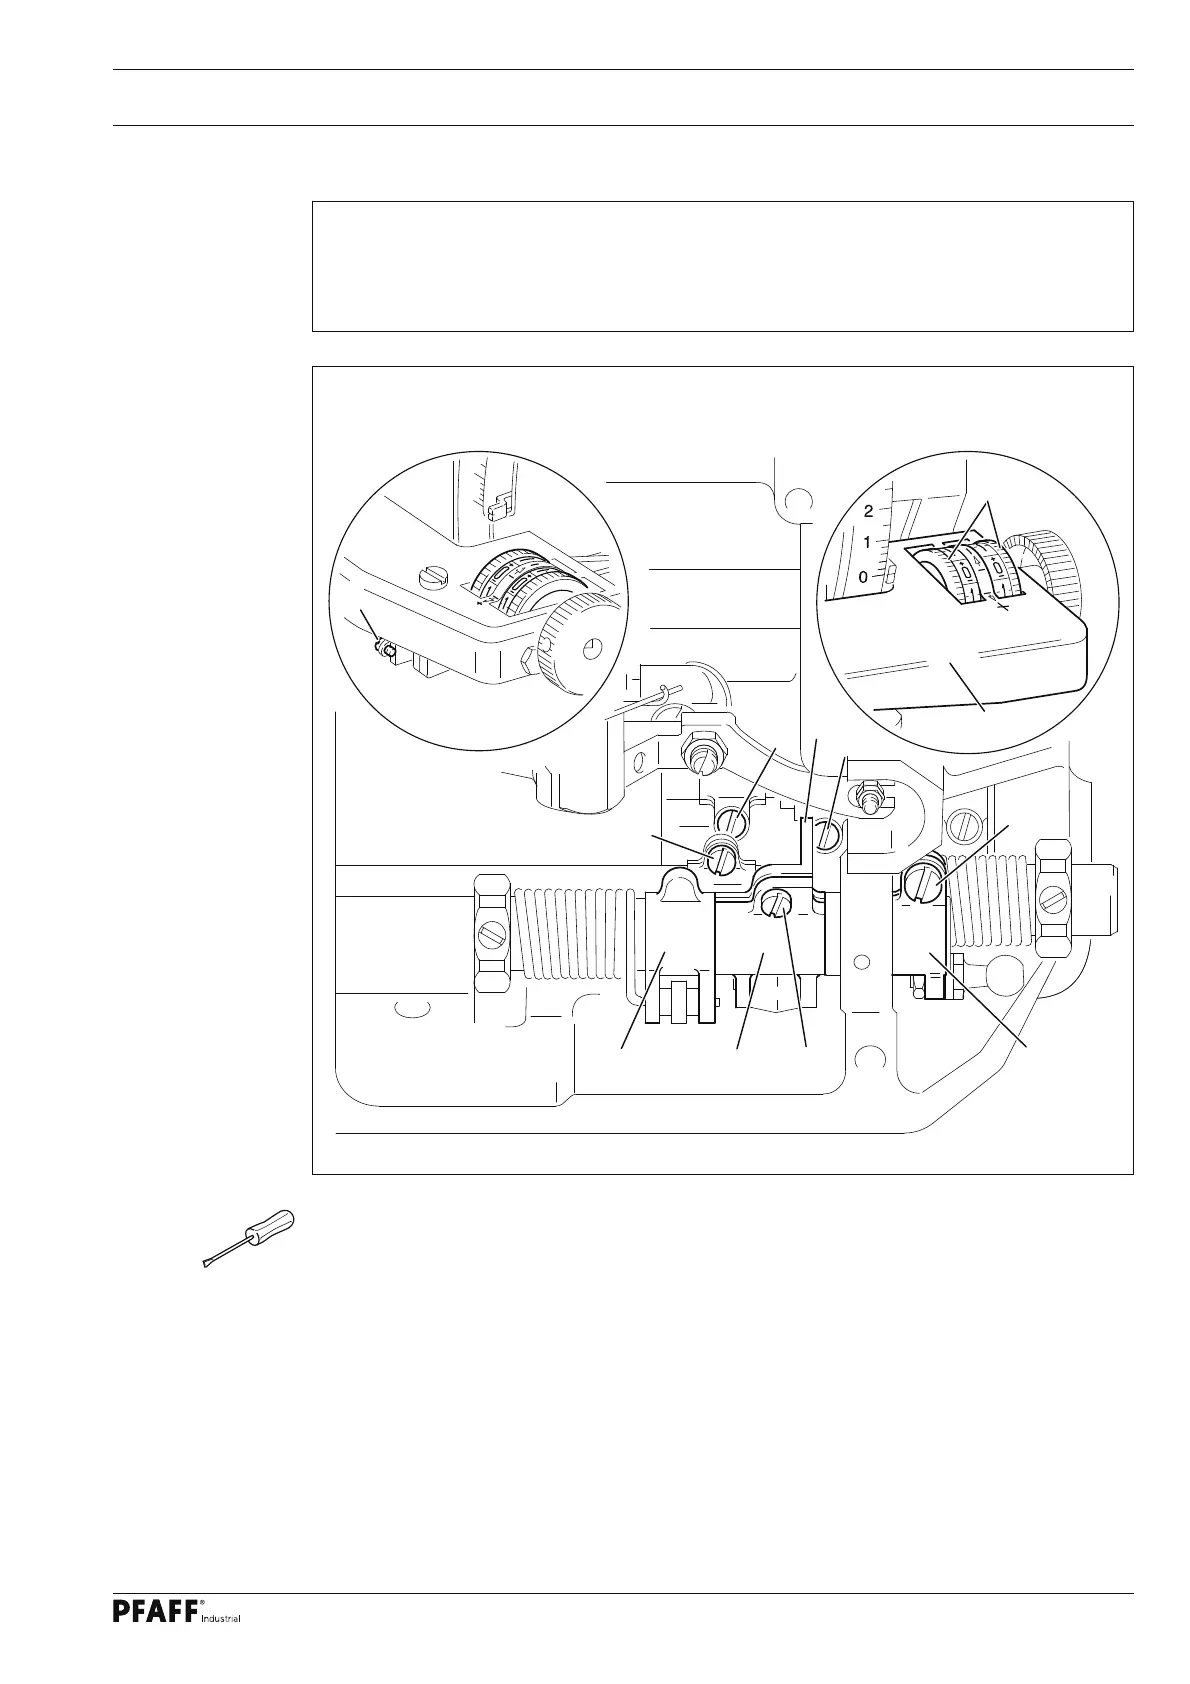
Fig. 1 - 16
1.05.15 Zeroing the differentiatio (only on the PFAFF 939 U)
● Unscrew screw 1 and the needle plate on machines with stitch length N24.
● Set both adjustment wheels 2 at "0".
● Loosen screws 3, 4, 5, 6 and 7.
● Set the maximum stitch length and adjust clamp crank 8 in accordance with the require-
ment. Tighten screws 5 and 6.
● Turn clamp crank 9 until it is parallel with clamp crank 8, and tighten srews 3 and 4.
● Turn clamp crank 10 so that it is parallel with the bedplate and tighten screws 7.
● On machines with stitch length N24, tighten screw 1 and fi t the needle plate.
Requirement
With the largest stitch length set, the reverse feed control key 12 should be set at its
highest position. In addition the stop lug 11 of clamp crank 8 should be touching the top
regulating shaft.
5
2
6
3
11
4
8
9
10
1
7
12
 Loading...