Do you have a question about the Pfaff 937 and is the answer not in the manual?
Regulations and legal requirements for machine construction and operation.
Guidelines for safe operation, maintenance, and personnel.
Explains danger symbols and their meanings for user safety.
Key information and user responsibilities regarding the manual and machine safety.
Defines roles and obligations for operating and specialist personnel.
Responsibilities of operators for machine use, cleaning, and fault handling.
Responsibilities of specialists for maintenance, repair, and adjustment.
Specific dangers and warnings related to machine operation and moving parts.
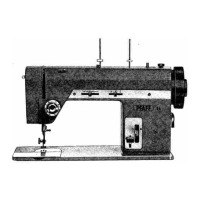
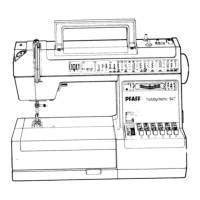
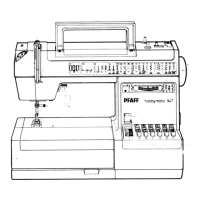
Information about the intended use of the PFAFF 937 sewing machine.
Technical specifications of the PFAFF 937 sewing machine, including stitch types and dimensions.
Details on different models and subclasses of the PFAFF 937, including stitch capabilities.
Recommendations for needle and thread types based on material and model.
Guidelines for the proper disposal of machine waste and lubricant-soiled parts.
Information on how the machine is delivered to customers.
Precautions for moving the machine within the customer's facility.
Instructions for disposing of the machine's packaging materials.
Guidelines for storing the machine for short or extended periods.
Explanation of symbols used in the manual to highlight important information, cleaning, lubrication, and servicing.
How to turn the machine on and off using the power switch and indicator lamp.
Description of the knuckle switch, used for reversing sewing direction on specific models.
Explanation of pedal functions for sewing, lifting presser foot, and thread trimming.
How to raise the presser foot using the designated lever.
Adjusting zigzag width and needle position using specific levers.
How to engage reverse sewing by pressing the reverse-feed key.
How to alter the stitch length using the adjustment wheel.
Adjusting top feed settings for normal sewing and applying fullness.
Requirements for installing the machine, including power and air supplies.
Step-by-step guide to adjust the height of the sewing machine's table top.
Instructions for properly tightening the V-belt connecting the motor and machine.
Guide for attaching the upper protective guard for the V-belt.
Instructions for installing the lower protective guard for the V-belt.
Steps for attaching the reel stand and sewing lamp to the machine.
Procedures for initial setup, oiling, and connecting compressed air.
How to turn the machine on and off and perform a test run.
Detailed steps for correctly inserting a new needle into the machine.
Instructions for winding the bobbin and adjusting its thread tension.
Steps for safely removing and inserting the bobbin case.
How to thread the bobbin case and adjust its thread tension.
Specific instructions for threading the bobbin case on models without a thread trimmer.
Specific instructions for threading the bobbin case on models with a thread trimmer.
Step-by-step guide to thread the needle correctly.
How to adjust the tension of the needle thread.
Adjusting the width of the zigzag stitch and the needle's lateral position.
How to set and adjust the length of the stitches.
Adjusting the top feed mechanism for various sewing operations.
Setting the top feed for standard sewing operations.
Adjusting the top feed to apply fullness consistently to the fabric.
Adjusting the top feed for intermittent application of fullness.
Setting the top feed to provide constant braking or stretching of the top fabric ply.
Adjusting the top feed for braking the top fabric ply or applying fullness intermittently.
Instructions for cleaning the sewing machine, including specific parts and safety precautions.
Detailed steps for lubricating the hook mechanism with the recommended oil.
Instructions for lubricating the zigzag drive mechanism and checking oil levels.
How to check and adjust the working air pressure for the machine.
Procedures for emptying and cleaning the water container in the air filter/regulator.
General notes and requirements for performing adjustments on the machine.
List of necessary tools, gauges, and accessories for machine adjustments.
Definitions of abbreviations used in the adjustment section.
Using blocking pins and holes for precise needle bar positioning during adjustments.
General adjustments for the core machine functions.
Adjusting the balancing weight for proper operation.
Aligning the needle to the center of the needle hole when viewed from the sewing direction.
Ensuring the needle bar moves in parallel alignment during its stroke.
Adjusting the locking lever to secure the zigzag stitch adjustment.
Setting the zigzag stitch to zero and aligning the scale markings.
Aligning the needle to the center of the needle hole when viewed crosswise to the sewing direction.
Adjusting the maximum width of the zigzag stitch.
Adjusting the lateral movement of the needle bar during zigzag stitching.
Ensuring symmetrical needle penetration for zigzag stitches.
Adjusting the needle's lateral position for different stitch widths.
Adjusting wheels to control the application of fullness to the fabric.
Setting the differentiation mechanism to its zero point.
Calibrating the main stitch length indicator.
Adjusting the bottom feed mechanism to zero with the gearbox closed.
Adjusting the bottom feed mechanism to zero with the gearbox open.
Adjusting the connecting rod for the vibrating presser.
Setting the vibrating presser mechanism to its zero position.
Adjusting the torsion spring for the reverse feed lever.
Adjusting the torsion spring for the differentiation regulating shaft.
Adjusting the feeding motion of the bottom feed dog.
Adjusting the lifting motion of the bottom feed dog.
Adjusting the tension and positioning of the drive belt in the gearbox.
Adjusting the hook bearing bracket using a specialized gauge.
Setting the oil thrower for proper hook lubrication.
Initial adjustment of the needle bar height relative to the needle plate.
Adjusting needle rise, hook clearance, and bobbin case finger position.
Final fine-tuning of the needle height relative to the hook point.
Adjusting the position of the bobbin case opener for correct operation.
Adjusting the motion of the bobbin case opener.
Adjusting the height of the bottom feed dog using a gauge.
Setting the correct clearance between the presser foot and needle plate.
Adjusting the feed and connecting lever of the vibrating presser.
Adjusting the stroke of the vibrating presser foot for different models.
Adjusting the lifting motion of the vibrating presser.
Adjusting the feeding motion of the vibrating presser.
Ensuring equal feeding strokes between the vibrating presser and bottom feed dog.
Adjusting the pressure of the vibrating presser and presser foot.
Adjusting the thread diverter pin for correct thread guidance.
Adjusting the needle thread tension release mechanism.
Adjusting the stroke of the knee lever for proper operation.
Adjusting the play in the knee lever mechanism.
Adjusting the bobbin winder for reliable operation and automatic disengagement.
Procedures for adjusting the thread trimmer mechanism.
Initial adjustment of the control cam for the thread trimmer.
Adjusting the roller lever for proper engagement with the control cam.
Adjusting the pawl for correct clearance with the control cam lobe.
Adjusting the engaging solenoid for proper operation.
Adjusting the release lever for correct clearance with the control cam.
Adjusting the engaging lever for correct clearance with the control cam.
Setting the thread catcher position and testing the cutting mechanism.
Final adjustment of the control cam and fitting the retaining spring.
Adjusting the needle thread tension release mechanism and clearances.
Steps for removing and reinstalling the control unit.
Information on synchronizer adjustment, referring to the motor manufacturer's manual.
| Brand | Pfaff |
|---|---|
| Model | 937 |
| Category | Sewing Machine |
| Language | English |