Adjustment
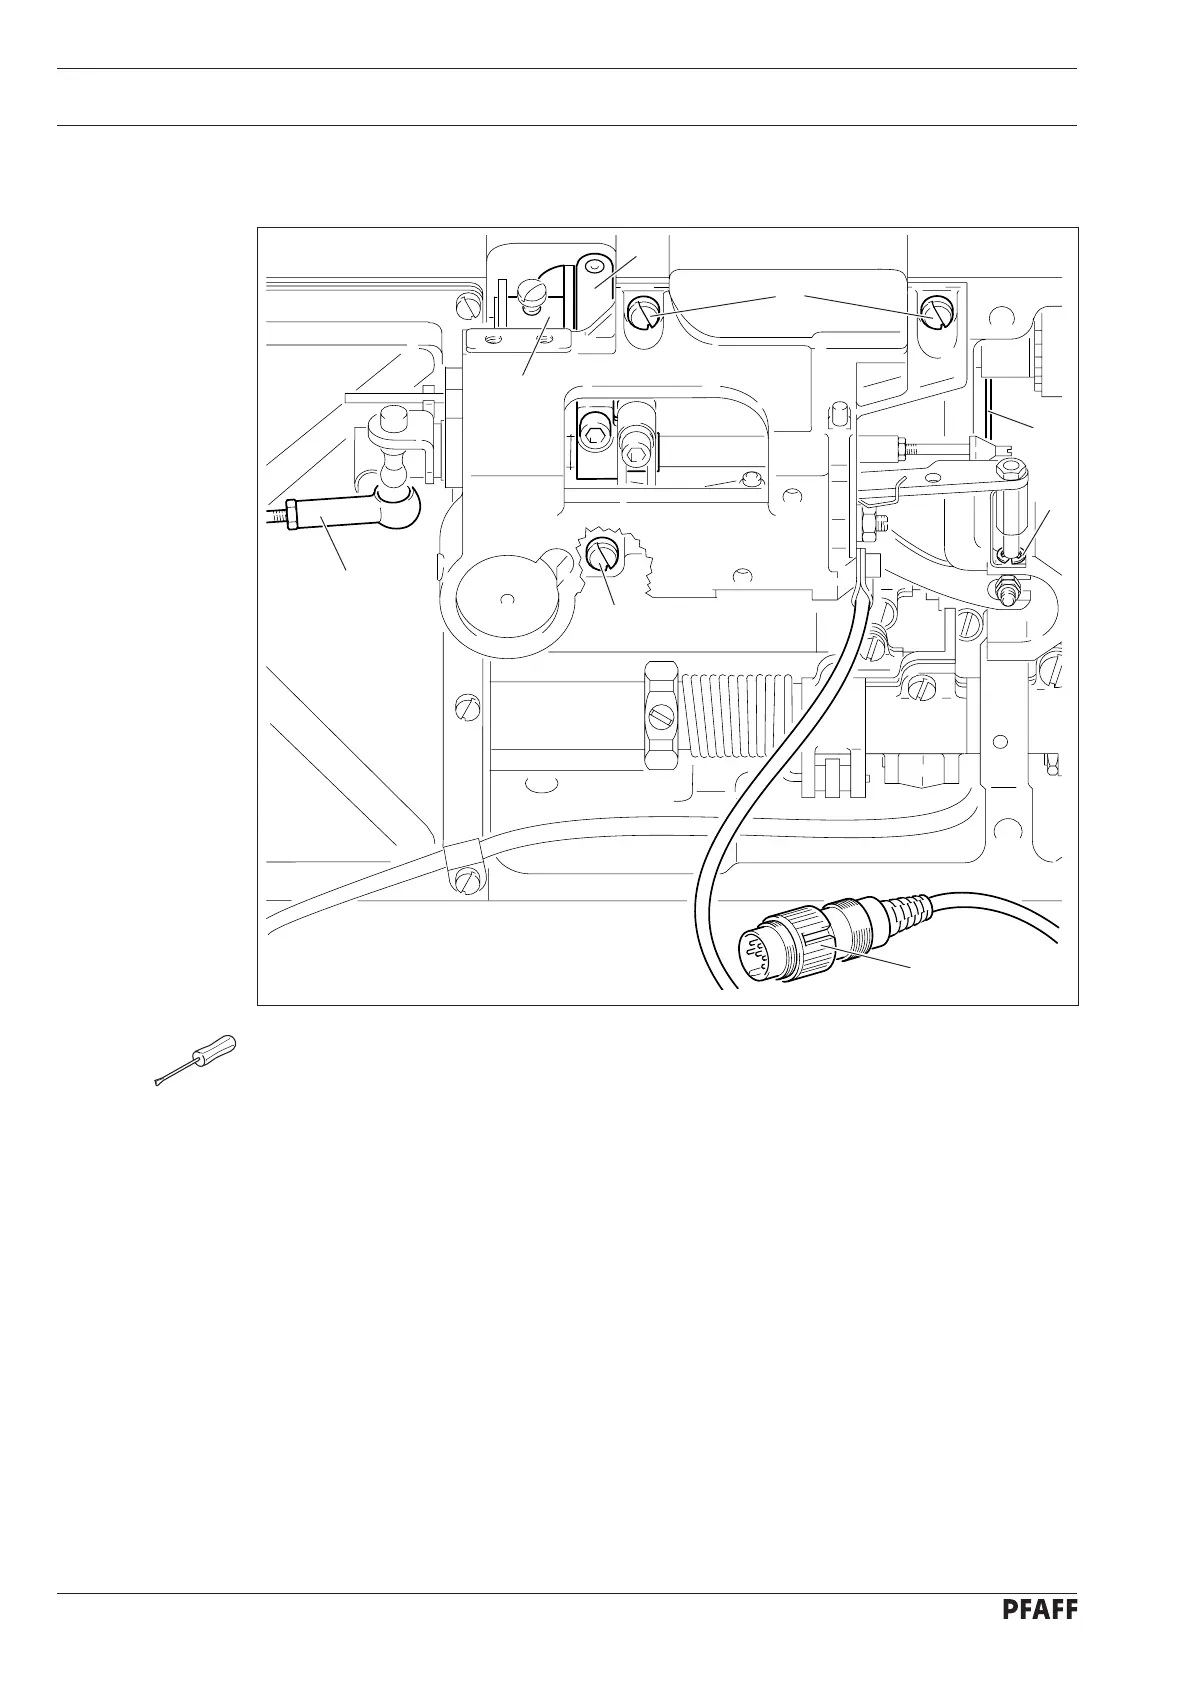
11.06.10 Removing and refitting control unit
● To remove the control unit, pull plug 1 out of the socket of the motor control plate or the
control box.
● Remove circlip 2 and disconnect connecting rod 3.
● Disconnect the ball joints of connecting rod 7 from the studs on the cutting and control
unit and remove the complete control unit.
● To refit the control unit, bring the needle bar to the needle rise position.
● Fit connecting rod 3.
● Replace the control unit and lightly tighten screws 4.
● Attach circlip 2.
● Bring needle bar to bdc.
● Activate the engaging lever manually so that roller lever 5 falls into control cam 6.
● Align the control unit in such a way that the roller of roller lever 5 is positioned in the
middle of the cutout in control cam 6.
● Tighten retaining screws 4.
● Fit connecting rod 7 and carry out a manual function-test.
● If the engaging lever is not released, realign the control unit.
24V = 4% ED
6
5
4
4
7
3
2
1
Fig. 11 - 54
11 - 57