50
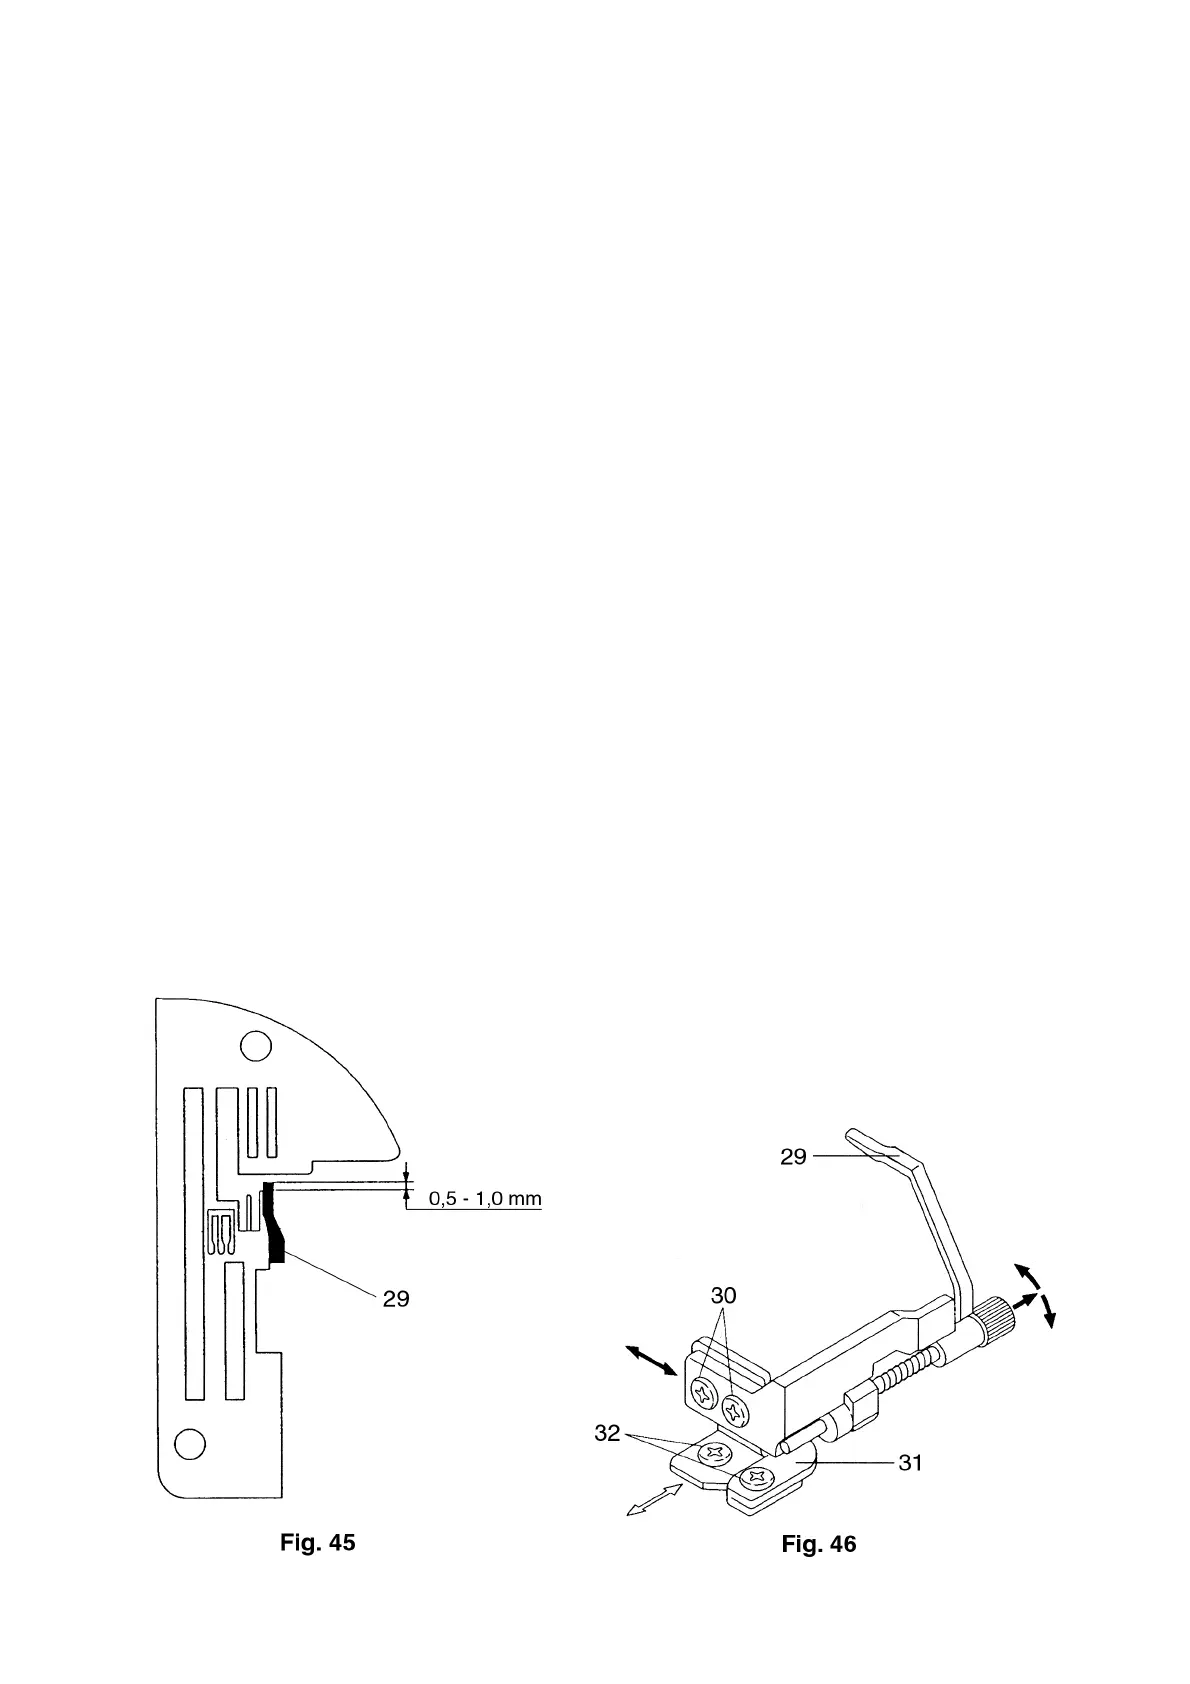
25. Setting the chaining finger
Requirement:
The chaining finger 29 must be parallel to the needle plate and its foremost point protrudes 0.5 - 1.0 mm
over the needle plate finger (fig. 45).
Check:
● Carry out a visual check.
Setting:
● Slightly loosen the fastening screws 30 (fig. 46).
● Push the chaining finger back and forth until the setting is as in fig. 45.
● Tighten the fastening screws 30.
● Loosen the fastening screws 32.
● Adjust the chaining finger bracket 31 so that it rests perfectly on the needle plate.
● Tighten the fastening screws 32.
Note:
Check the automatic return of the chaining finger.
The chaining finger must not rub against the movable blades.
Test:
● As described under “Check”.
 Loading...