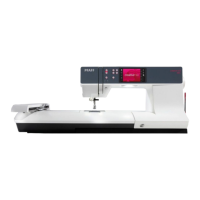
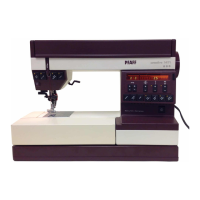
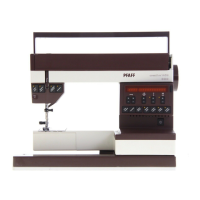
Do you have a question about the Pfaff creative 7570 and is the answer not in the manual?
Safety rules pertaining to mains lead colour coding and plug usage for the United Kingdom.
Reference to the index located on pages 4-7 for detailed topic lookup.
Safety precautions for household use tailored for the United States market.
Critical warnings highlighting immediate hazards and potential risks during machine operation.
Guidelines for operating the machine in suitable environments and safe cleaning practices.
Connecting the mains cord, foot pedal, and storing accessories in the carrying case.
Instructions for opening the top cover and information regarding displayed sewing machine programs.
Steps for connecting the foot control pedal and its function during sewing operations.
Explanation of the master switch operation and how it activates the sewing lamp and prepares the machine.
Using the accessory box and removing the detachable work support to access the free-arm feature.
Guidance on organizing and storing the included sewing machine accessories within the designated compartments.
Steps to prepare the machine for bobbin winding, including holding the handwheel and release disk.
Instructions for correctly placing the bobbin onto the winder and pushing it to the winding position.
Steps for placing the thread and winding the bobbin using the reel holder and unwinding disk.
Guiding the thread through tension disks and winding it onto the bobbin, including automatic stop function.
Instructions to turn the release disk and handwheel after bobbin winding is complete.
Using the second reel holder and threading the machine for bobbin winding with a second thread.
Performing the winding action, stopping automatically, and removing the full bobbin.
Steps to open the hook cover and remove the bobbin case for accessing the bobbin.
Explanation of needle and bobbin thread tension for optimum seam appearance and durability.
Correctly inserting the bobbin into the bobbin case, ensuring thread path and clockwise rotation.
Methods to check bobbin thread tension and adjust it using the tension spring screw.
Properly inserting the bobbin case into the sewing hook and closing the hook cover.
Using the presser foot lifter to raise and lower the sewing foot for various sewing operations.
Technique for bringing up the bobbin thread loop to the needle area for starting to sew.
Using the thread trimmer to cut excess threads from the back to the front over the trimmer.
Procedure for safely removing the sewing foot from its holder, including disengaging the buttonhole foot.
Steps for attaching a new sewing foot and verifying its secure engagement using the presser foot lifter.
Instructions for activating and deactivating the top feed (dual feed) system for improved fabric handling.
Note on using specific sewing feet with cutouts at the back when the top feed is engaged.
Step-by-step guide for removing and inserting sewing machine needles, ensuring correct orientation and security.
Setting the correct needle thread tension for different sewing types, referencing the tension marking.
Procedure for lowering the feed dog, essential for tasks like darning and free-motion sewing.
Adjusting display contrast and enabling/disabling error message notifications for user feedback.
Setting the display language and understanding battery messages for machine operation.
Introduction to the basic menu structure and selecting stitches directly via keys.
Methods for selecting stitches and patterns using program keys, numerical input, or motif groups.
Modifying the length and width settings of selected patterns, including direct value entry.
Selecting needle positions (left, center, right) for straight stitch programs and fine adjustments.
Entering and repeating specific seam lengths for consistent stitching, including tacking at start and end.
Details on function keys like Cursor, ESC, Number Keys, Pattern Selection, OK, Menu, Info, and Clear.
Setting stitch density and adjusting pattern balance for optimal stitch quality on various fabrics.
Accessing help files for recommended thread tension, sewing feet, and pattern mirroring via the INFO key.
Using straight stitch for general sewing and basting stitches for temporary garment assembly.
Applying zigzag stitch for edge finishing and blind stitch for invisible hems on various fabrics.
Utilizing elastic stitches, overlock stitches, and stretch triple stitches for durable and decorative seams.
Comprehensive guide to sewing various buttonhole styles, including automatic, semi-automatic, and keyhole types.
Techniques like lace trimmings, fagoting, covering seams, and cross stitch for decorative effects.
Creating hemstitches using special needles and performing eyelet embroidery for refined fabric decoration.
Guidance on quilting using the machine, including layering fabrics and using specific feet for the process.
Instructions for selecting, entering, and customizing alphabets and monograms for personalized embroidery designs.
Procedure for connecting and disconnecting the embroidery unit from the sewing machine safely.
Steps for inserting and removing embroidery pattern cards and selecting patterns from the card.
Guide to properly hooping fabric and stabilizers into the 80mm and 120mm embroidery frames.
Understanding display symbols, adjusting pattern size, mirroring, rotation, and positioning within the embroidery field.
Instructions for embroidering multi-color patterns, including thread changes and color segment management.
Resolving common embroidery errors like thread breaks, bobbin issues, and incorrect machine setup.
Techniques for combining embroidery motifs with text sequences and storing them for personalized designs.
Instructions for saving pattern sequences and monograms onto the Creative Card and retrieving them.
Guidelines for cleaning the sewing machine, lubricating key areas, and maintaining the display.
Instructions for replacing the sewing machine's batteries and the internal sewing lamp bulb.
Diagnosing and resolving common problems such as skipped stitches, thread breakage, and feeding irregularities.
| Built-in Needle Threader | Yes |
|---|---|
| Maximum Stitch Width | 9mm |
| Maximum Stitch Length | 6mm |
| Touch Screen | No |
| USB Connectivity | No |
| Memory | Yes |
| Needle Threader | Automatic |
| Speed Control | Yes |
| Embroidery Unit | Yes |
| Display | LCD |
| Presser Feet | Included |

