28
Sewing on Buttons
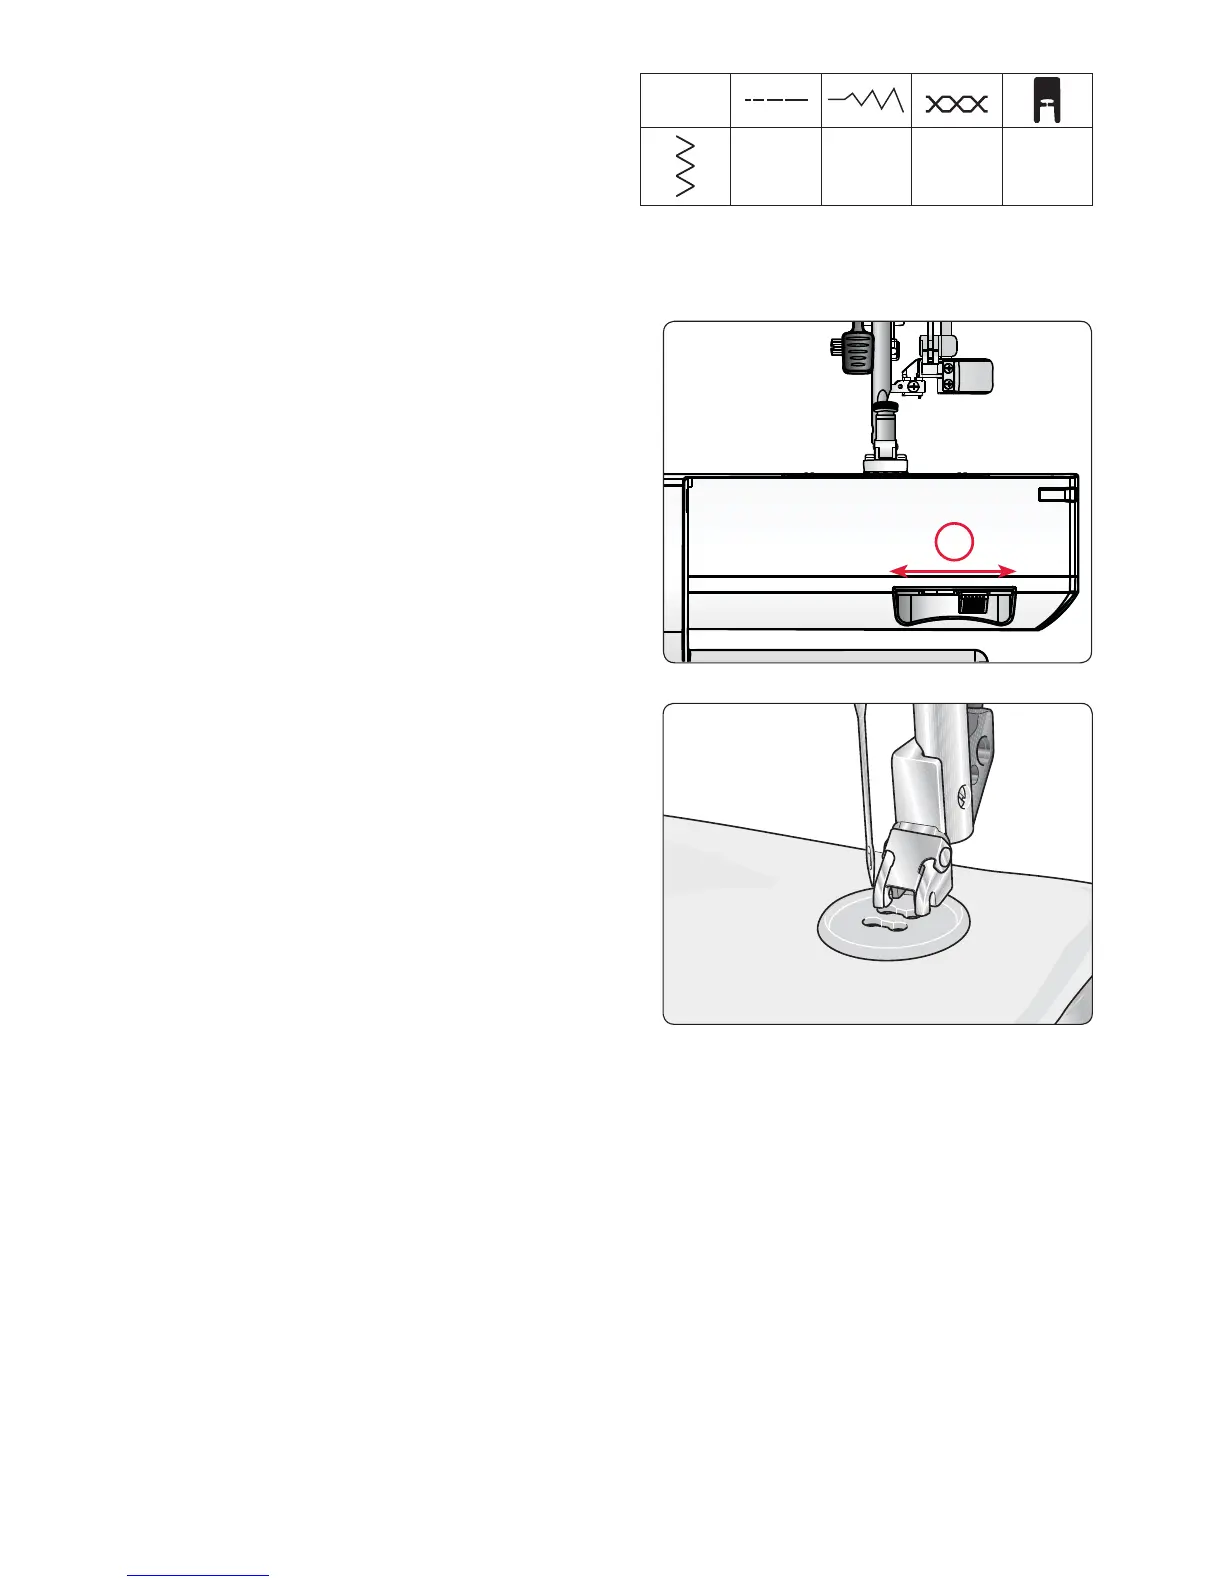
6HZEXWWRQVTXLFNO\ZLWK\RXUVHZLQJPDFKLQH
1. Remove the presser foot and lower the
IHHGGRJV$
2. Mark the fabric where the button is to be
located. Place the fabric and button under
the ankle with the holes in the button
lined up with the swing of the needle.
Bring the needle down into the holes of
the button with the hand wheel to verify
that the correct stitch width is set.
Note: The recommended width of 3mm is set
for most buttons. If you sew a tiny button or
a very large coat button, decrease or increase
the stitch width until the swing of the needle
sews in the holes of the button.
Note: Do not use this technique if the button
is less than 1 cm (3/8”) in diameter.
3. Press the foot control and sew six to eight
VWLWFKHV6HWWKHVWLWFKZLGWKGLDOWRDQG
À[WKHWKUHDGVZLWKDIHZVWLWFKHV
.
4. Raise feed dogs when button sewing is
completed.
Set for button sewing
A
stitch
0 3-5 3-5 ²