16
A
B
C
E
F
G
H
D
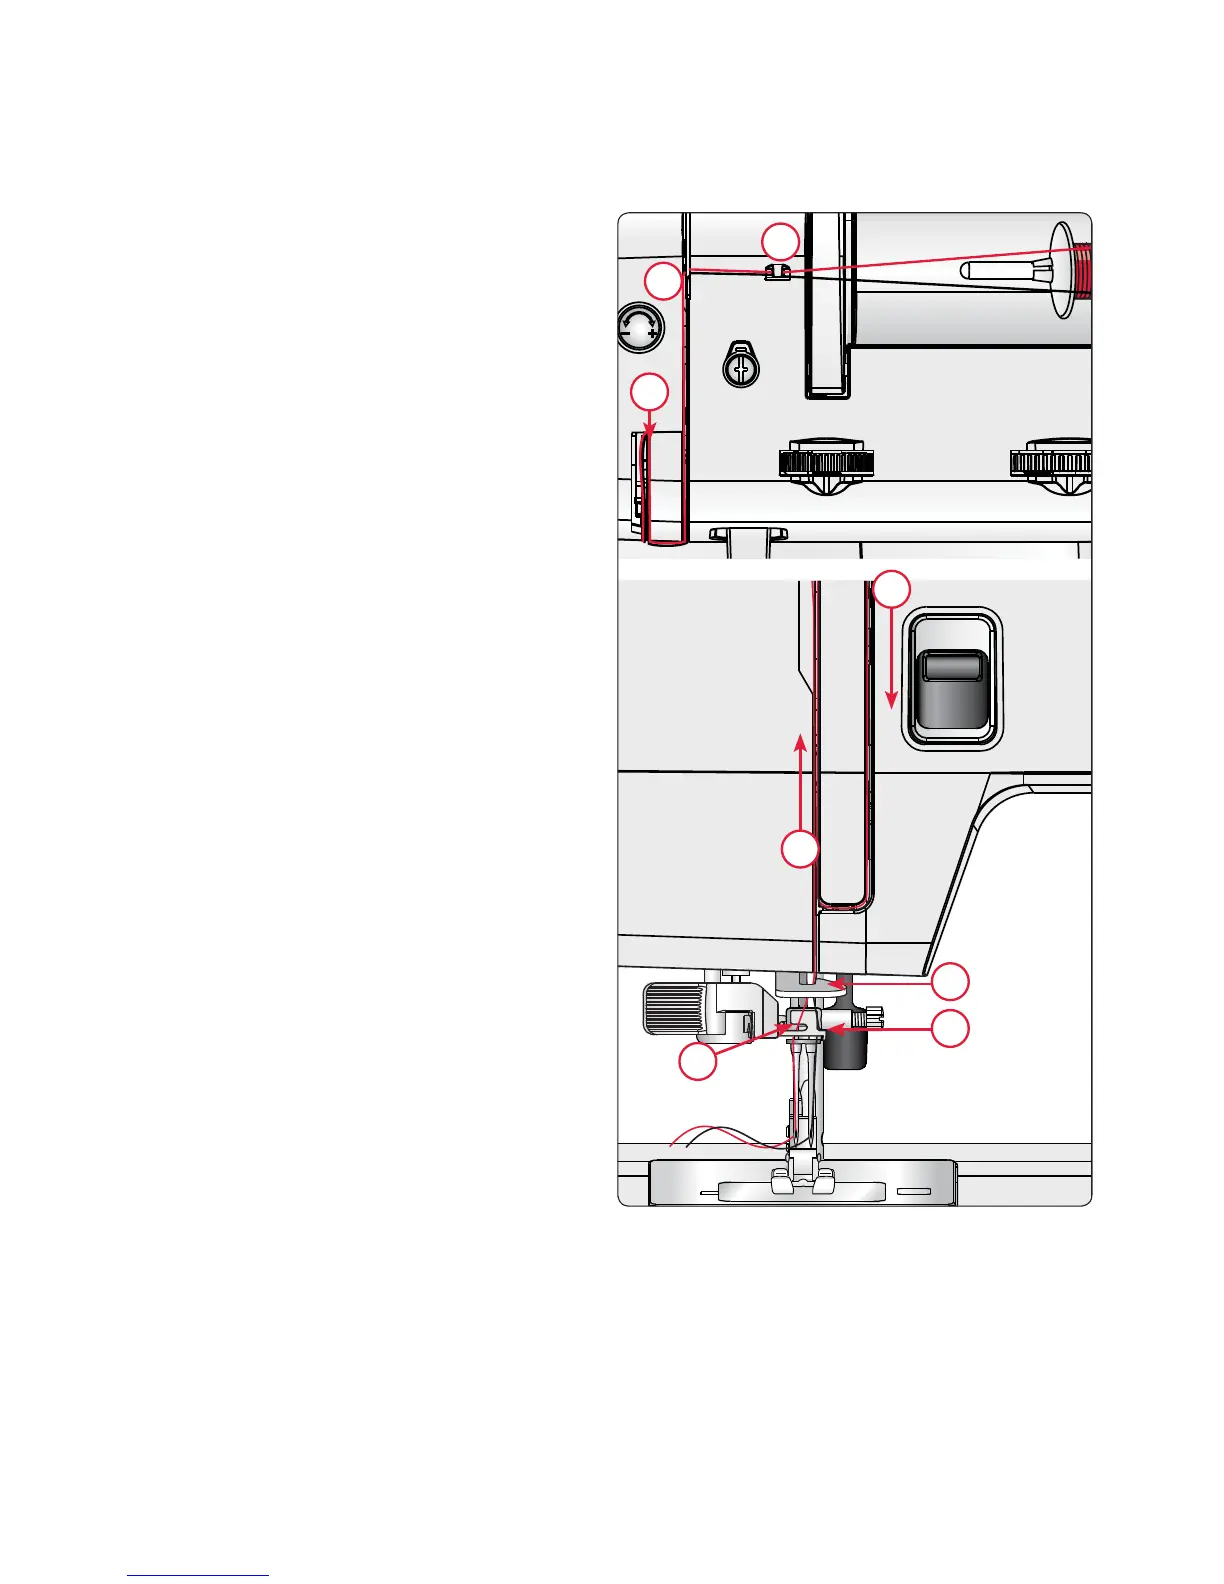
Threading for Twin Needle
Replace the sewing needle with a twin needle. Make sure that the presser foot is raised and
the needle is in its highest position.
1. Place the thread spool on the spool pin
and fit the appropriately sized spool
cap. Insert the auxiliary spool pin.
6OLGHRQDODUJHVSRROFDSDQGDIHOW
pad. Place the second thread spool on
the spool pin.
2. Pull the threads into the thread guide
$IURPIURQWWRWKHEDFN3XOOERWK
WKUHDGVEHWZHHQWKHWHQVLRQGLVFV%
3. Thread down through the right
WKUHDGLQJVORW&DQGWKHQXSZDUGV
WKURXJKWKHOHIWWKUHDGLQJVORW'
4. Bring the threads from the right into
WKHWDNHXSOHYHU(DQGGRZQLQWKH
left threading slot. Place the threads
LQWRWKHORZHUWKUHDGJXLGH)3ODFH
one thread into the slot on the left side
RIWKHQHHGOHWKUHDGJXLGH*DQG
the other thread into the slot on the
right side of the needle thread guide
+0DNHVXUHWKDWWKHWKUHDGVGRQRW
become twisted.
5. Thread the needles manually from
front to back.
Note: When you are using a twin needle, you
might need to reduce the stitch width to pre-
vent damage of the twin needle, stitch plate
or presser foot. How much you need to reduce
it depends on the width and/or the size of the
twin needle.
Note: The weight and irregular surface of
specialty threads such as metallic increases the
amount of friction on the thread. By reduc-
ing the tension, the risk of needle breakage is
prevented.