Advanced settings
70
This function can not be used to calibrate any other model of gauge.
Configuration To be recognized by the leak detector, the PI3C gauge of the customer’s installation must
be declared in the supervisor board (see 5.7.4).
Procedure Î From the "Settings" screen, press [Advanced] [Leak Detection] [Internal Pirani
Calib.].
Î Block the detector's inlet with a blanked-off flange.
Î Make sure:
– that the leak detector is in a hard vacuum test, in the most sensitive test mode.
– that the end of the cycle is manual (= ’operator’).
The calibration takes place in 2 stages: setting the limit pressure and setting the atmo-
spheric pressure.
Setting the limit
pressure
Î Make sure that the external gauge pressure of the customer's installation is signifi-
cantly lower than 1·10
-3
hPa.
Î Start a test: press .
Î The "Pressure" value decreases: wait for this value to stabilise (around 5 minutes) and
press the [>HV].
Setting the atmospheric
pressure
Î Stop the test: press the .
Î Set the external gauge to atmospheric pressure.
Î The "Pressure" value increases: wait for this value to stabilise (around 5 minutes) and
press the [>Atm].
7.8.7 Leak detection: Detector pressure gauge
Allows the leak detector to be managed by an external gauge.
Preliminary conditions Ɣ Detector equipped with the 37 pin I/O interface (see 10).
Î Set the source of the inlet pressure used (= 'external').
Possible gauges
(*) Special case for the PI3 gauge (see 5.7.4).
Ɣ The gauge and the cable are at the customer’s expense.
Setting
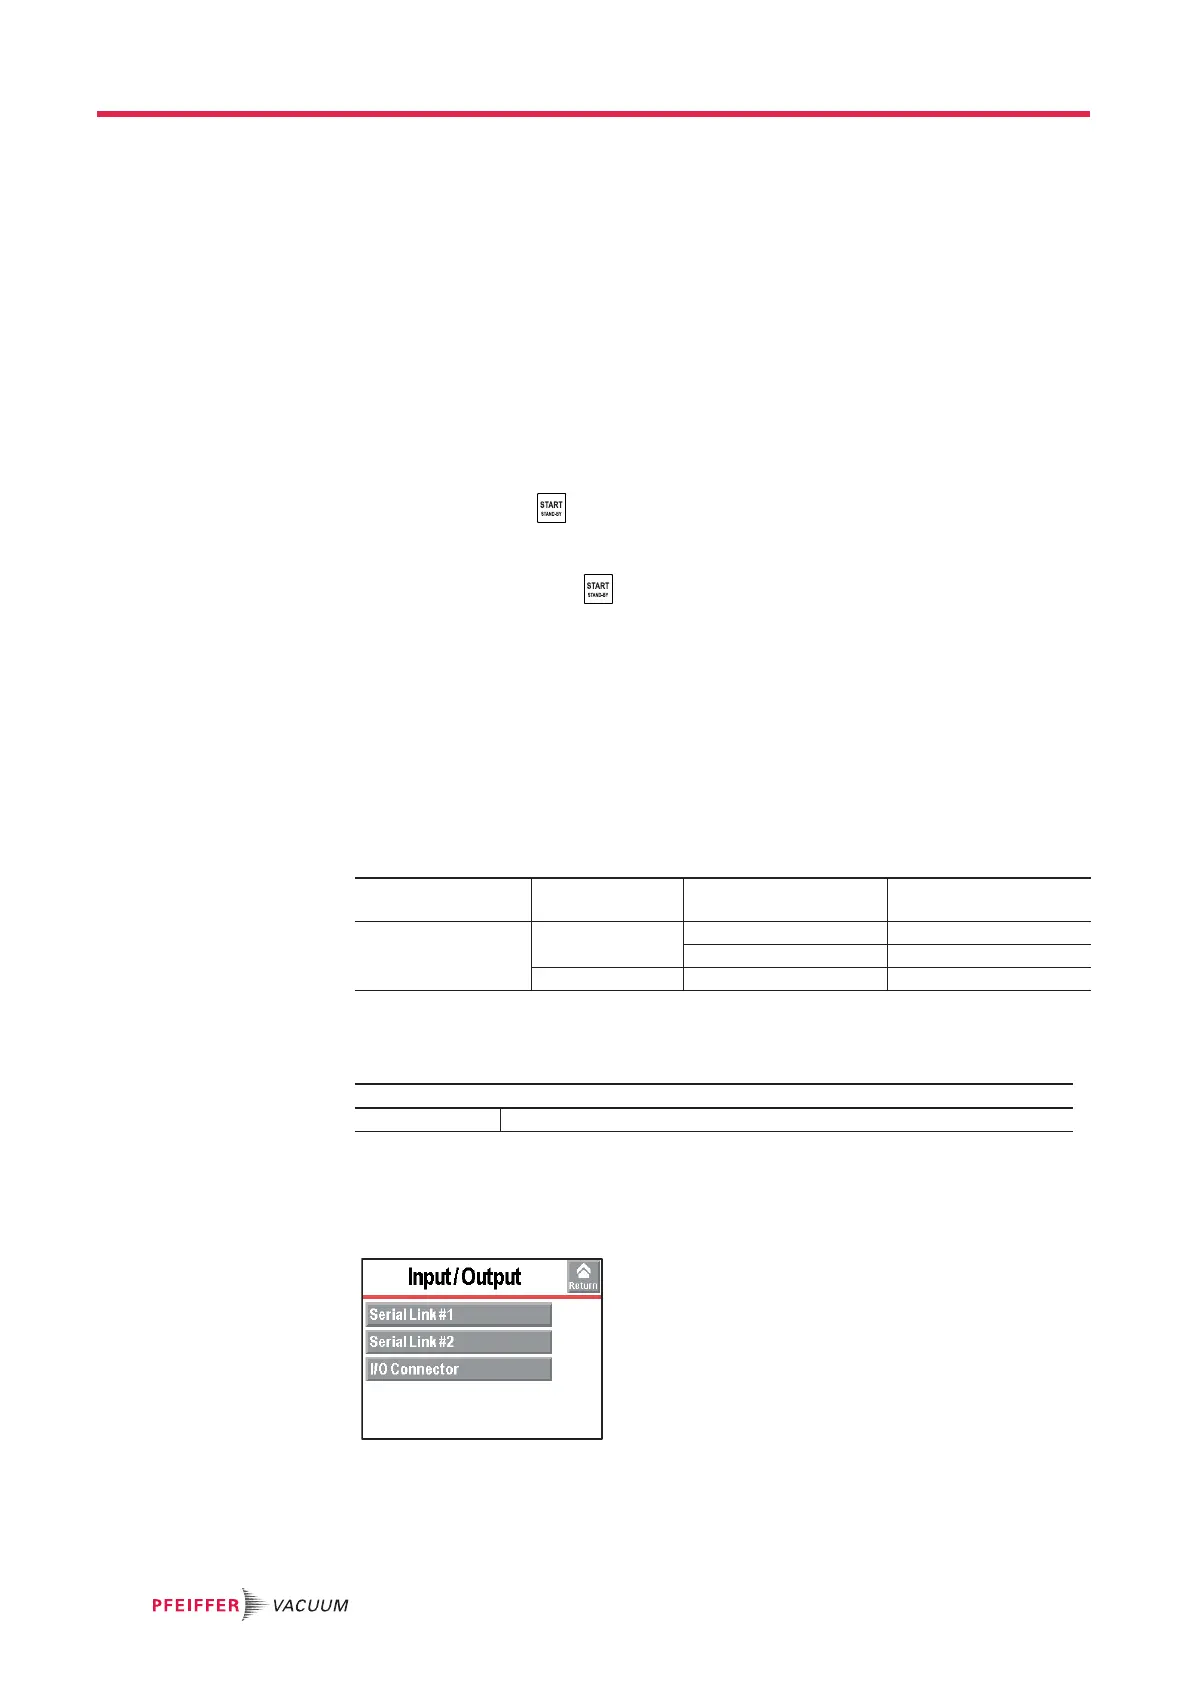
7.8.8 Input/Output menu
Î From the "Settings" screen, press [Advanced] [Input/Output].
Type of gauge detected by
the detector
Gauge model
Logarithmic gauges Pirani TPR/PCR TPRxxx
PI3 PI3C
(*)
Capacitives Pirani TPR/PCR PCRxxx
From the "Settings" screen, press [Advanced] [Leak Detection] [External Gauge].
Gauge Ö Select the external gauge model.
 Loading...