EasyManua.ls Logo

Pfister Weller LG48-WR0 User Manual

Pfister Weller LG48-WR0
12 pages
To Next Page IconTo Next Page
Page #1 background imageLoading...
Page #1 background image
495370100
Installation Support • Soporte de instalación • Support d’installation
Installation Videos Available
Videos de instalación a disposición
Vidéos d’installation disponibles
Personal Assistance, Product Specs, &
“How-to” Questions:
Asistencia personal, especificaciones del
producto y preguntas sobre “cómo hacerlo”:
Aide personnelle, spécifications du produit
et questions « pratico-pratiques » :
1800PFAUCET (7328238)
pisterfaucets.com/support
pisterfaucets.com/videos
Nov 4, 2016
4" Centerset Lavatory Faucet
Grifo central de 4 pulg. para el baño
Robinet pou lavabo centré de 4 po.
Required Tools
Herramientas necesarias
Outils nécessaires
Additional Helpful Tools
Otras herramientas útiles
Outils supplémentaires utiles
Parts in the Box
Piezas en la caja
Pièces dans la boîte
Copyright © 2016, Pister Inc.
Adjustable Wrench
Llave ajustable
Clé à mollette
Safety Goggles
Anteojos de seguridad
Lunettes de sûreté
Flashlight
Linterna
Lampe De Poche
Cloth
Paño de limpieza
Chion
Quick Installation Guide
Guía de instalación rápida
Guide d’installation rapide
LG48-WR0
Weller
WARNING / ADVERTENCIA / AVERTISSEMENT
To reduce the risk of injury or property damage, read all instructions before installing product. Wear safety goggles. Product must be installed in
accordance with all state & local plumbing & building codes. Call a professional if you are uncertain about installing this product.
Para disminuir el riesgo de lesiones o daños a la propiedad, lea todas las instrucciones antes de instalar el producto. Utilice gafas de seguridad. El producto
deberá instalarse de acuerdo con la normativa de plomería y construcción estatal y local. Llame a un profesional si no está seguro sobre cómo instalar este
producto.
Pour réduire le risque de blessures ou de dommages, lire toutes les instructions avant d’installer le produit. Porter des lunettes de sécurité. Le produit doit
être installé en conformité avec tous les codes de construction et de plomberie locaux et de l'état. Appelez un professionnel si vous n’êtes pas certain de la
façon d’installer ce produit.
Locate water supply inlets and shut of the water supply valves. These are usually
found under the sink or near the water meter. If you are replacing an existing faucet,
remove the old faucet from the sink and clean the sink surface thoroughly.
Ubique las entradas del suministro de agua y cierre las válvulas de suministro de agua.
Generalmente se encuentran debajo del fregadero o cerca del medidor de agua. Si se trata de
un reemplazo de grifo, quite el grifo viejo y limpie completamente la supericie del fregadero.
Recherchez les entrées d'approvisionnement et fermer leurs robinets. Ces robinets se
trouvent généralement sous l'évier ou près du compteur d’eau. Si vous remplacez un robinet
existant, retirez, le vieux robinet de l'évier et nettoyer soigneusement la surface de ce dernier.
Turn O Water Supply Cierre el suministro de agua Couper l’alimentation en eau
Hot
Caliente
Chaud
Cold
Fría
Froid
1
A B
C
1171301
Aerator Tool
Herramienta aireador
Outil d’aérateur
D
SAMPLE COPY
Question and Answer IconNeed help?

Do you have a question about the Pfister Weller LG48-WR0 and is the answer not in the manual?

Pfister Weller LG48-WR0 Specifications

General IconGeneral
BrandPfister
ModelLG48-WR0
Product TypeFaucet
Number of Handles1
Handle TypeLever
Flow Rate1.2 GPM
Installation TypeDeck Mount
Valve TypeCeramic Disc
MaterialMetal
WarrantyLifetime Limited Warranty

Summary

Installation Preparation and Safety

General Safety Warnings

Read all instructions before installation and wear safety goggles to reduce injury risk.

Required Tools for Installation

List of essential tools needed for the faucet installation process.

Helpful Tools for Installation

List of recommended additional tools to assist with the installation.

Parts in the Box

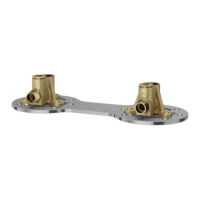
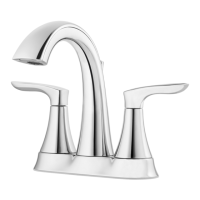
Inventory of all components provided with the faucet for installation.

Step 1: Turn Off Water Supply

Shutting Off Water Supply

Instructions on how to locate and shut off the water supply valves before starting.

Step 2: Install Faucet

Disassemble Faucet Components

Instructions for taking apart the faucet assembly before mounting.

Mounting Faucet Base

Securing the faucet base to the sink surface using provided parts.

Step 3: Secure Faucet

Hand Tighten Faucet Components

Securing the faucet assembly to the sink by hand tightening.

Step 4: Connect Water Supply Lines

Connecting Hot and Cold Water Lines

Attaching the hot and cold water supply lines to the faucet connections.

Step 5: Prepare and Install Pop-Up Drain

Disassemble Pop-Up Assembly

Taking apart the pop-up drain assembly for preparation.

Install Drain Body and Ball Rod

Attaching the drain body and adjusting the ball rod for proper operation.

Step 6: Connect Lift Rod

Install and Connect Lift Rod

Assembling and connecting the lift rod to the pop-up drain mechanism.

Step 7: Final Checks and Operation

Remove and Reinstall Aerator

Steps to remove the aerator for flushing and then reinstall it.

Turn On Water and Test Faucet

Opening water supply and testing faucet operation, checking for leaks.

Parts Explosion and Identification

Exploded View of Faucet Parts

Detailed diagram showing all faucet components and their part numbers.

Maintenance and Care Instructions

Cartridge Removal Procedures

Steps for safely removing the faucet cartridge for maintenance or replacement.

Aerator Cleaning and Maintenance

Instructions for cleaning the faucet aerator for optimal performance.

Pop-Up Drain Maintenance

Guidance on maintaining the pop-up drain assembly.

Warranty Information

Pfister Lifetime Warranty Coverage

Details on the lifetime mechanical and finish warranty for homeowners.

Warranty Limitations and Exclusions

Information on what is not covered by the Pfister warranty.

Related product manuals