The viewfinder output provides component video and 12V power to a
viewfinder, but can alternately feed a monitor via a component breakout
cable.The OSD can be enabled with the Analog OSD control in the PVP
software.The viewfinder output and SDI outputs always output the same
video format.This affects the video output only.
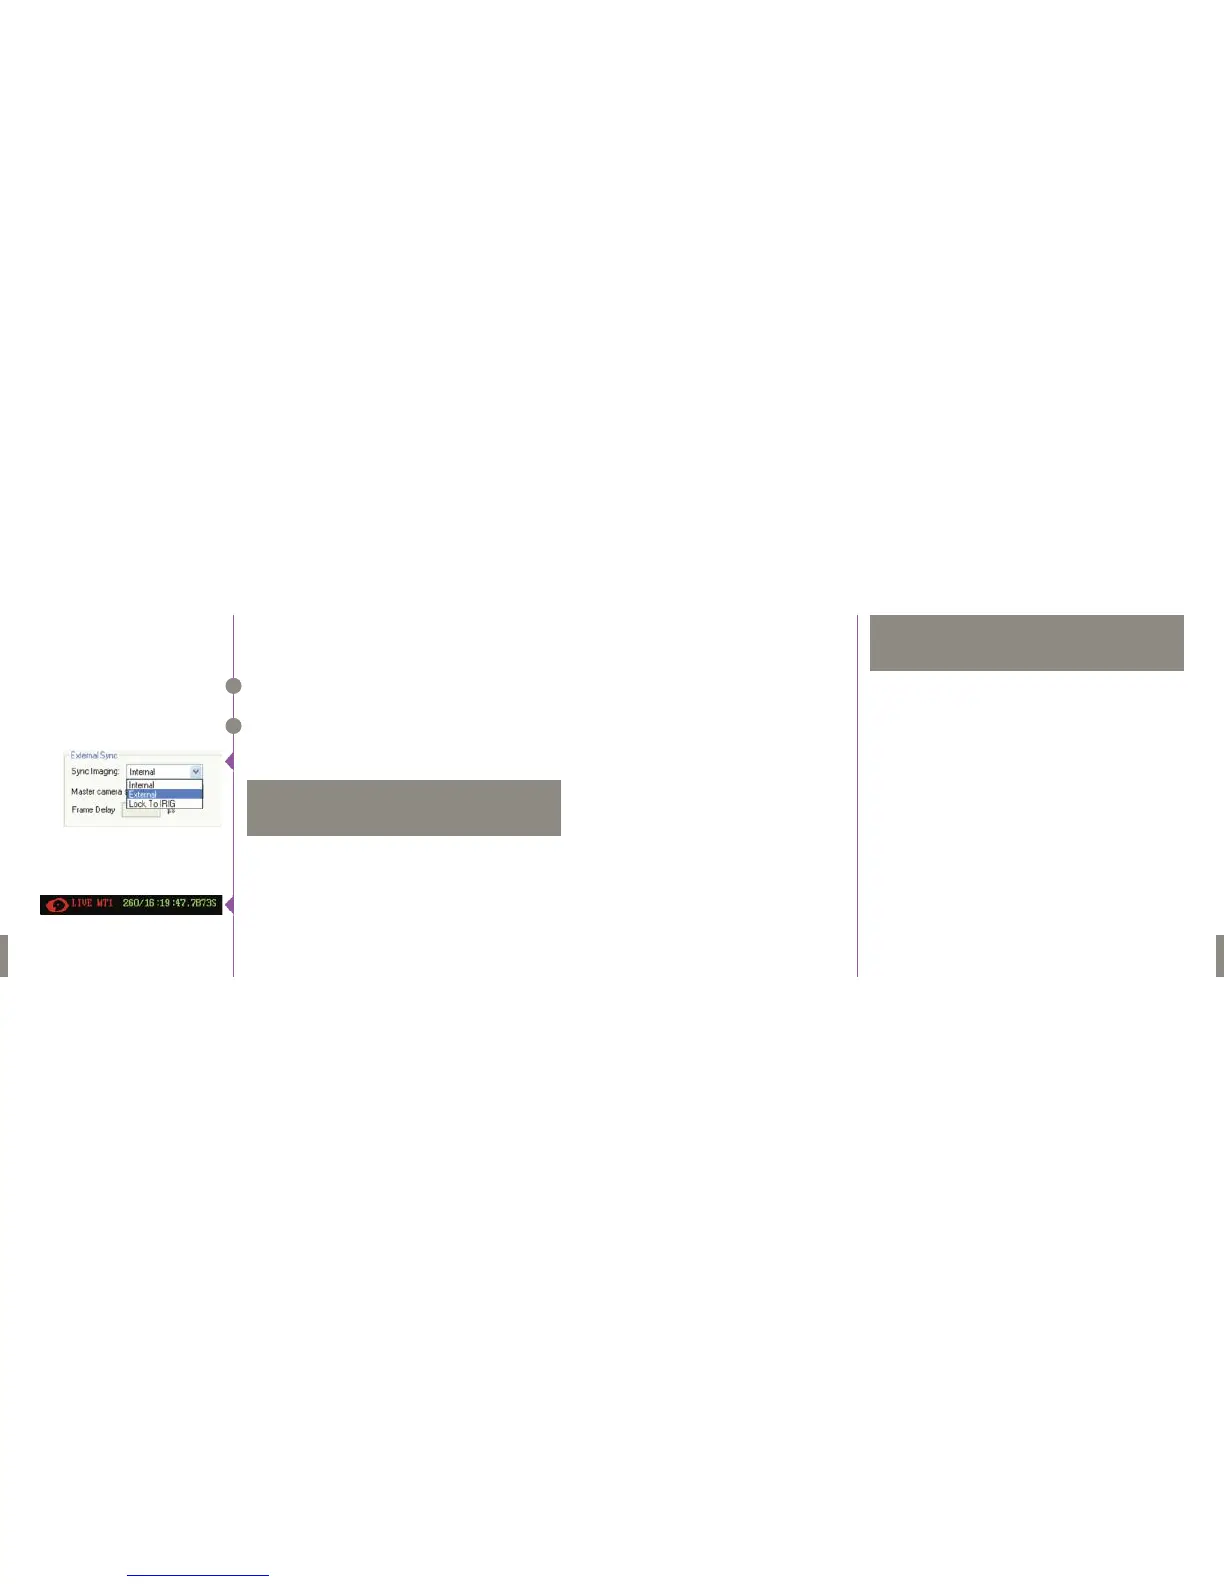
The camera will genlock to an external tri-level sync signal connected to the
genlock connector on the rear of the camera.The sync signal must be exactly
the same format as the output video format of the camera.
Two cameras can be synchronized by connecting the F-SYNC signals to each
other, and running time code out of one camera to time code in of the other.
In the Phantom software one camera must be set to external sync.
This will ensure that both cameras are capturing images at exactly the same
time and will be recording with identical time code.
To synchronize the triggers of the two cameras, a BNCT-connector can be
used to bridge the trigger inputs of the two cameras to a single external
trigger.
When time-code is being properly fed from one camera to another, there
will be an “S” after the time-code display on the OSD of the slave camera.
On a camera set to external sync, if there is no proper sync signal feeding
the camera, there will be a frozen image output. Proper F-SYNC can be
verified by the presence of a moving image on the video output.
Genlock
Syncing Multiple Cameras
14
Phantom Flex Manual
The camera will power up as soon as a 24V power source is connected to one
of the 2 power inputs on the back of the camera.The camera should fully
power up in under 30 seconds.
If you don’t see an image on the viewfinder, you probably need to change the
video format. See Phantom Software Chapter.
If you will be recording to a CineMag, mount it now.
For more information on CineMags, see The CineMag Chapter.
For continuous shooting at lower frame rates, you may want to enable HQ
mode to reduce the need for black balance. Press the “Settings” knob on
the operator side of the camera to enter the menu, turn the knob to select
the HQ Mode setting on page 1. Push in the knob to edit the value, twist until
you have selected the value you wish, then push the knob again to lock in
the value.
For recording directly to the CineMag, change the “Capture” setting in
page one of the menu to “R/S”. For the highest possible frame rates, use the
camera’s RAM buffer by changing this setting to “Loop”.
Set your desired resolution by changing the horizontal and vertical values
of the RES setting. If the resolution you choose is higher than the resolution
of the output format, the image will be scaled to fit the video format.
Keep in mind that the lower the resolution selected the higher the achievable
frame-rate.
Power Up the Camera
Setting a Video Format
Attaching a CineMag
Choosing HQ or SQ mode
Choosing R/S or Loop mode
Setting the Resolution
Quick Guide to Shooting
15
Phantom Flex Manual
Adding the serial number of a camera in the "Master camera serial"
field will ease camera control with the Phantom software by causing
some settings to automatically be transferred from the master cam-
era to the slave.
NOTE
G
H
Quick Start
This is a brief overview of getting up and running with the camera,
covering the basic operations that need to be performed to get us-
able shots. Due to the number of different ways that the camera can
be used, you should read the rest of this manual and practice using
the camera before using the Flex in a commercial environment.
NOTE
 Loading...